Custom View
Overview
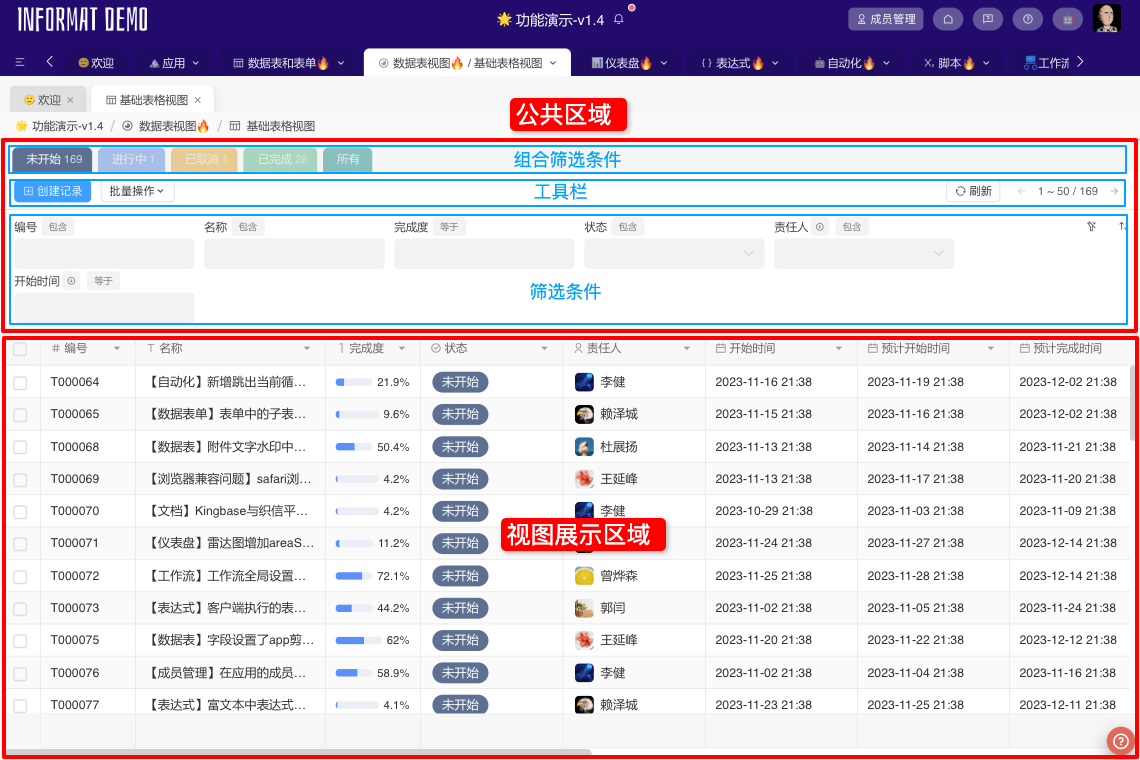
Custom views render views through two methods: Website Module pages and Components. When the system-provided views cannot meet requirements, custom views can implement functionality by writing code. The customized content will be embedded in the View Display Area, while data acquisition, sorting, filtering, and form display for the view are still provided by the system.
Rendering Using Website Module Pages
When using this rendering method, an iframe element is embedded in the page view display area, and data interaction with the platform is performed through the Website Service. It also supports Custom View Service. The view can obtain system-queryed list data through the Custom View Service.
Listenable Events
- record-list-updated Triggered when the data table is refreshed
Example
We take over the rendering of the list page by setting up a Custom View with No Filter Conditions Displayed and Hide Toolbar. The specific effect is as follows:

- Download the custom view source code, and upload the packaged
distdirectory to theWebsite and Resource Hostingmodule - Configure the custom view, and set the uploaded page address
Key Code Explanation
In the App.vue file:
- Use the
customViewService.getRecordListmethod to obtain the list data returned by the view in the custom view. - Listen to the
record-list-updatedevent to monitor user refresh behavior, thereby refreshing the data in the custom view. - Use the
customViewService.changePaginationmethod to change the pagination information of the custom view.
<style lang="scss" scoped>
  #app {
      position: relative;©
      height: 100%;
      width: 100%;
      overflow: auto;

      ::v-deep {
          .el-container {
              position: relative;
              height: 100%;
              width: 100%;
              overflow: hidden;
          }

          .el-main {
              background-color: #f6f7f9;
          }

      }
  }
</style>

<template>
  <div id="app">
    <el-container>
      <el-main class="pd-0">
        <component :is="viewComponent" :data-list="dataList" :data-count="dataCount" :table-info="tableInfo" @type-change="onTypeChange" @pagination-change="onPaginationChange" @show-record="onShowRecord" @selection-change="onSelectionChange" @reload="reload" />
      </el-main>
    </el-container>
  </div>
</template>

<script>
  import TableView from "@/components/TableView.vue";
  import CardView from "@/components/CardView.vue";

  export default {
    name: "App",
    components: {
      TableView,
      CardView,
    },
    computed: {
      viewComponent() {
        return `${this.viewType}View`;
      },
    },
    data() {
      return {
        viewType: "Table",
        dataList: [],
        selectionIds: [],
        dataCount: 0,
        tableInfo: null,
      };
    },
    // Wait for RPC channel establishment when component is created
    created() {
      eventService.onceEvent("rpc-ready", () => {
        this.onRpcReady();
      });
    },
    mounted() {
      this.loadData();
    },
    methods: {
      onRpcReady() {
        eventService.onEvent("record-list-updated", (data) => {
          this.loadData();
        });
        customViewService.getTableInfo().then((info) => {
          this.tableInfo = info;
          this.reload();
        });
      },
      reload() {
        customViewService.reload();
      },
      refresh() {
        customViewService.refresh();
      },
      loadData() {
        this.clearSelection();
        // Get list data in custom view
        customViewService.getRecordList().then((list) => {
          this.dataList = list;
        });
        // Get list data count in custom view
        customViewService.getRecordCount().then((count) => {
          this.dataCount = +count > 0 ? +count : 0;
        });
      },
      onShowRecord(recordId) {
        customViewService.openRecord(recordId);
      },
      onTypeChange(type) {
        this.viewType = type;
        this.clearSelection();
      },
      onPaginationChange(pagination) {
        this.clearSelection();
        // Change page number of custom view
        customViewService.changePagination(pagination);
      },
      clearSelection() {
        this.selectionIds = [];
        customViewService.setSelectedRecordIdList([]);
      },
      onSelectionChange(ids) {
        this.selectionIds = ids;
        customViewService.setSelectedRecordIdList(this.selectionIds);
      },
    },
  };
</script>Rendering Using Components
This rendering method supports embedding a component developed by the component designer and allows data interaction with the custom view through events and parameters of the Component Editor. For specific examples, please refer to Custom View Using Component Rendering