Jump to End Node
Feature Description
Complete the task and end the process
Parameter Settings
| Configuration Item | Description |
|---|---|
| Workflow Module | Module to which the workflow belongs |
| Task ID | ID of the task to be completed |
| Require Remarks | Whether remarks need to be filled in when completing the task |
| Default Remarks | Default remarks information |
| Set Process Variables | Set workflow variables when completing |
| Form Data Table | Data table for saving form data |
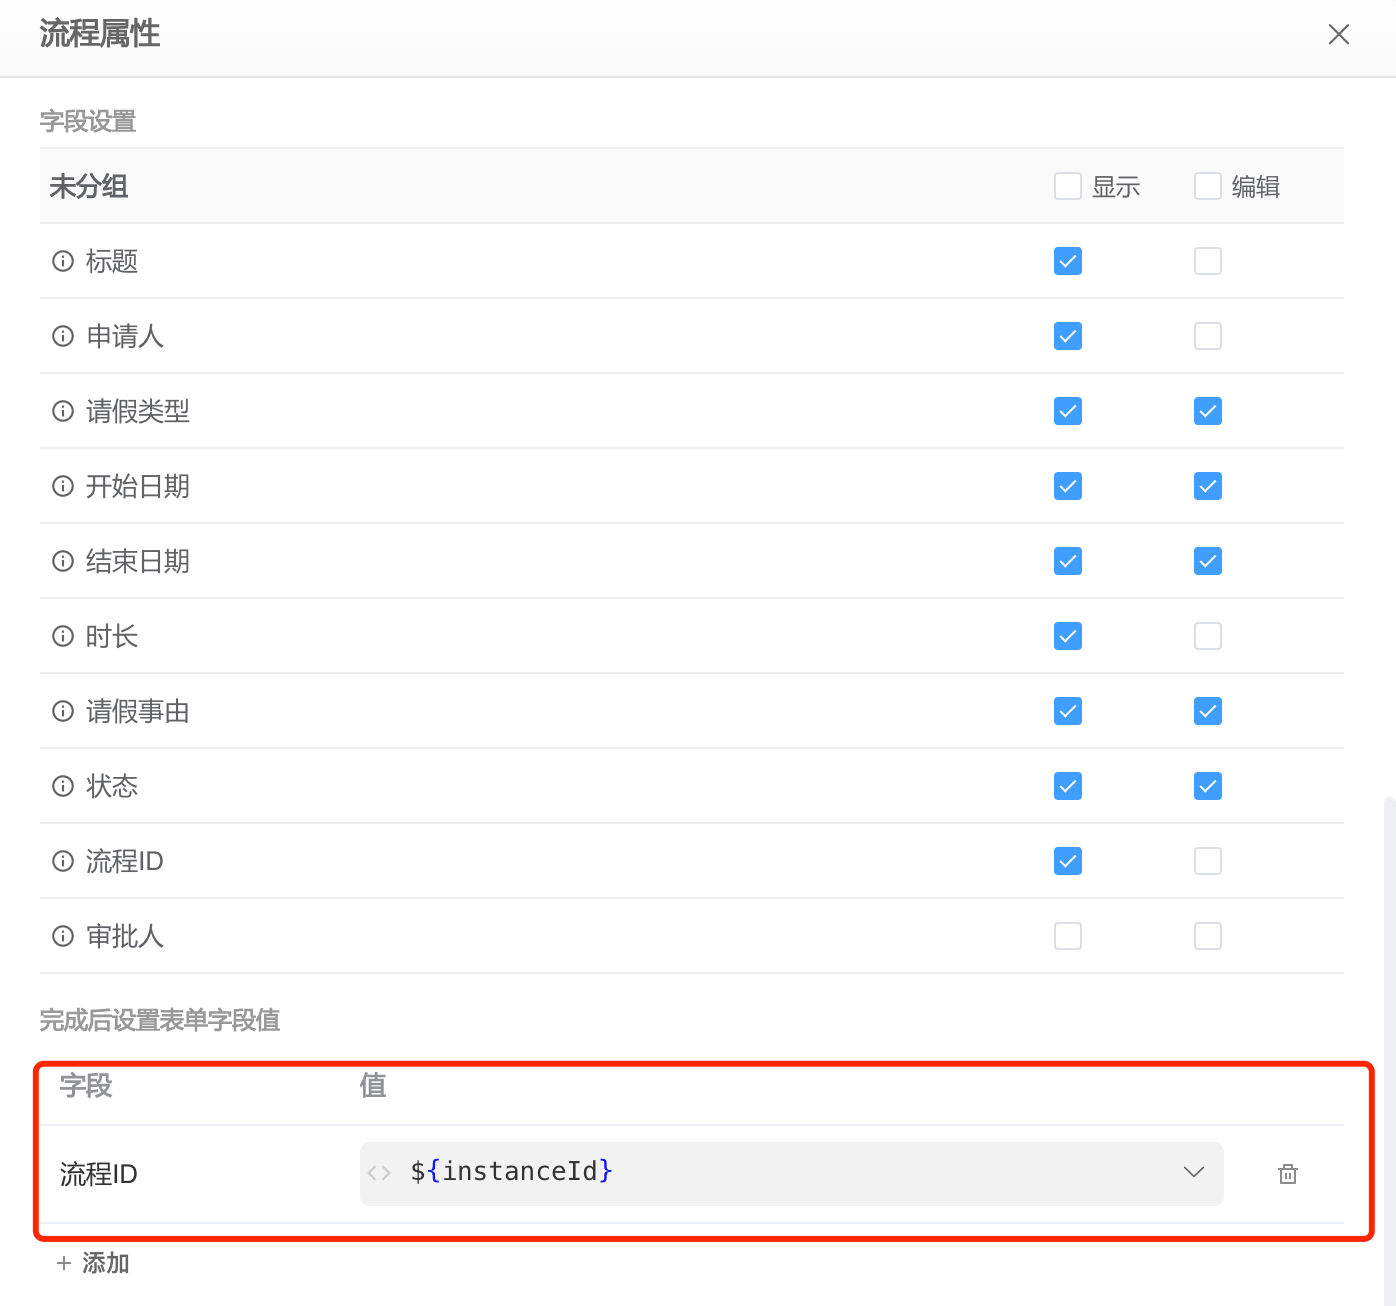
| Set Form Field Values After Completion | Automatically set form field values after completing the task |
Example
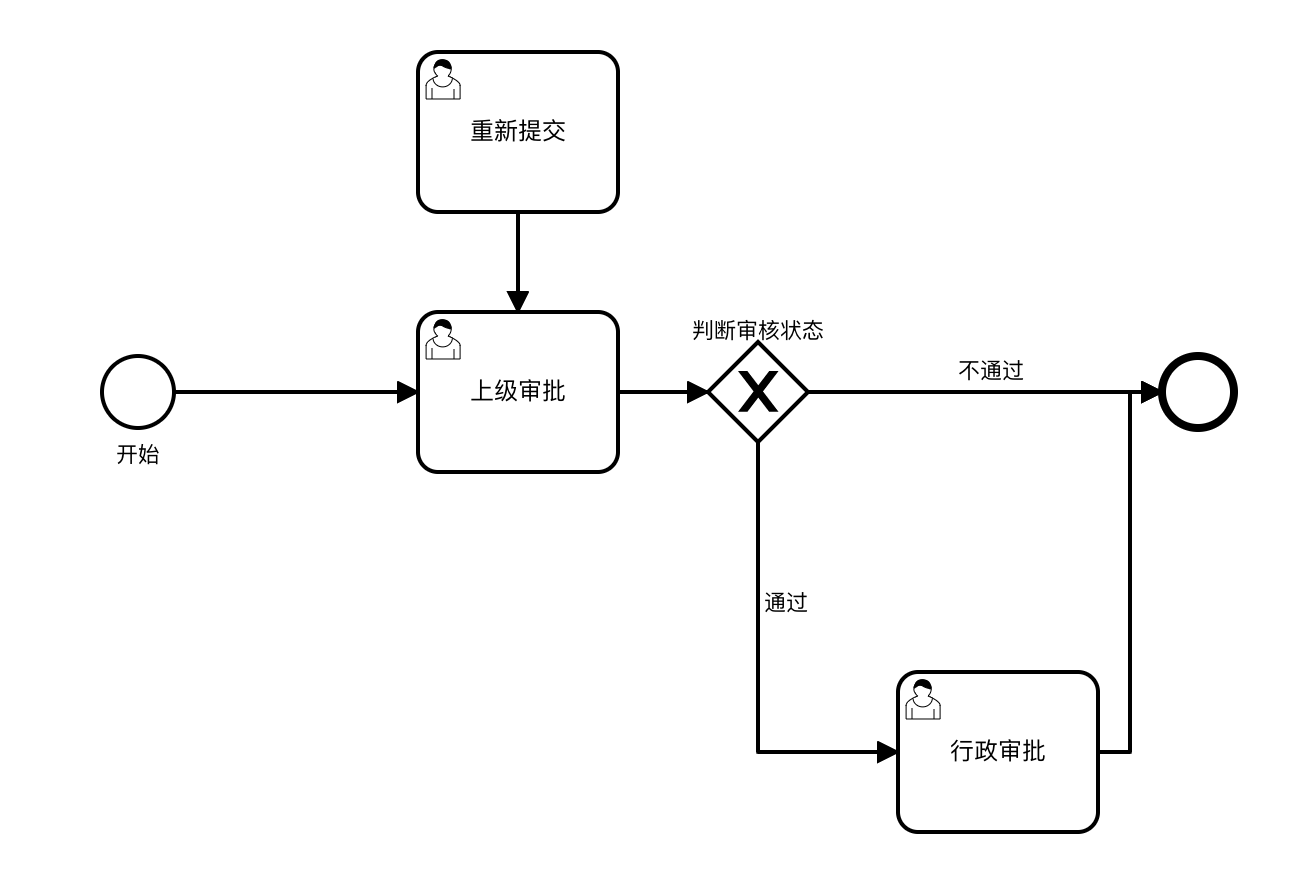
In the process task pop-up window, if we need a button to complete the task and end the process, we can achieve this by adding a button with the execution action Jump to End Node. In the leave application module shown below, the resubmission task node uses a cancel button to complete the current task and directly end the process.
Suppose there is a simple Leave Application process. After the process is initiated, the process instance ID is saved in the Leave Application data table.
The structure of the Leave Application data table that stores form data is as follows:
| Field | Type | Description |
|---|---|---|
| applicant | User Selection | Applicant |
| leaveType | List Selection | Leave Type, with options Annual Leave, Sick Leave, Personal Leave |
| startDate | Date | Start Date |
| endDate | Date | End Date |
| reason | Multi-line Text | Reason for Leave |
| status | List Selection | Status, with options Pending Approval, Approved, Rejected |
| approver | User Selection | Approver |
| instanceId | Single-line Text | Process ID |
The process flow diagram is as follows:
The process startup settings are as follows: