3.4 Field Design Instructions
After successful creation, you will enter the form field design interface for the [Department Table].
The system automatically creates four system-maintained and hidden fields by default: Creation Time (when this record was created), Modification Time (last modification time of this record), Creator (who created this record), and Modifier (who last modified this record).
We can temporarily ignore these four automatically created fields and first carefully understand how to add a field.
In the upper right corner of the screen, you will see a prominent "Add Field" button.
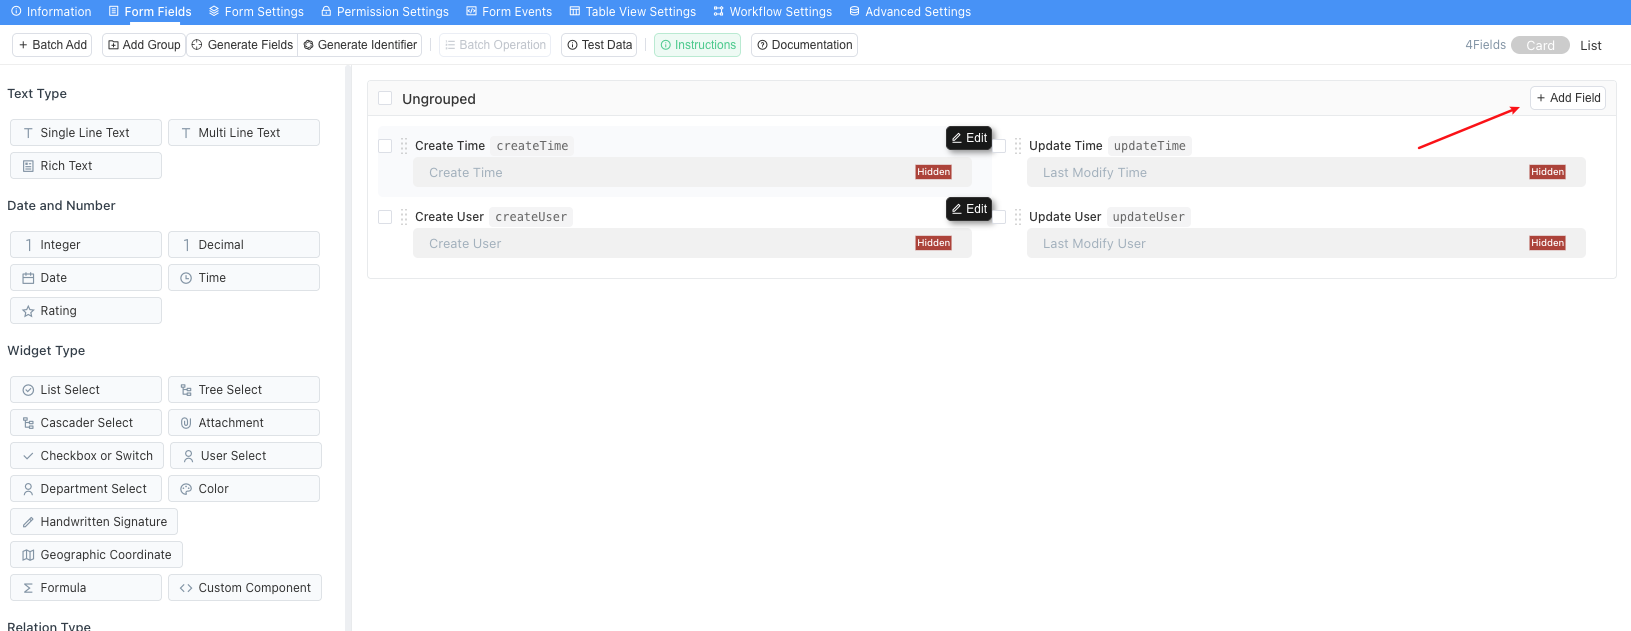
Clicking the Add Field button will pop up a feature-rich field design page window, which is one of the places we will deal with most in the future.
Although this page looks complex, don't worry! We will give you a quick explanation so you can create fields quickly later.
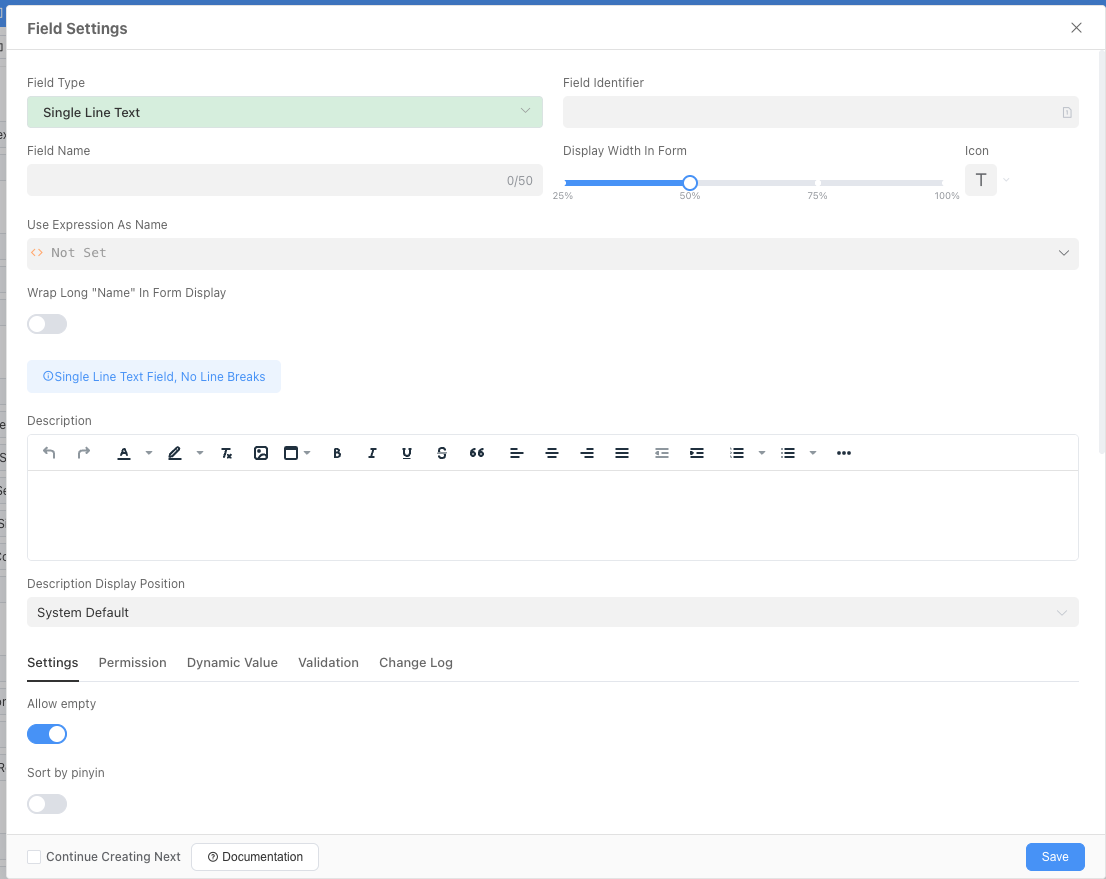
We will break down this panel into four core areas from top to bottom:
Area 1: Core Definition Area (What is this?)
This part is the "identity information" that each field must configure.
Field Type: This is the most important option, determining the "soul" of this column of data. It specifies whether the data is text, number, date, or other types.Field Name: This is the name for users to see, which is the column header in the future data table. Strive for clarity and simplicity, such as "Name" and "Contact Number".Field Identifier: This is the "internal code" for the system, mainly used in advanced scenarios such as formula calculations, scripts, and automation. If you don't know how to fill in this field, you can use the pinyin or English (or abbreviation) corresponding to the field name you filled in above.
Area 2: Appearance Display Area (What does it look like?)
This part determines the appearance and prompt information of the field when users fill out the form.
Display Width in Form: By dragging the slider, you can determine the width that this input box occupies on the page, which is convenient for simple page layout.Description: This is a very practical feature! You can enter a detailed description text here and set it to be displayed as a hover. When the user hovers the mouse or clicks the small question mark next to the field name, this text will be displayed. For example, you can write "Please fill in the official name of the department" in the description of the "Name" field to provide clear guidance for data fillers.Placeholder in Form when Not Filled(in the "Settings" tab below): This is the gray prompt text pre-displayed in the input box. For example, you can set "Please enter employee's real name" in the "Name" field.
Area 3: Rule Constraint Area (What rules does it have?)
This is the key area to ensure data quality, located in tabs such as Settings and Validation below. For beginners, we focus on a core function under the Settings tab:
Allow Not Filling: This is a crucial switch! Its function is to control whether the field is a required item.- When the switch is on (default state): It means "allow not filling", that is, users can leave this blank when submitting data.
- When the switch is off: It means "do not allow not filling", that is, the field becomes a required item, and users cannot save or submit records without filling it in. A red asterisk
*will appear after the field name as a prompt.
Area 4: Advanced Function Area (What other capabilities does it have?)
Tabs such as Permissions, Dynamic Value, Validation, and Change Records at the bottom of the panel reflect the powerful capabilities of Informat.
Permissions: Can finely control whether different roles can "view", "edit", or "hide" this field.Validation: Can set complex data validation rules, such as requiring "mobile phone number field must be a valid 11-digit number" or "end time must be later than start time".
In this quick start tutorial, we will not delve into these advanced features for now. Later, you can click this link: Field Settings to understand their specific usage.
Finally, in the lower right corner of the panel:
Continue to create one: After checking this, when you click "Save", this panel will not close but will refresh for you to continue creating the next field, which is very efficient when you need to add multiple fields continuously.Save: When you complete all configurations, click it, and a new field is born!