Chapter 2: Preparation and First Look at Informat
In this chapter, we will get familiar with the Informat working environment and create the application shell for our "Employee Information Management System". This is like laying the foundation for a building that will soon rise.
2.1 How to Start Using Informat
Informat is an on-premises deployment system for enterprises. This means it will be installed independently on your company's own servers or cloud environment to ensure the highest level of data security and autonomy.
Therefore, the way you access and log in to Informat will vary depending on your identity:
➡️ If your enterprise has already deployed the Informat platform on-premises:
You need to contact your company's IT administrator or relevant person in charge to obtain the Informat system access address, your login account, and initial password. Usually, the system will prompt you to change your password after the first login.
➡️ If you are evaluating or want to try Informat:
We welcome you to learn more about Informat's powerful capabilities. Due to the on-premises deployment requirement of Informat, we cannot provide an open public registration entry. You can visit the official Informat website (ainformat.com) and contact our sales or solution team through the "Request a Demo" button on the official website. They will arrange an exclusive product demonstration for you and provide a trial environment based on your needs.
After successfully logging in, you will see Informat's main interface. Now, let's explore this workspace where magic will soon happen!
2.2 Overview of the Informat Workspace
After successful login, you will enter Informat's main workspace. This is a highly integrated interface, and most of your future work will start from here.
Although there are multiple functional modules here, as a quick start, we first need to focus on the following two core areas:
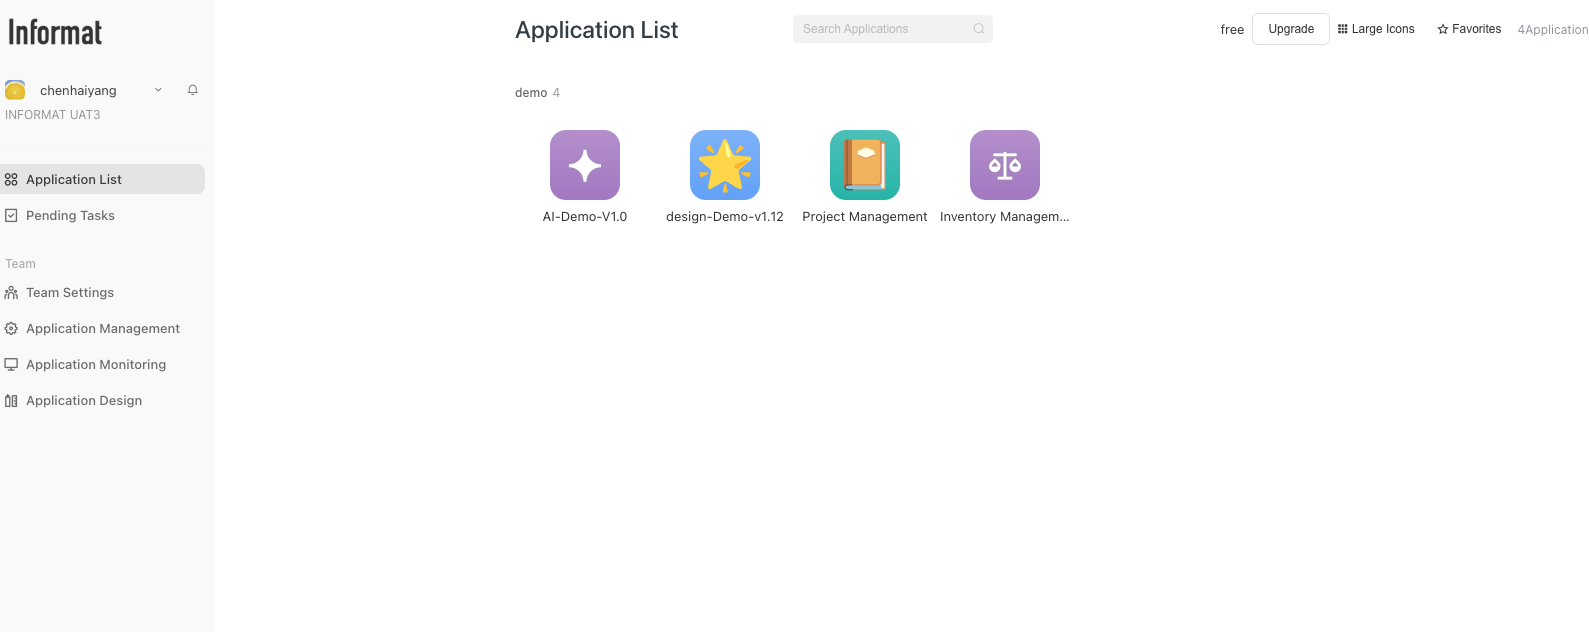
- Application List
- This is the "airport" for all your applications. Whether created by yourself or shared with you by other members of the team, all applications will be clearly displayed here in the form of cards or lists.
- You can quickly start any completed application from here and enter its final usage interface.
- The entry point for our subsequent creation of the "Employee Information Management System" is also in this area. Think of it as the desktop of your phone, where each icon is an entry to an application.
- Application Design
- This is the real "creator's workshop". When you need to create a new application or modify an existing application (such as adding data tables, designing processes, adjusting pages), you need to enter here.
- It is a powerful backend that integrates all development tools such as data modeling, process orchestration, page design, and permission configuration. In the following chapters, we will spend a lot of time "building" in this module.
In addition to these two core modules, you may (depending on your account permissions) also see modules such as Pending Tasks (to centrally process all tasks in all applications that require your approval or operation), Team Settings (where to perform organizational structure and user management), etc. We will gradually come into contact with them in subsequent practices.
2.3 Create Your First Application: "Employee Information Management System"
Theoretical introduction is over, let's get our hands dirty immediately! Now, we will create the blank application container for the "Employee Information Management System" to prepare for subsequent work.
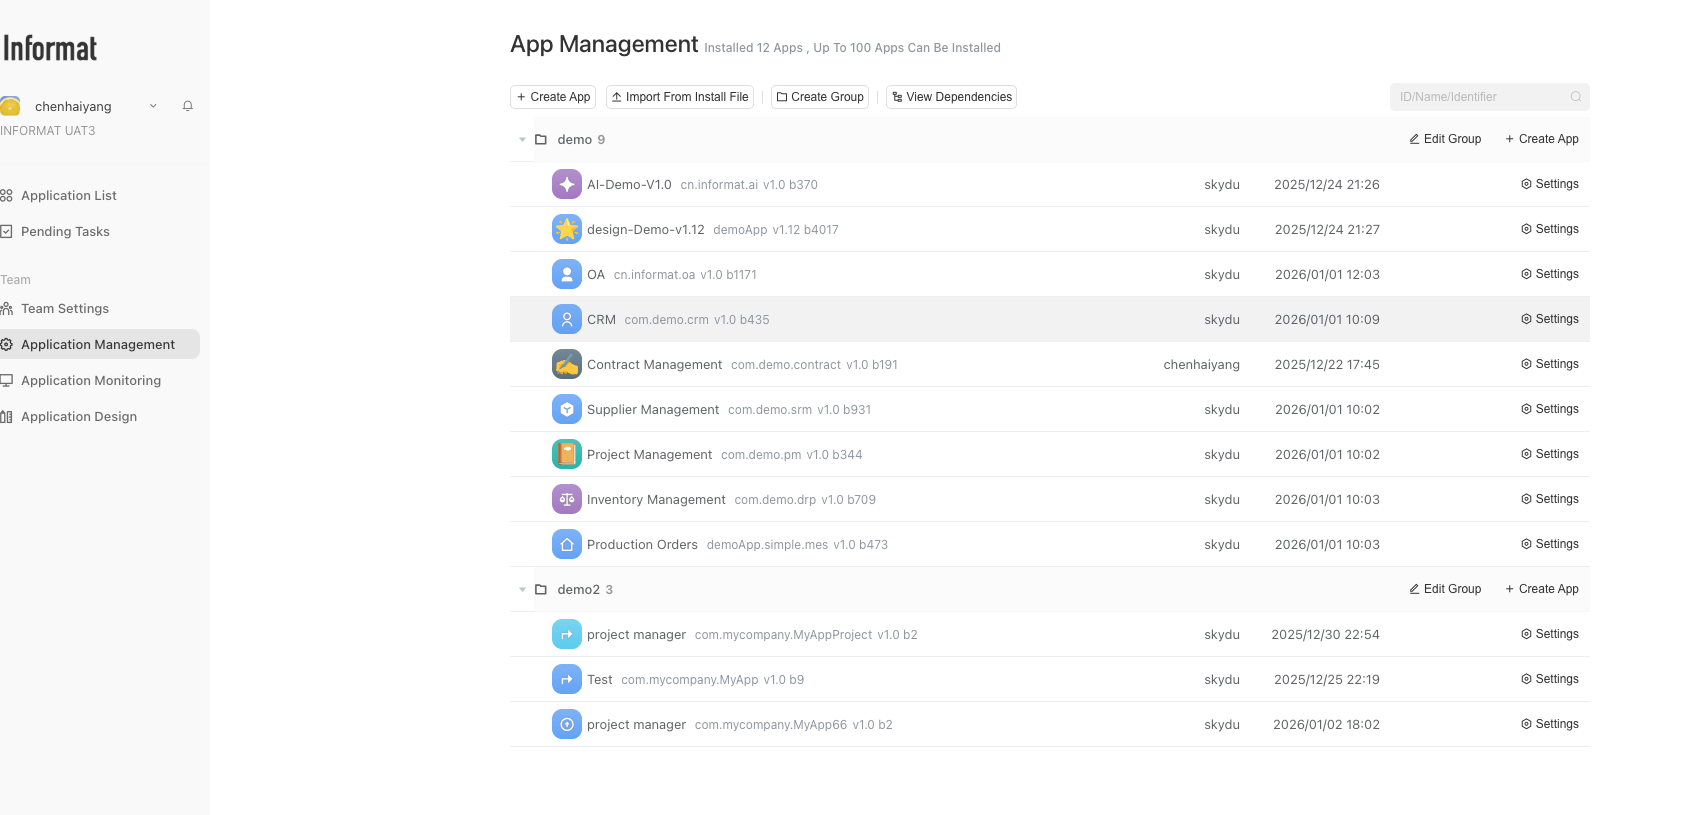
Step 1: Find the Creation Entry
In the "Application Management" interface, find and click the "Create Application" button.
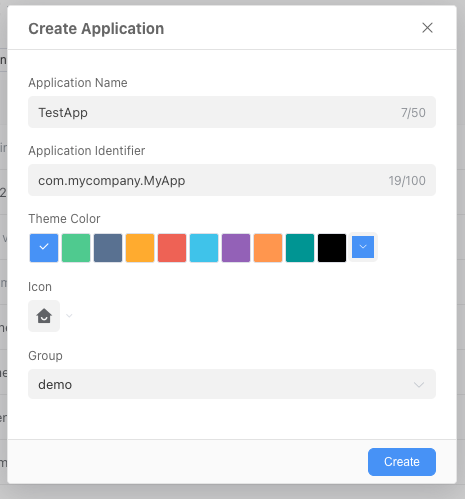
Step 2: Configure Basic Application Information
After clicking, a configuration window will pop up.
Here, we need to fill in some basic information for our new application:
- Application Name (Required): Enter the name of our practice -
Employee Information Management System. - Application Identifier: This is a unique identifier for this application. You can think of it as the application's ID card number, and each application's identifier should be unique. If you are currently just learning and understanding Informat, you can use the default value. If you want to know more about identifiers, please read this link: Basic Information.
- Application Icon and Theme Color: Choose an icon and background color you like, such as a "book" or "school" icon, to make it easier to identify.
- Group: The group to which this application belongs. You can think of it as a folder on your phone desktop. In Informat, each application must belong to a group. You can create a new group in Application Management.
Step 3: Complete the Creation
After filling in the information, click the "OK" or "Create" button.
Congratulations! You have successfully created your first Informat application. The system should now default to the application design interface.
Here, you can see a configuration page with many functions. Don't worry, you can keep most of the configurations as default for now. After you have a preliminary understanding of Informat's usage, we will explain the specific role of each configuration to you.
In this chapter, we are familiar with the Informat working environment and successfully created a "home" for the "Employee Information Management System" project. If you want to learn more about applications in Informat from a technical perspective, you can read this link: Basic Concepts of Applications.
Starting from the next chapter, we will officially enter the core design phase - adding bricks and tiles to this application and designing its data framework.