Chapter 9 Role Permissions
9.1 Role Management
The application role management module is used to create and manage different roles and permissions in applications.
9.1.1 Concept of Role Management
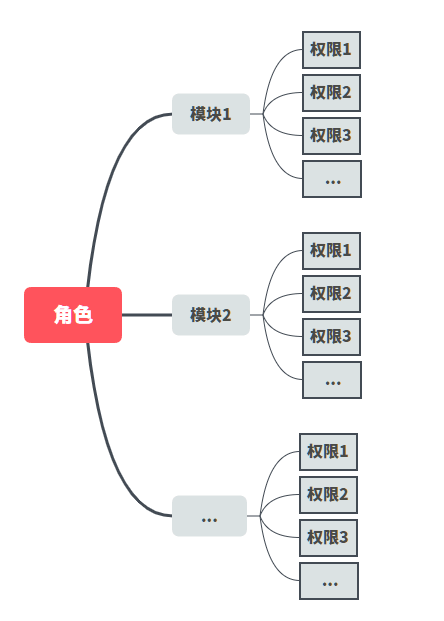
This module allows creating and configuring different roles, and assigning these roles with different CRUD permissions in other modules. These roles can be used in the Application Member Management Module to grant different application permissions to different members. The goal of the Informat platform's application role management module is to help application administrators improve application availability and manageability without sacrificing security and data access control.
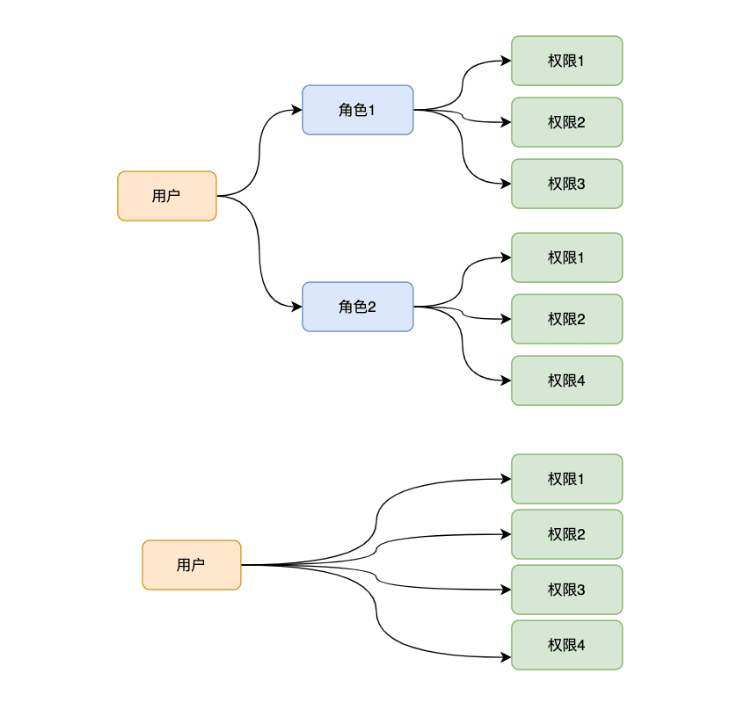
Users can have multiple roles, and the permissions a user with multiple roles has in an application are the union of the permissions of all their roles.
9.1.2 Custom Roles
The roles created in this module are custom roles, which are different from the roles created in the global settings in the designer. Roles created in application design will have a system tag, while roles created in our application role module will have a custom tag. Among them, system roles created in the application designer's global settings will also be exported when exporting the application, but custom roles created in the application role module will not be exported with the application. The application role management module implements the ability for application members to customize application-related role permissions at runtime without accessing the designer and without republishing the application version.

Custom roles will be stored as application data and will not be exported with the installation package
The following are the main functions of the application role management module:
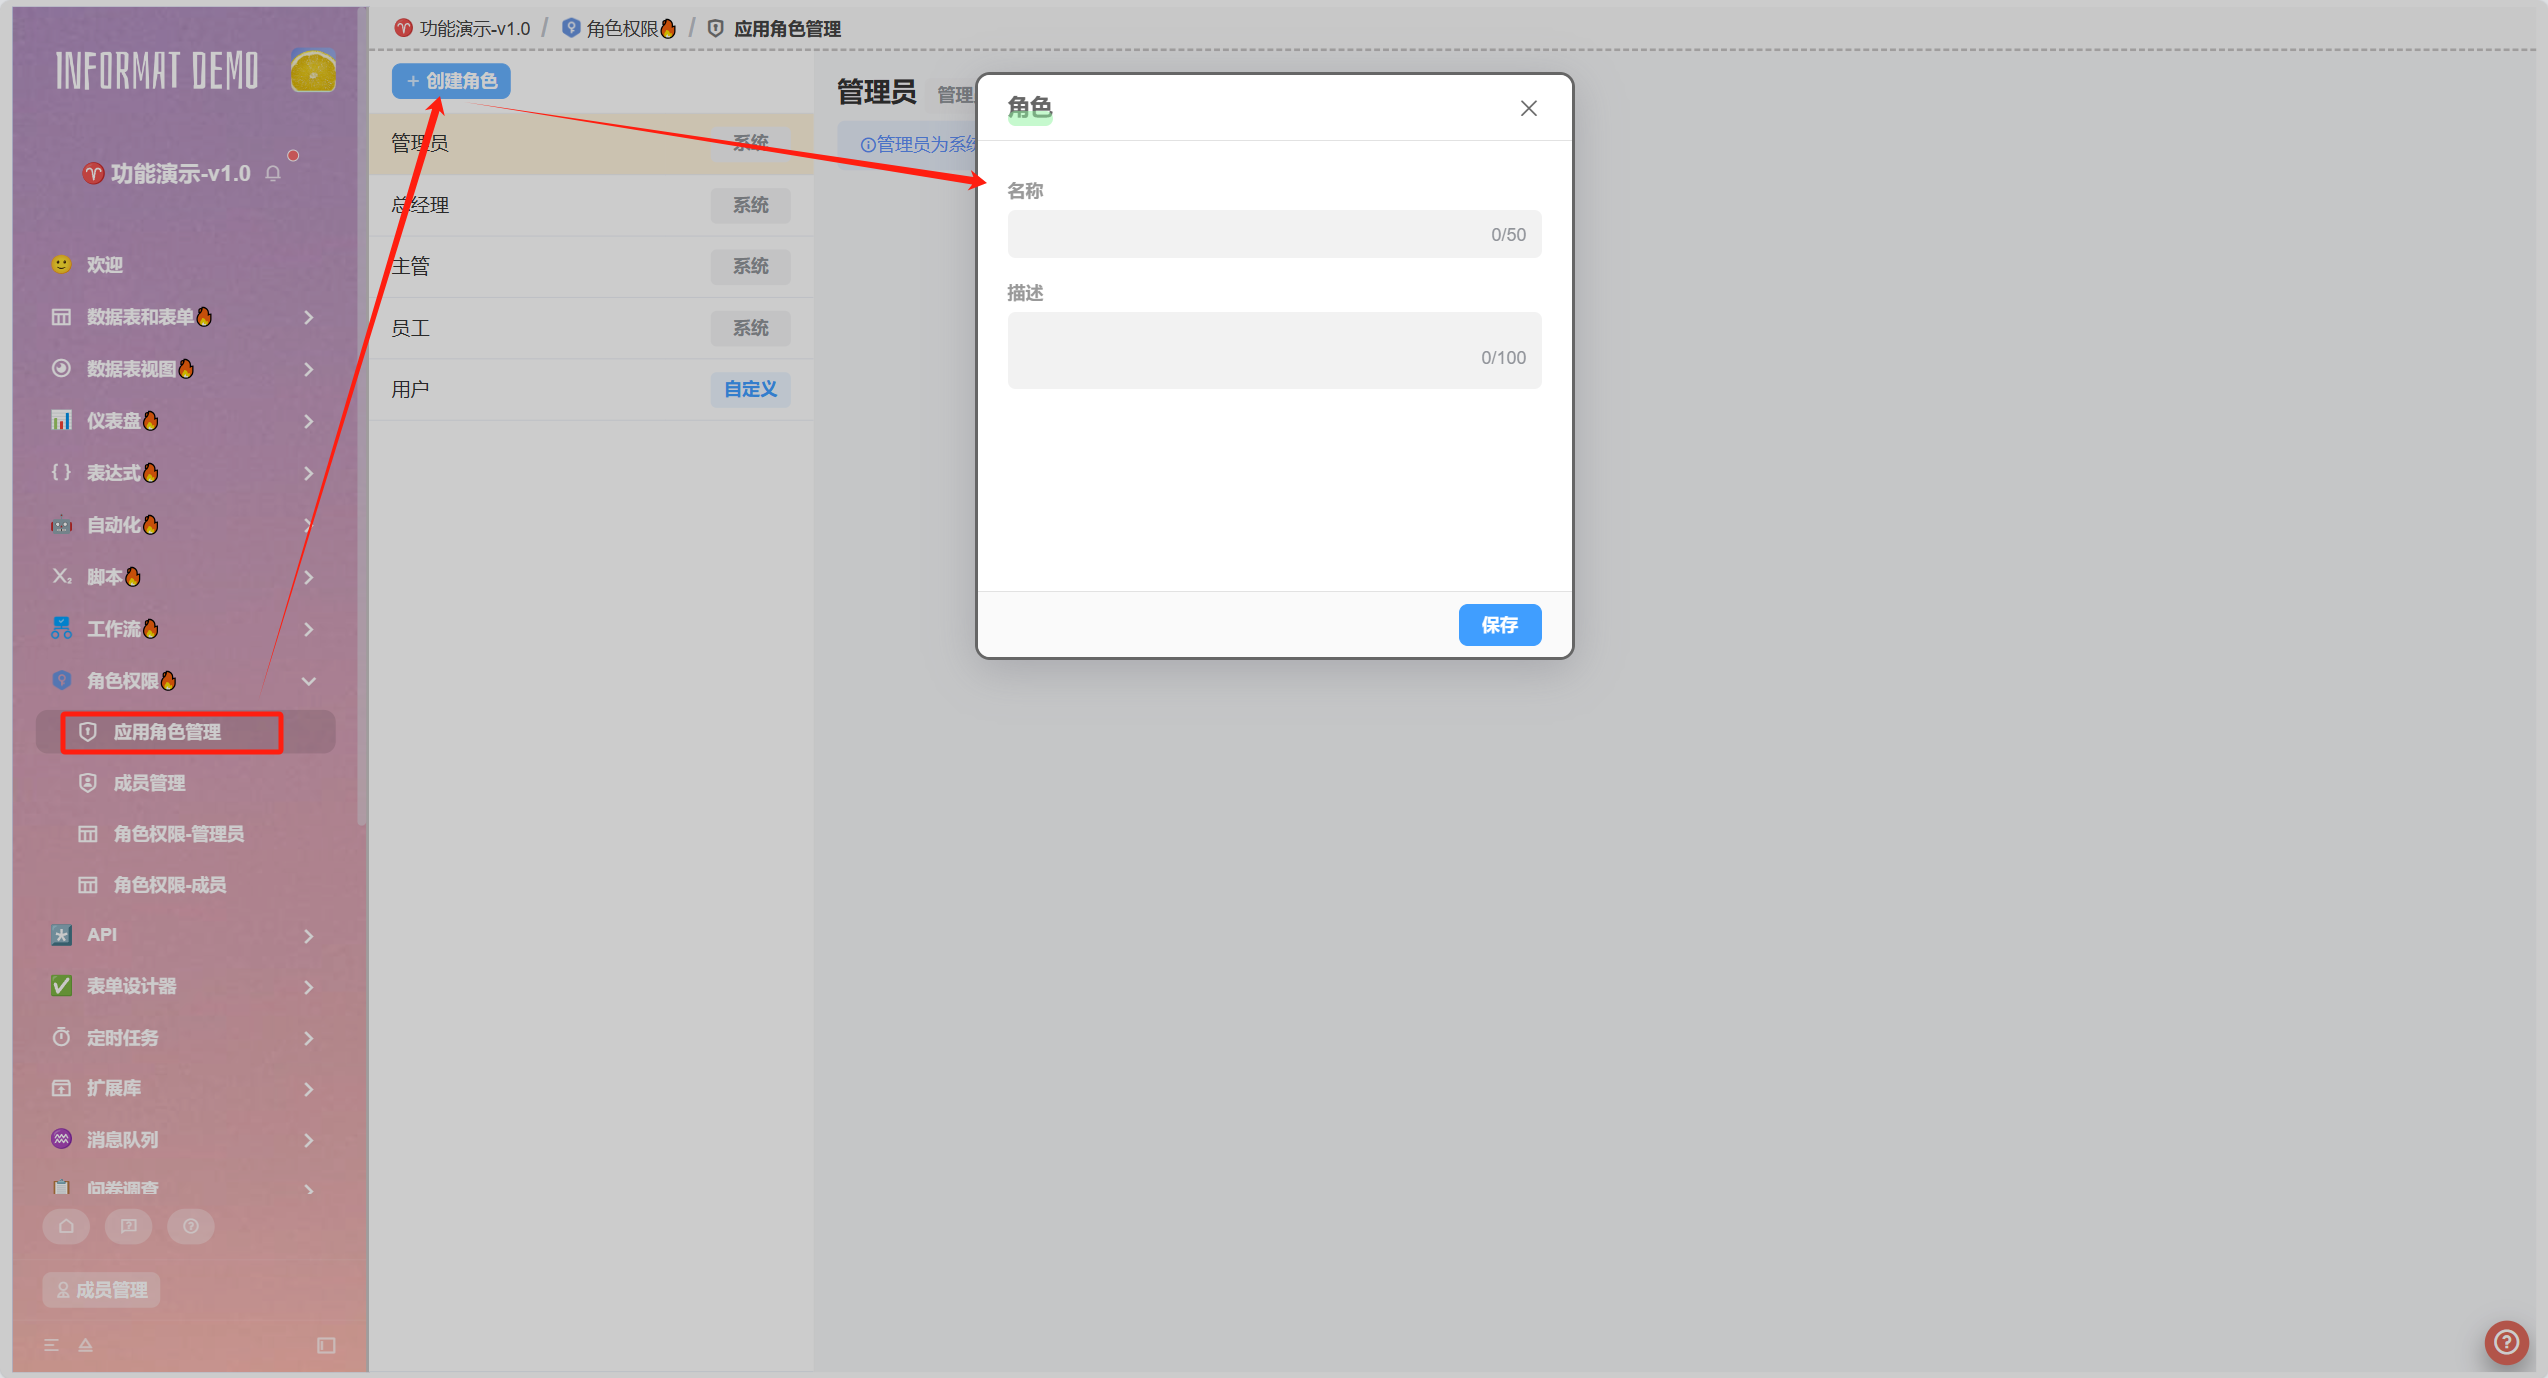
Role Creation:
Allows application administrators (or other defined roles) to create different application roles.
Permission Assignment:
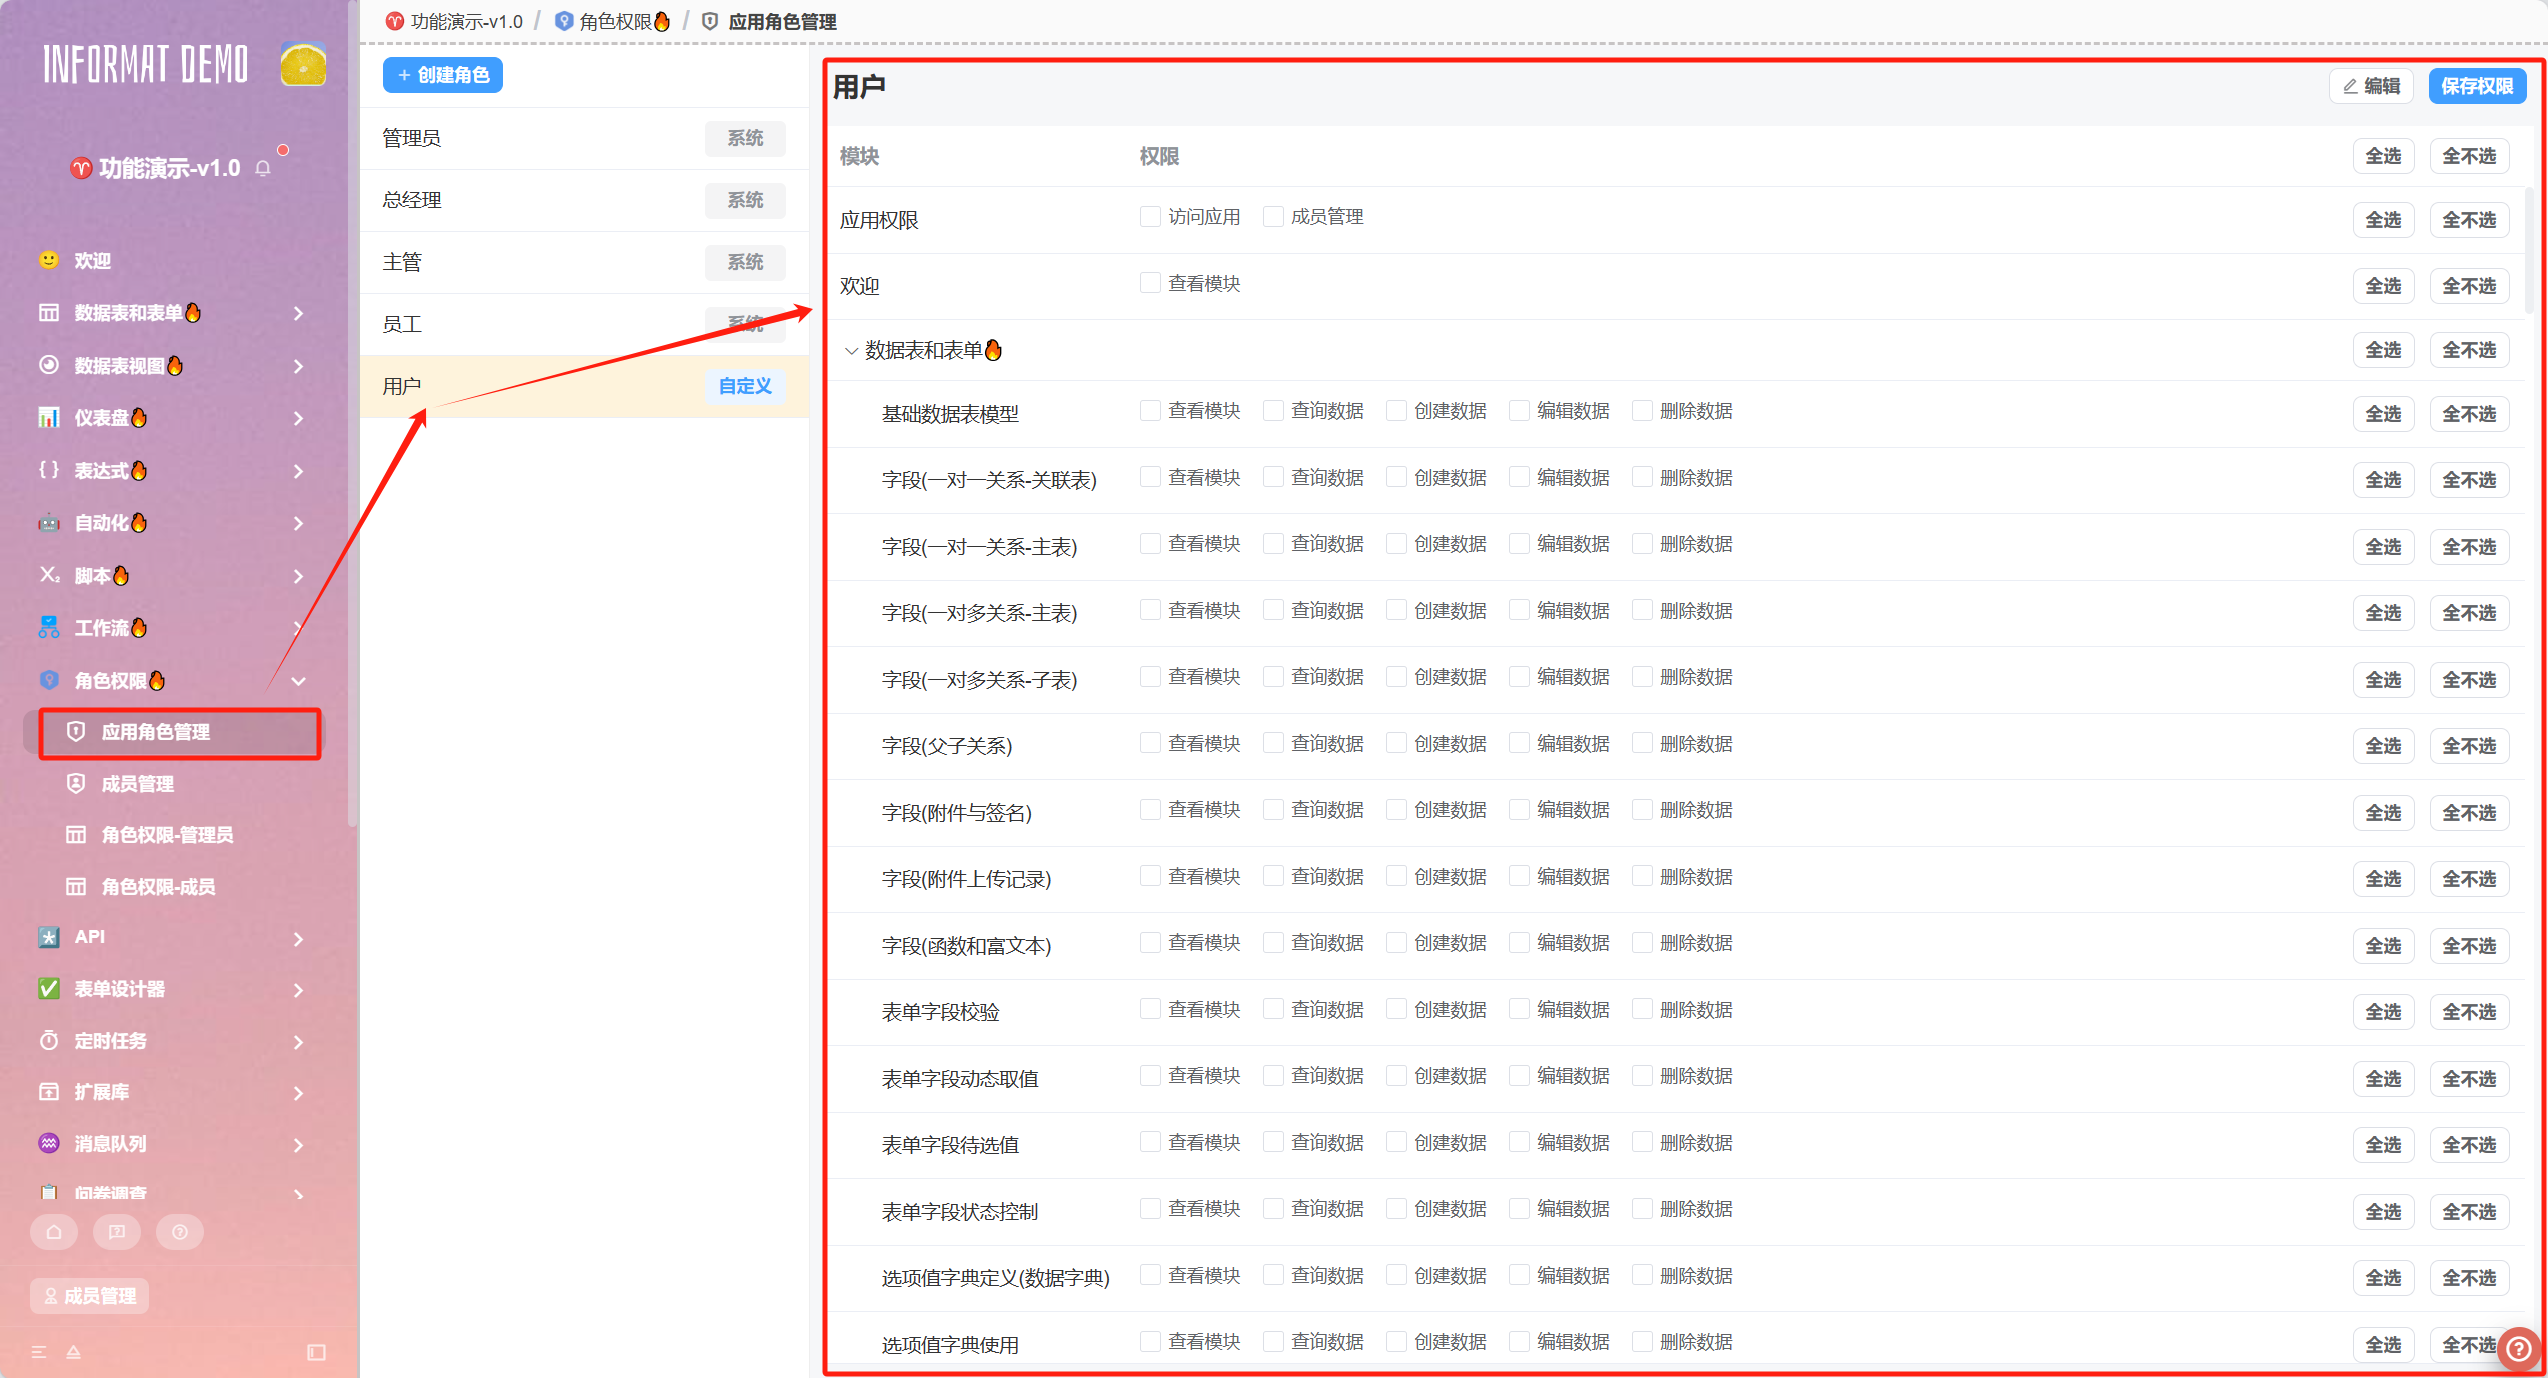
Allows application administrators (or other defined roles) to grant CRUD permissions of modules created within the application to the created roles.
Role Management:
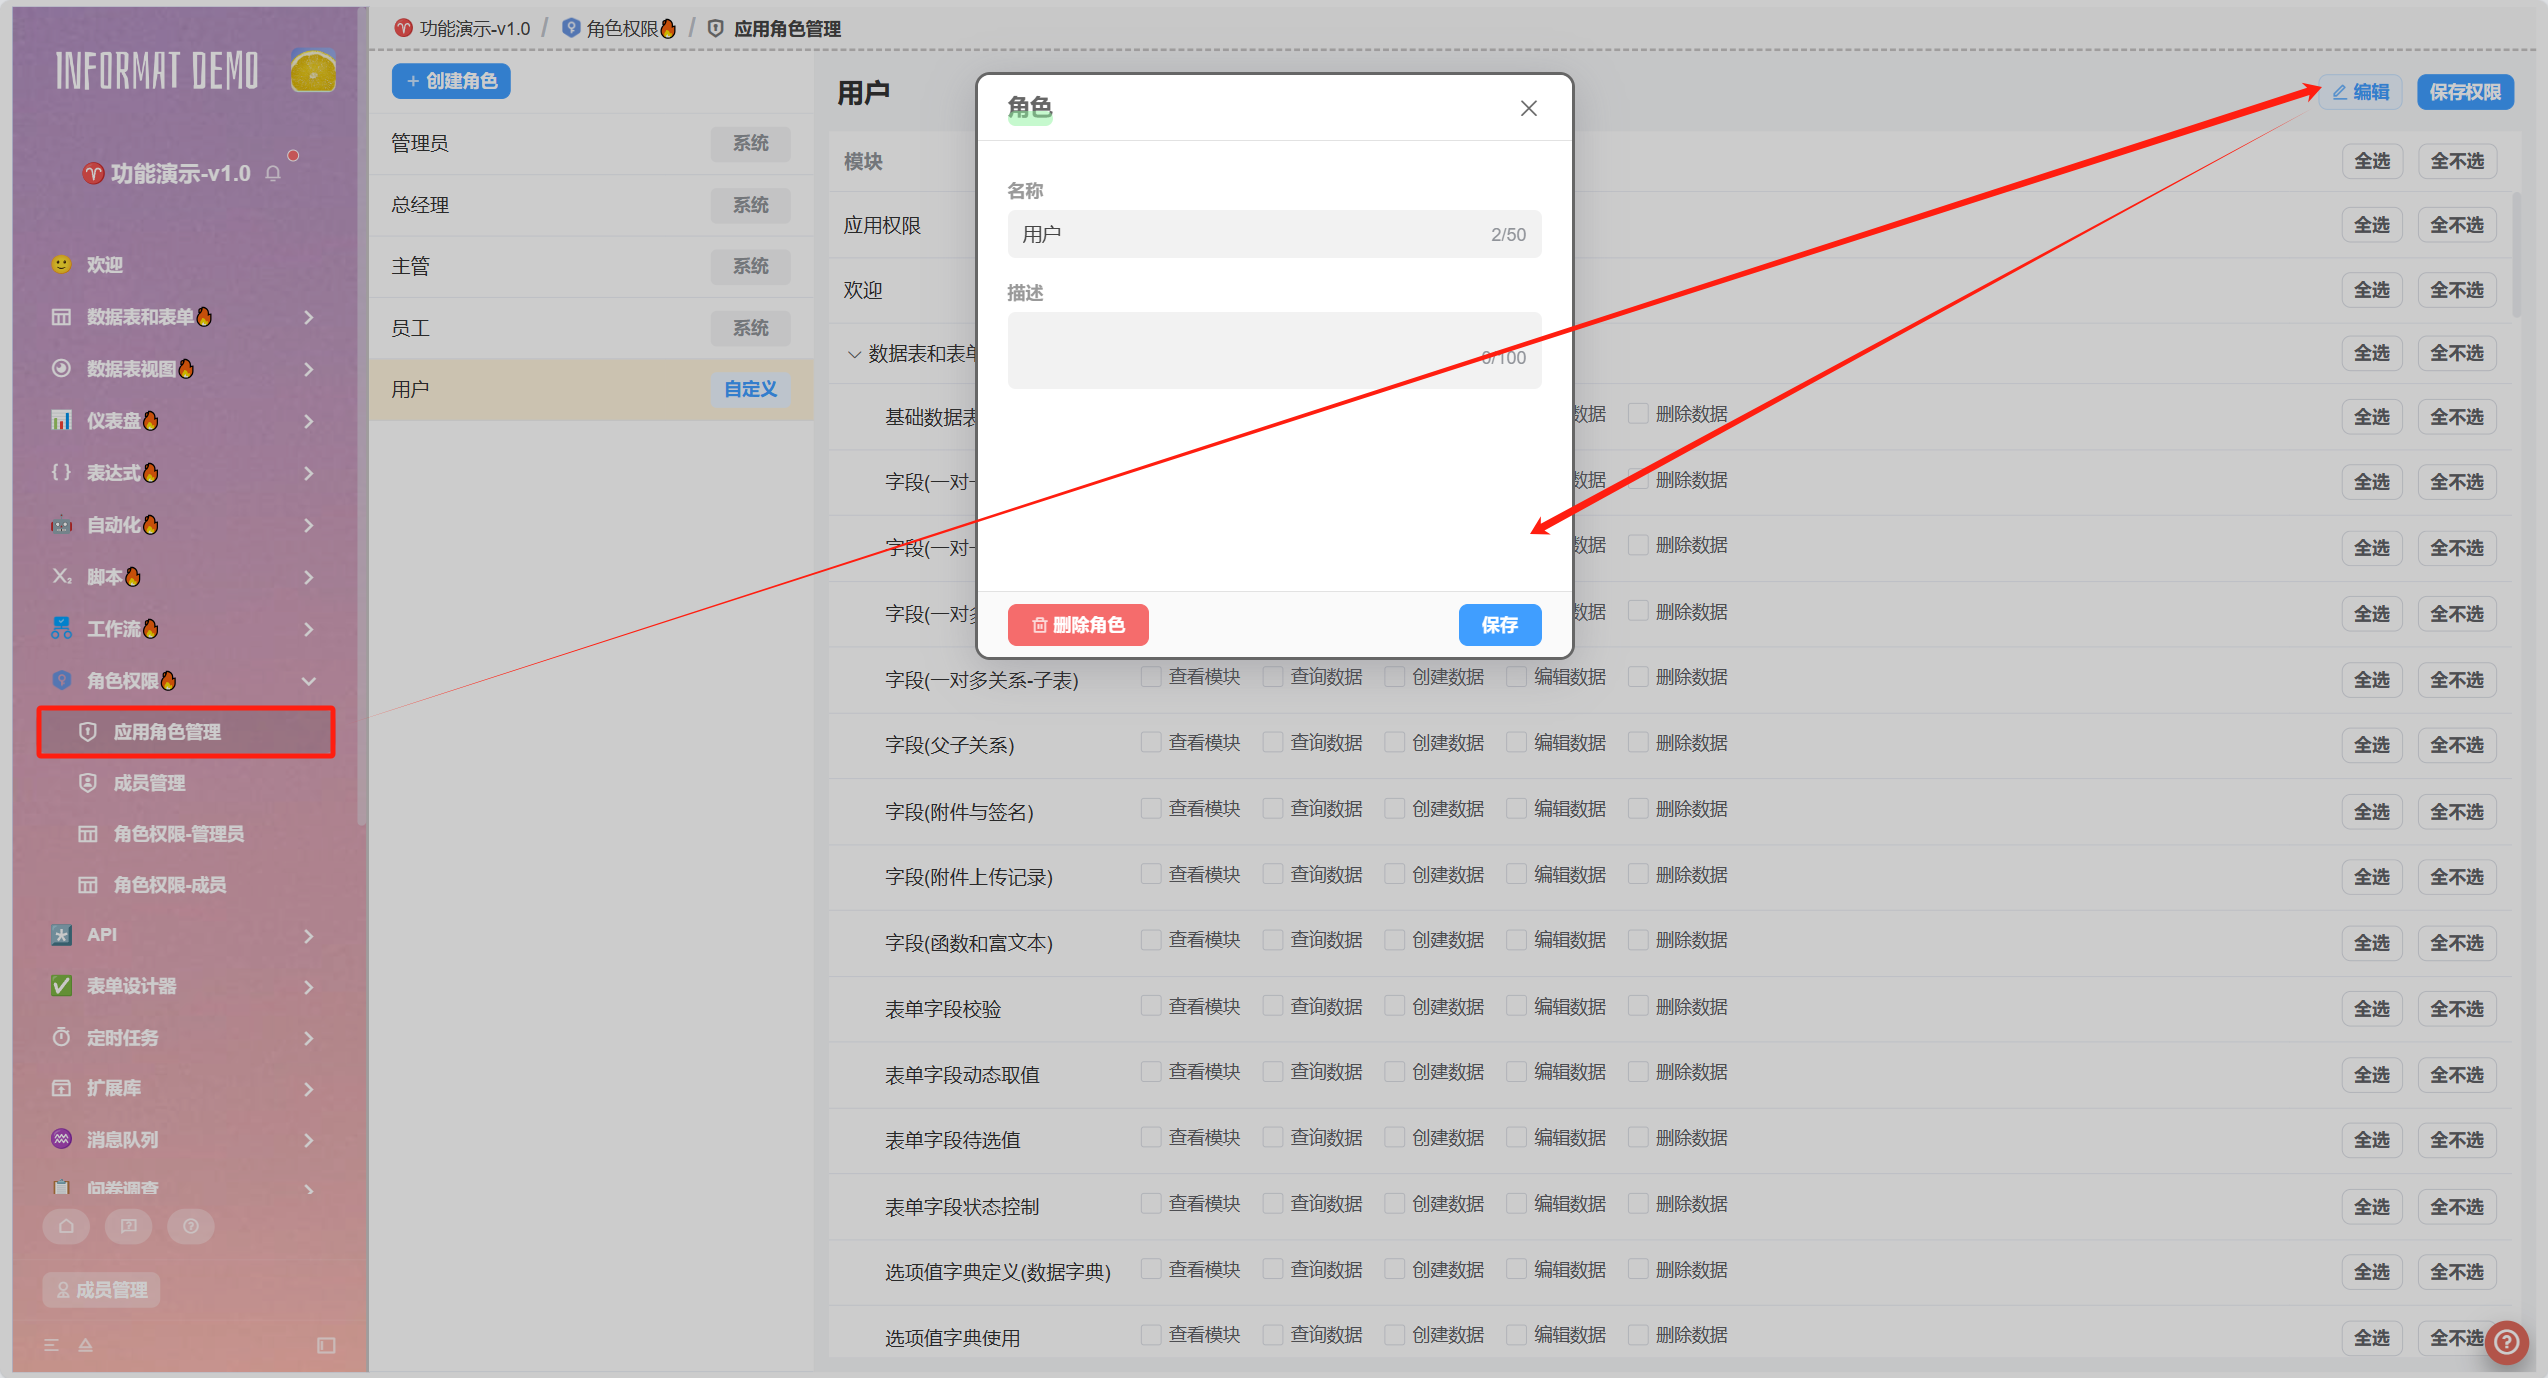
Allows application administrators (or other defined roles) to edit, delete created roles, and reassign permissions for each role.
- Permission to view a module means the module menu will be displayed in the navigation menu bar
- The
query data,create data,edit data, anddelete datain table permissions are data permissions and will not affect the display or disabled state of control buttons
9.1.3 Custom Permissions
To meet richer and more detailed permission management capabilities, the Informat platform supports setting custom permissions for applications or specific modules in application design. After completing the settings, you can use the Context.hasAppPerm and Context.hasModulePerm() methods in expressions to determine whether the current user has the custom permission, thereby achieving permission control effects.
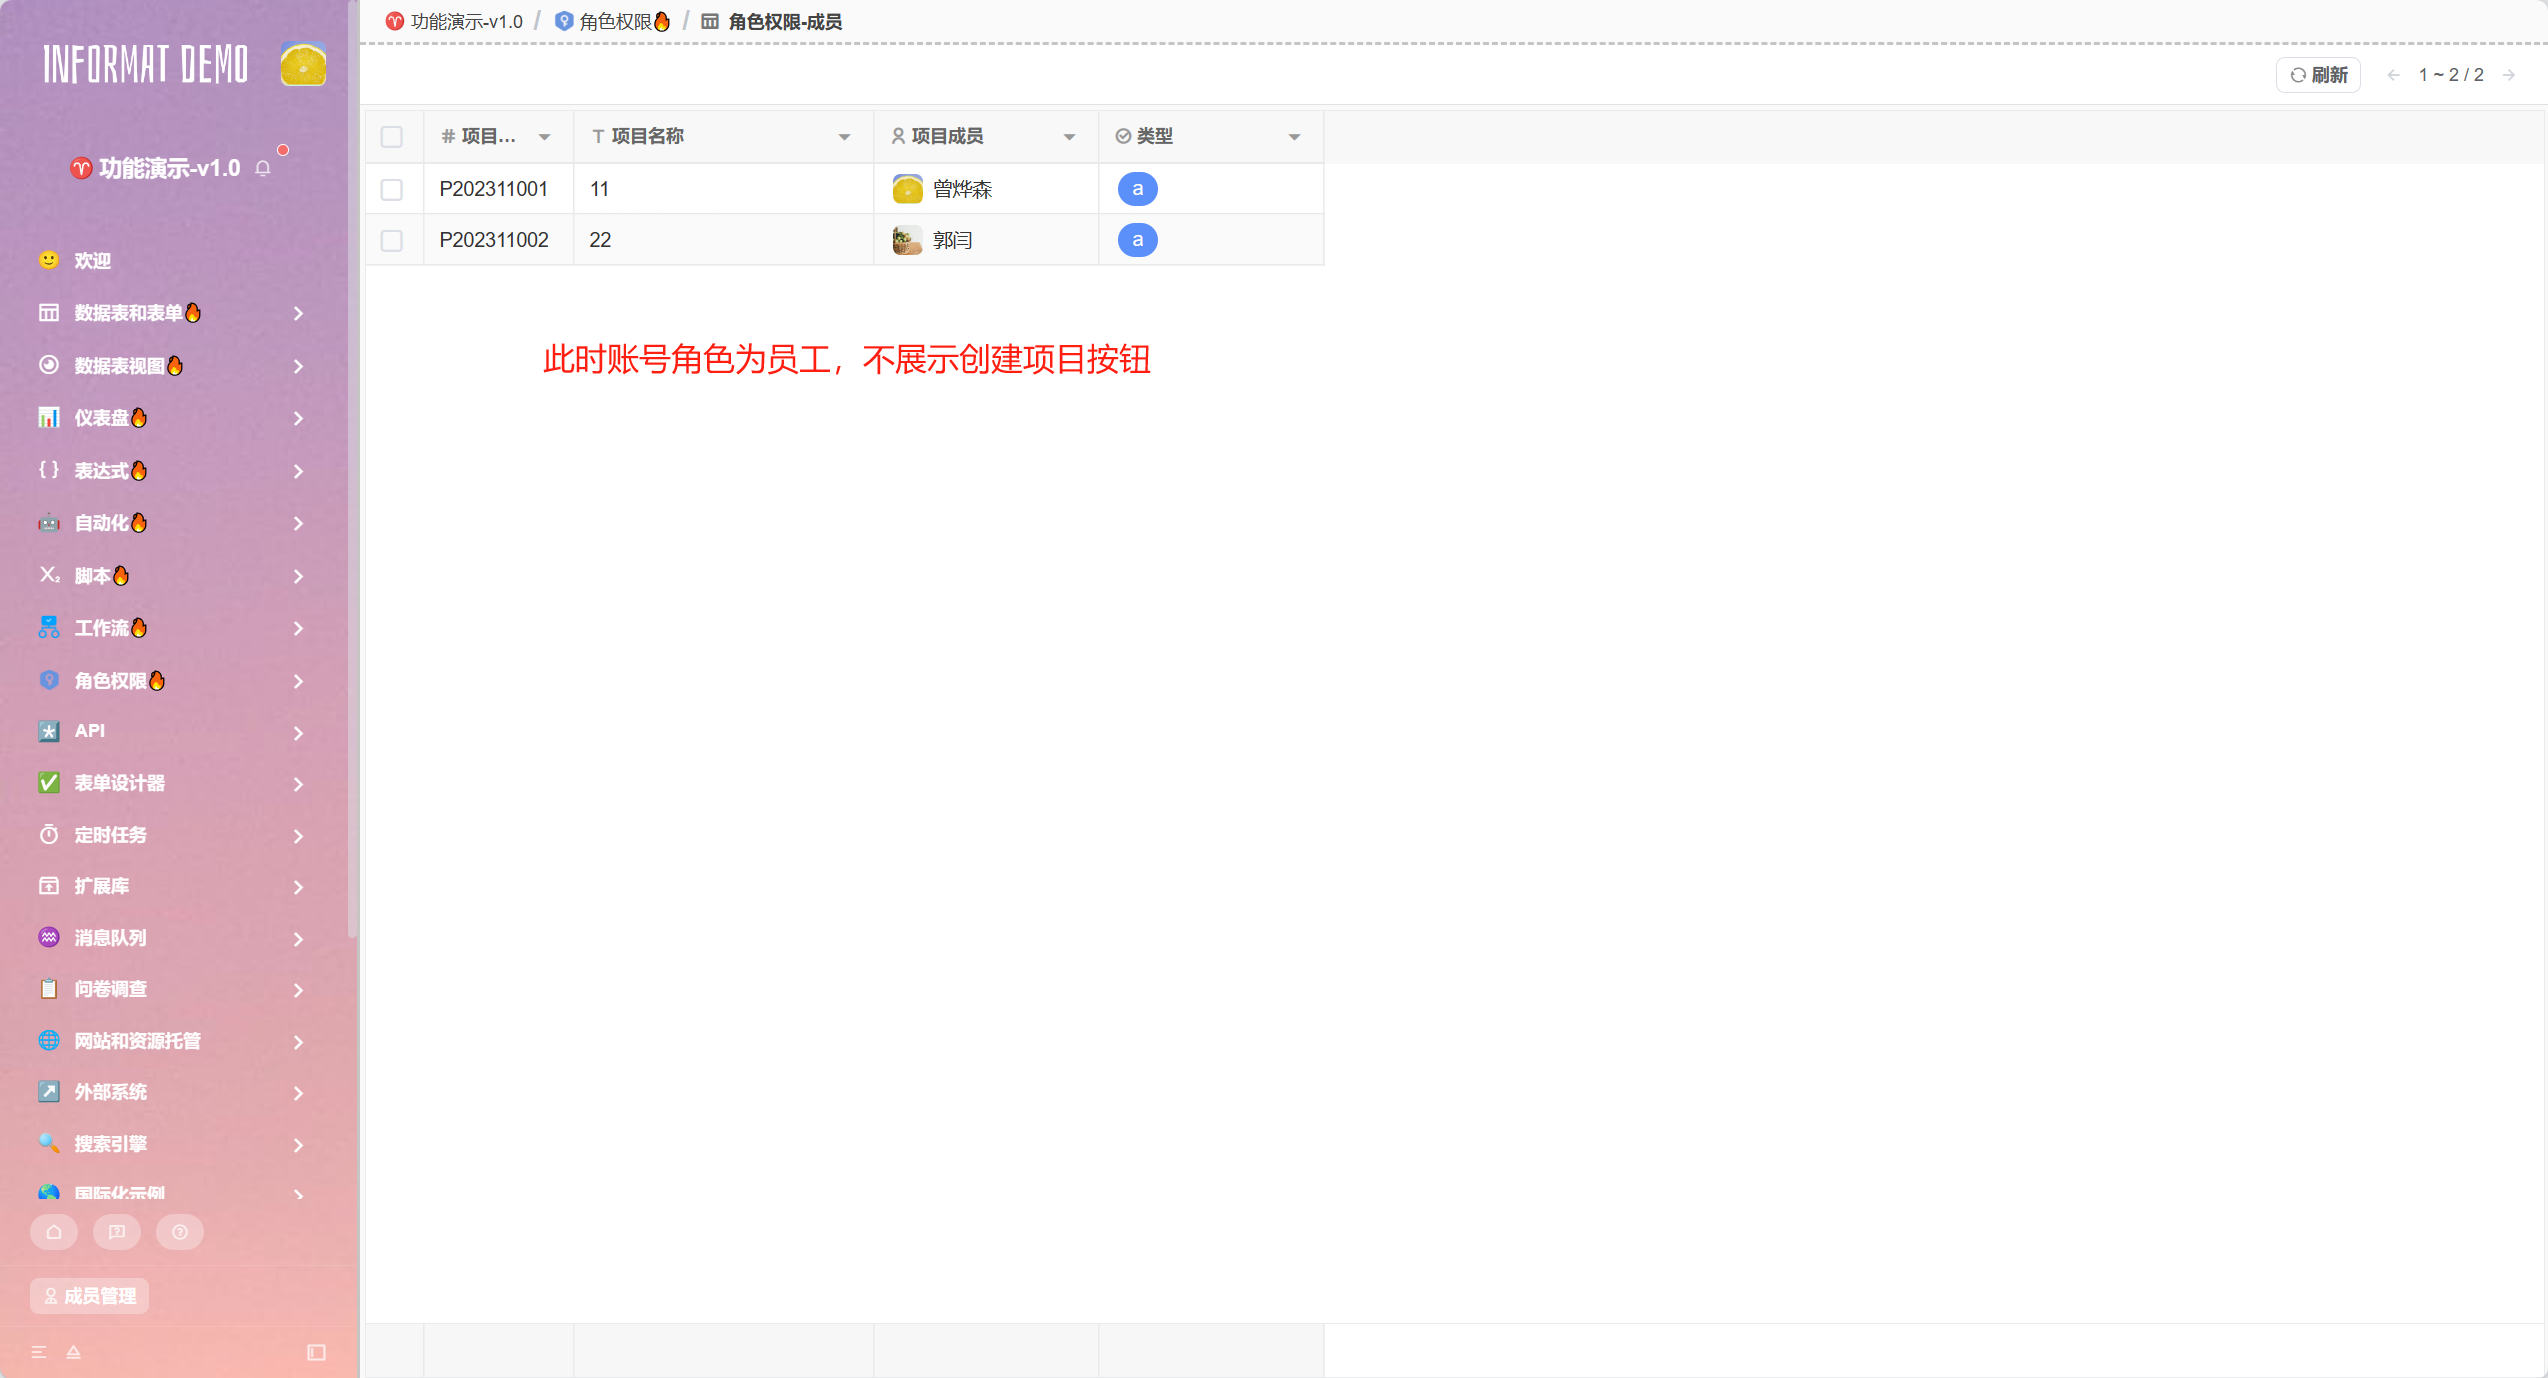
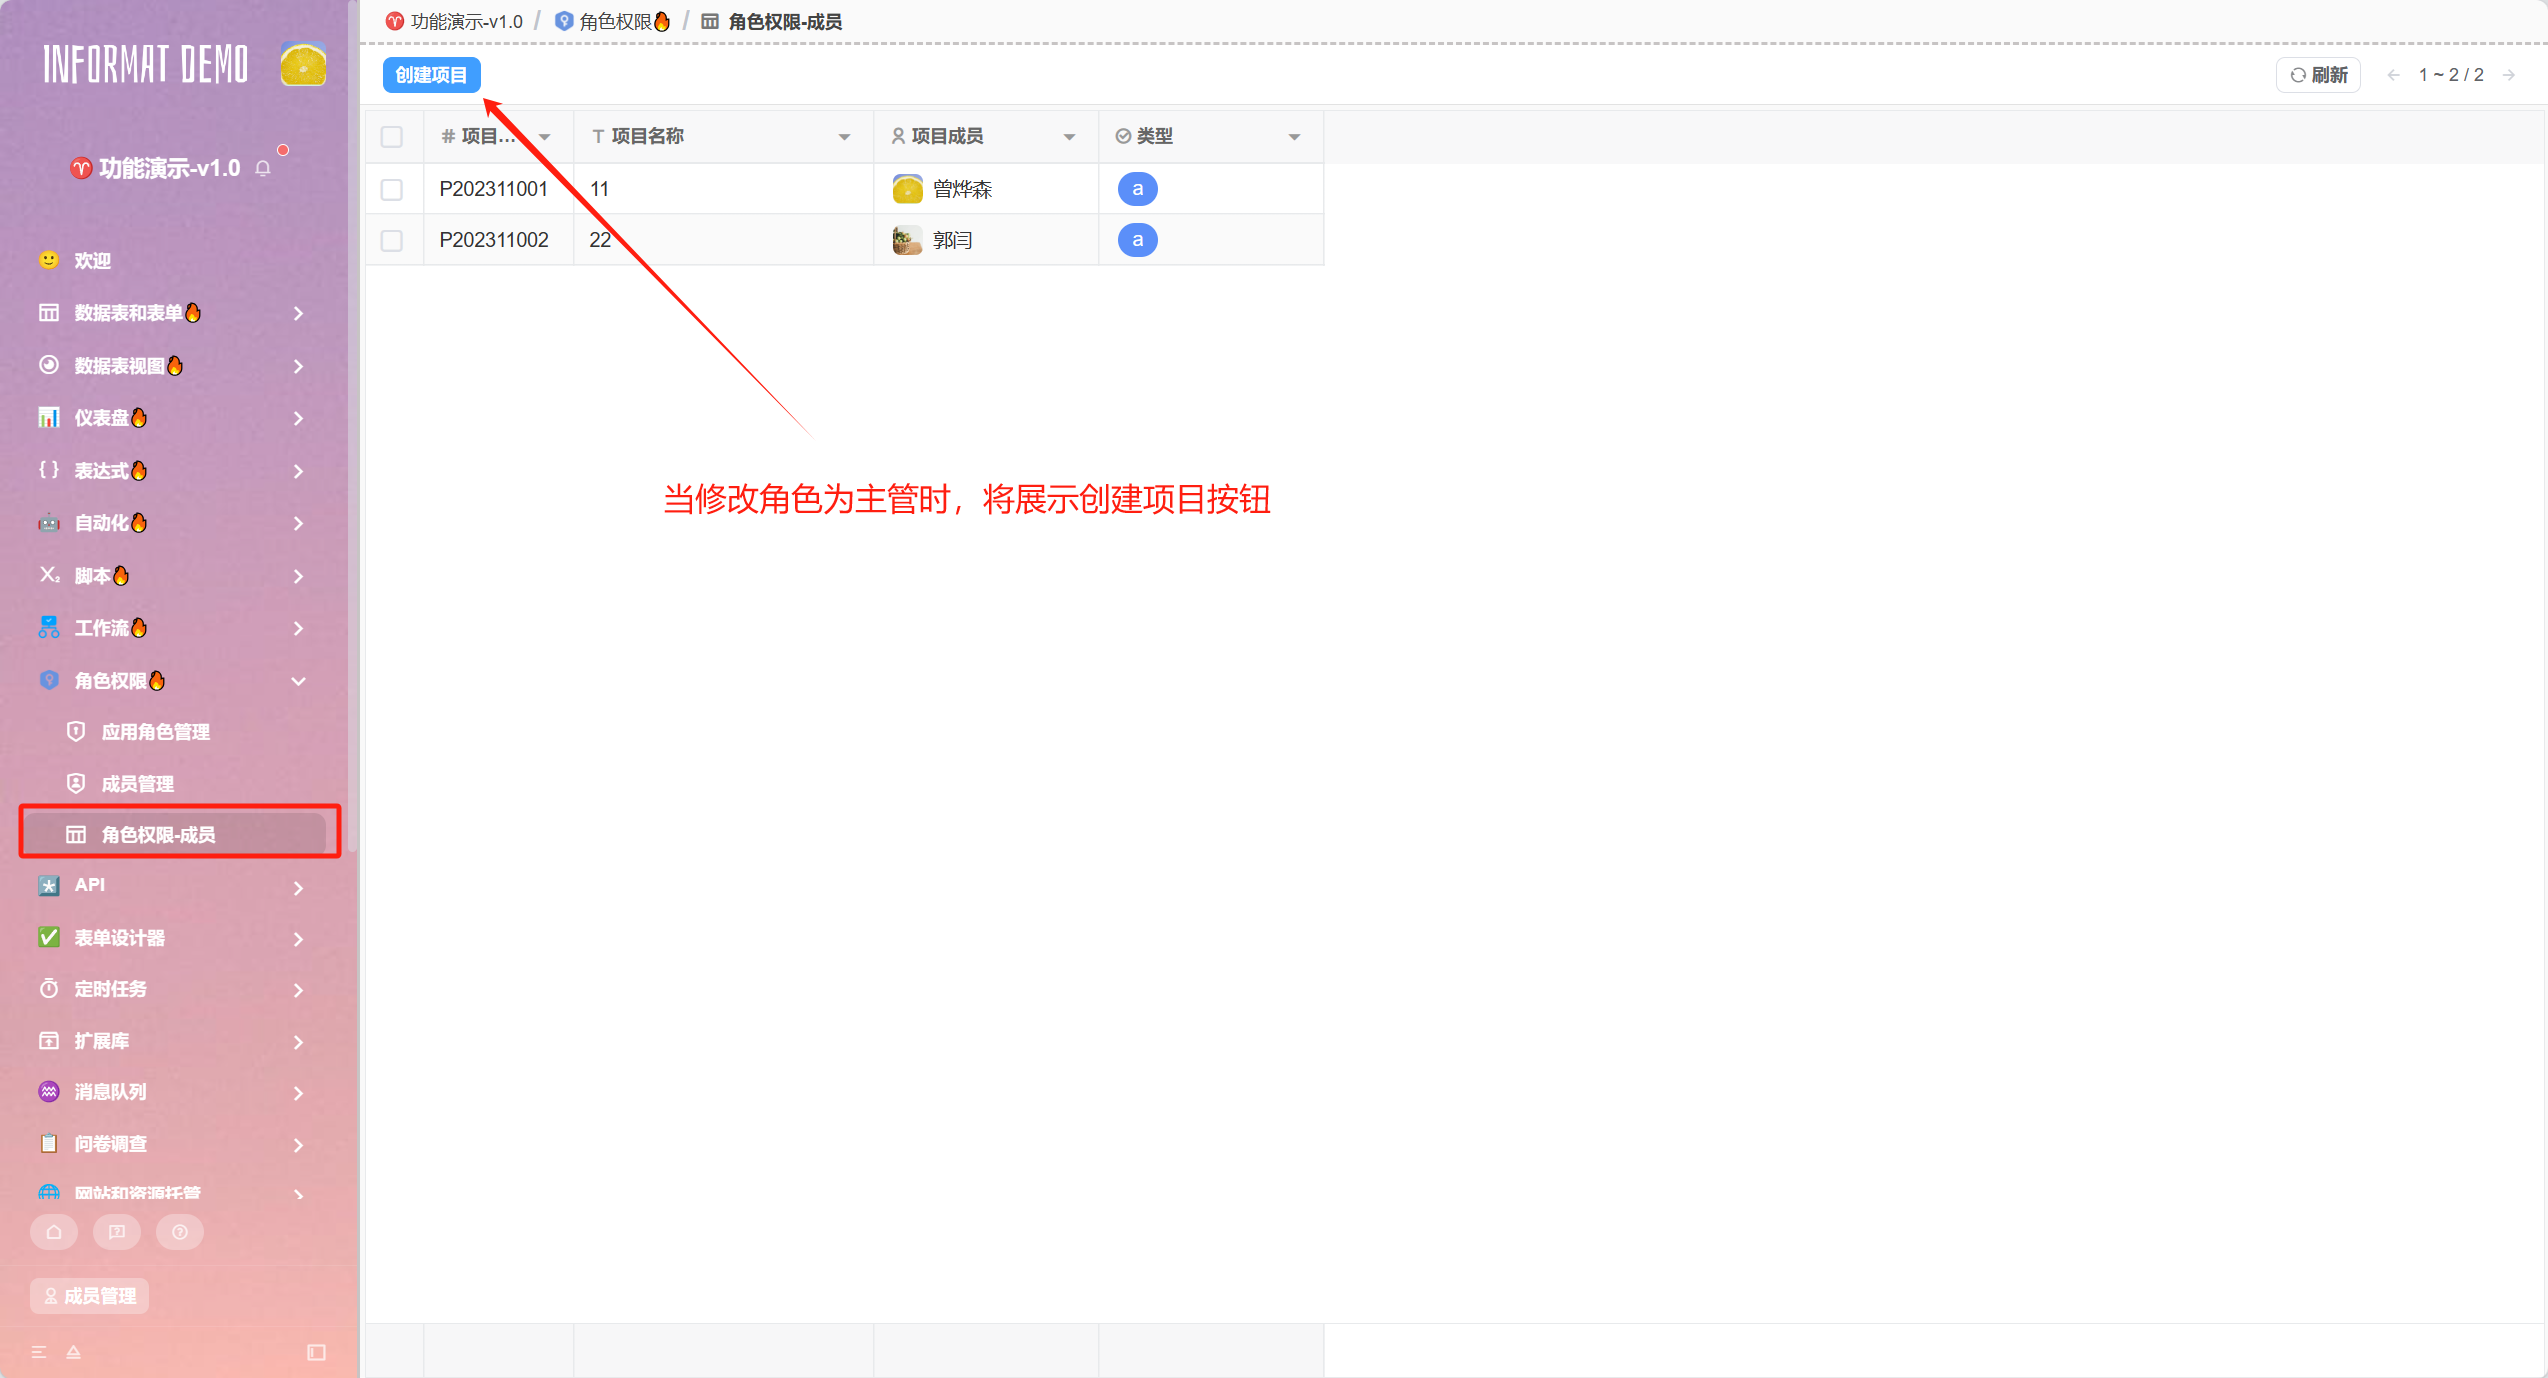
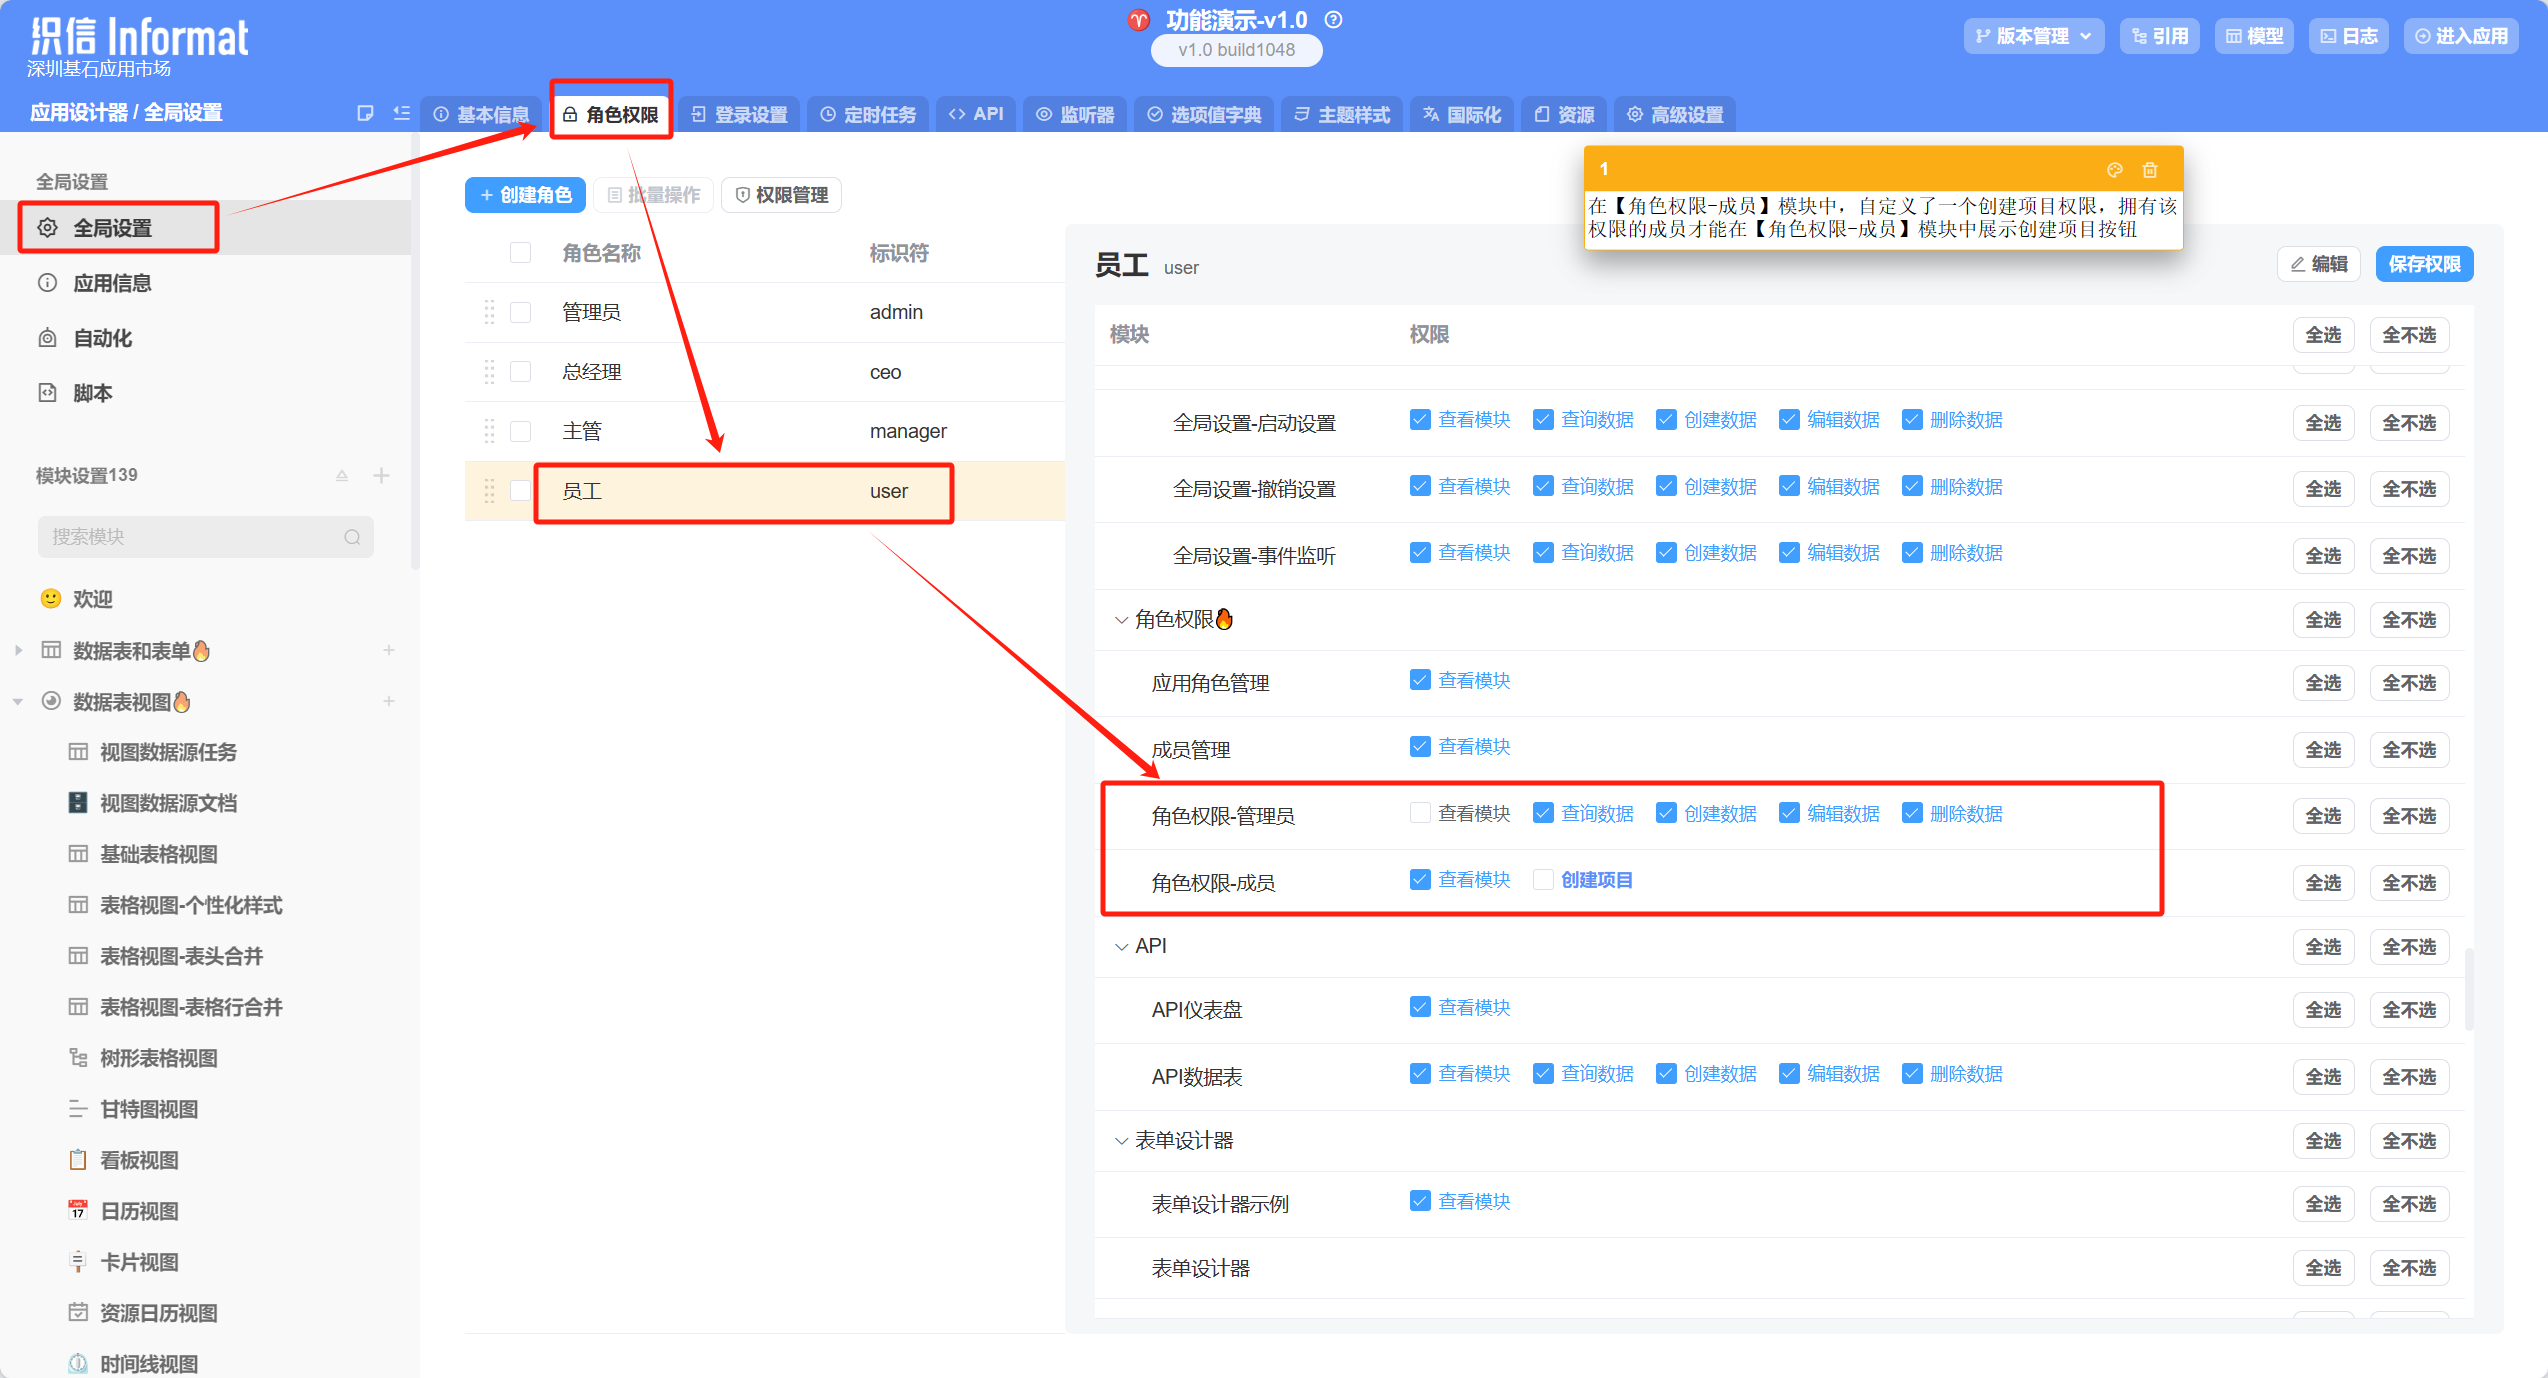
For example, I want to add a custom permission in the [Role Permission-Member] module, named "Create Project", so that only members with this permission can see the 【CreateProject】 button in this module. The configuration process is as follows: Add the "Create Project" permission in the [Role Permission-Member] module of permission management → Add a create button in the form toolbar of [Role Permission-Member] → Use Context.hasModulePerm() in this button to set conditional hiding
Add the "Create Project" permission in the [Role Permission-Member] module of permission management:
Enter the application designer, open global settings, enter the role permission section, and click the [Permission Management] button
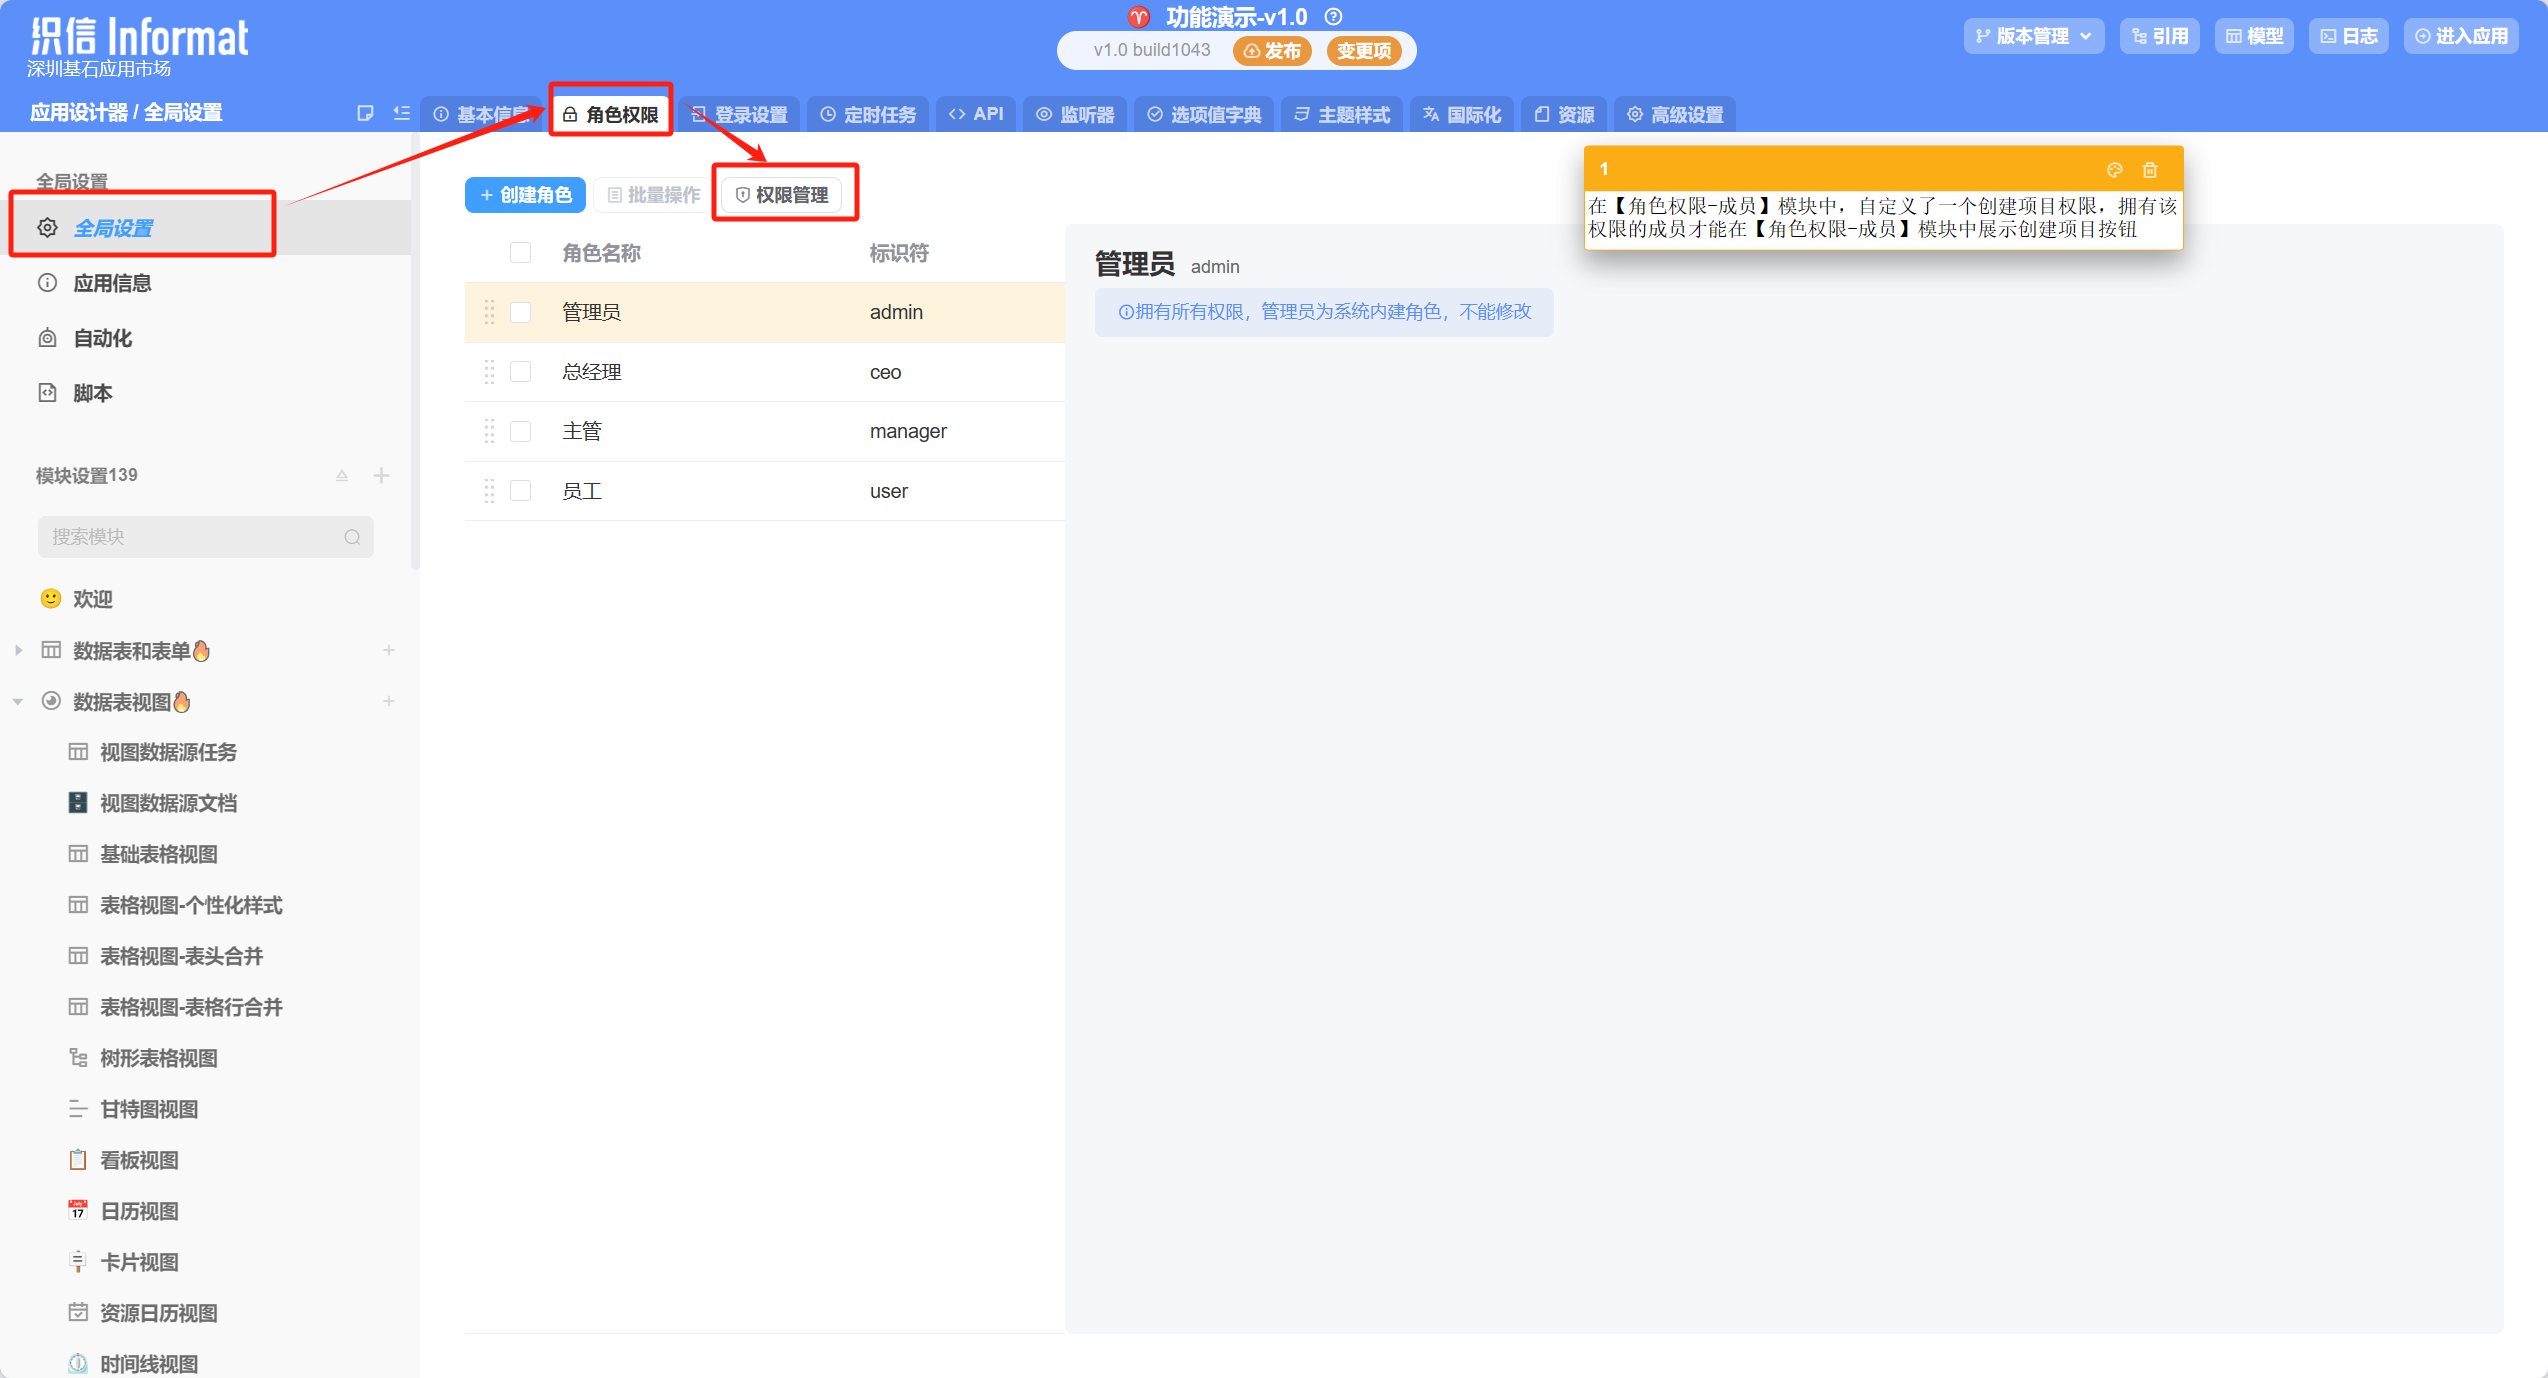
Find the [Role Permission-Member] module in the pop-up window and click the [Add Permission] button below
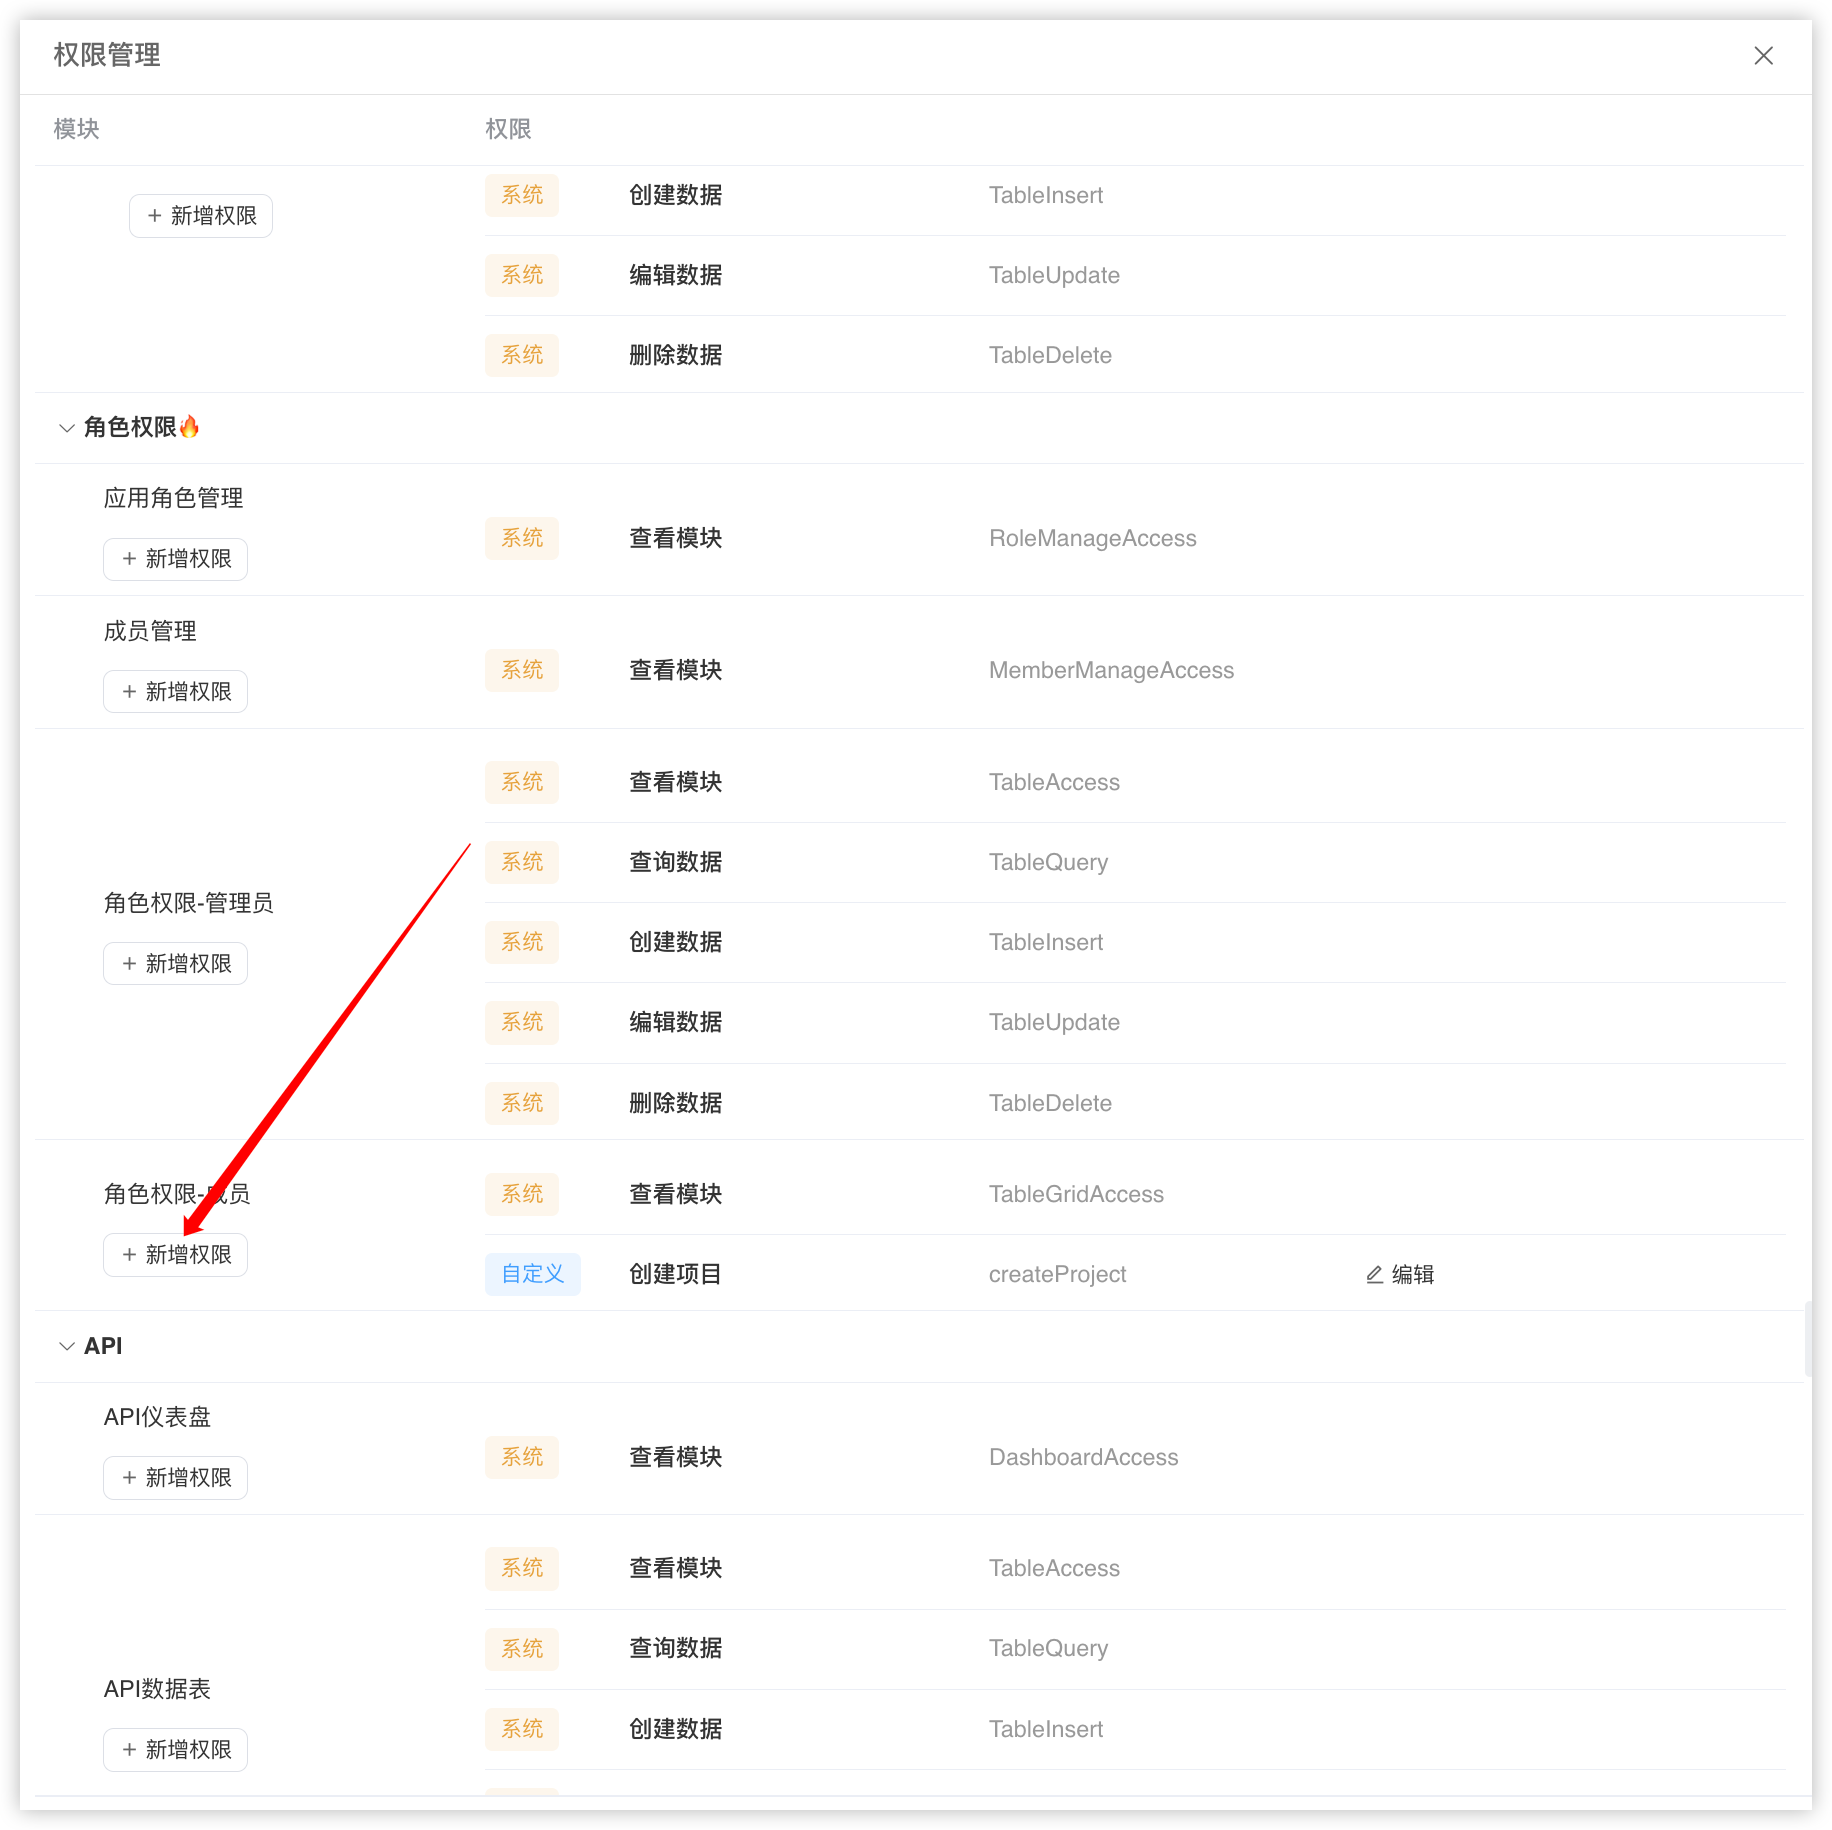
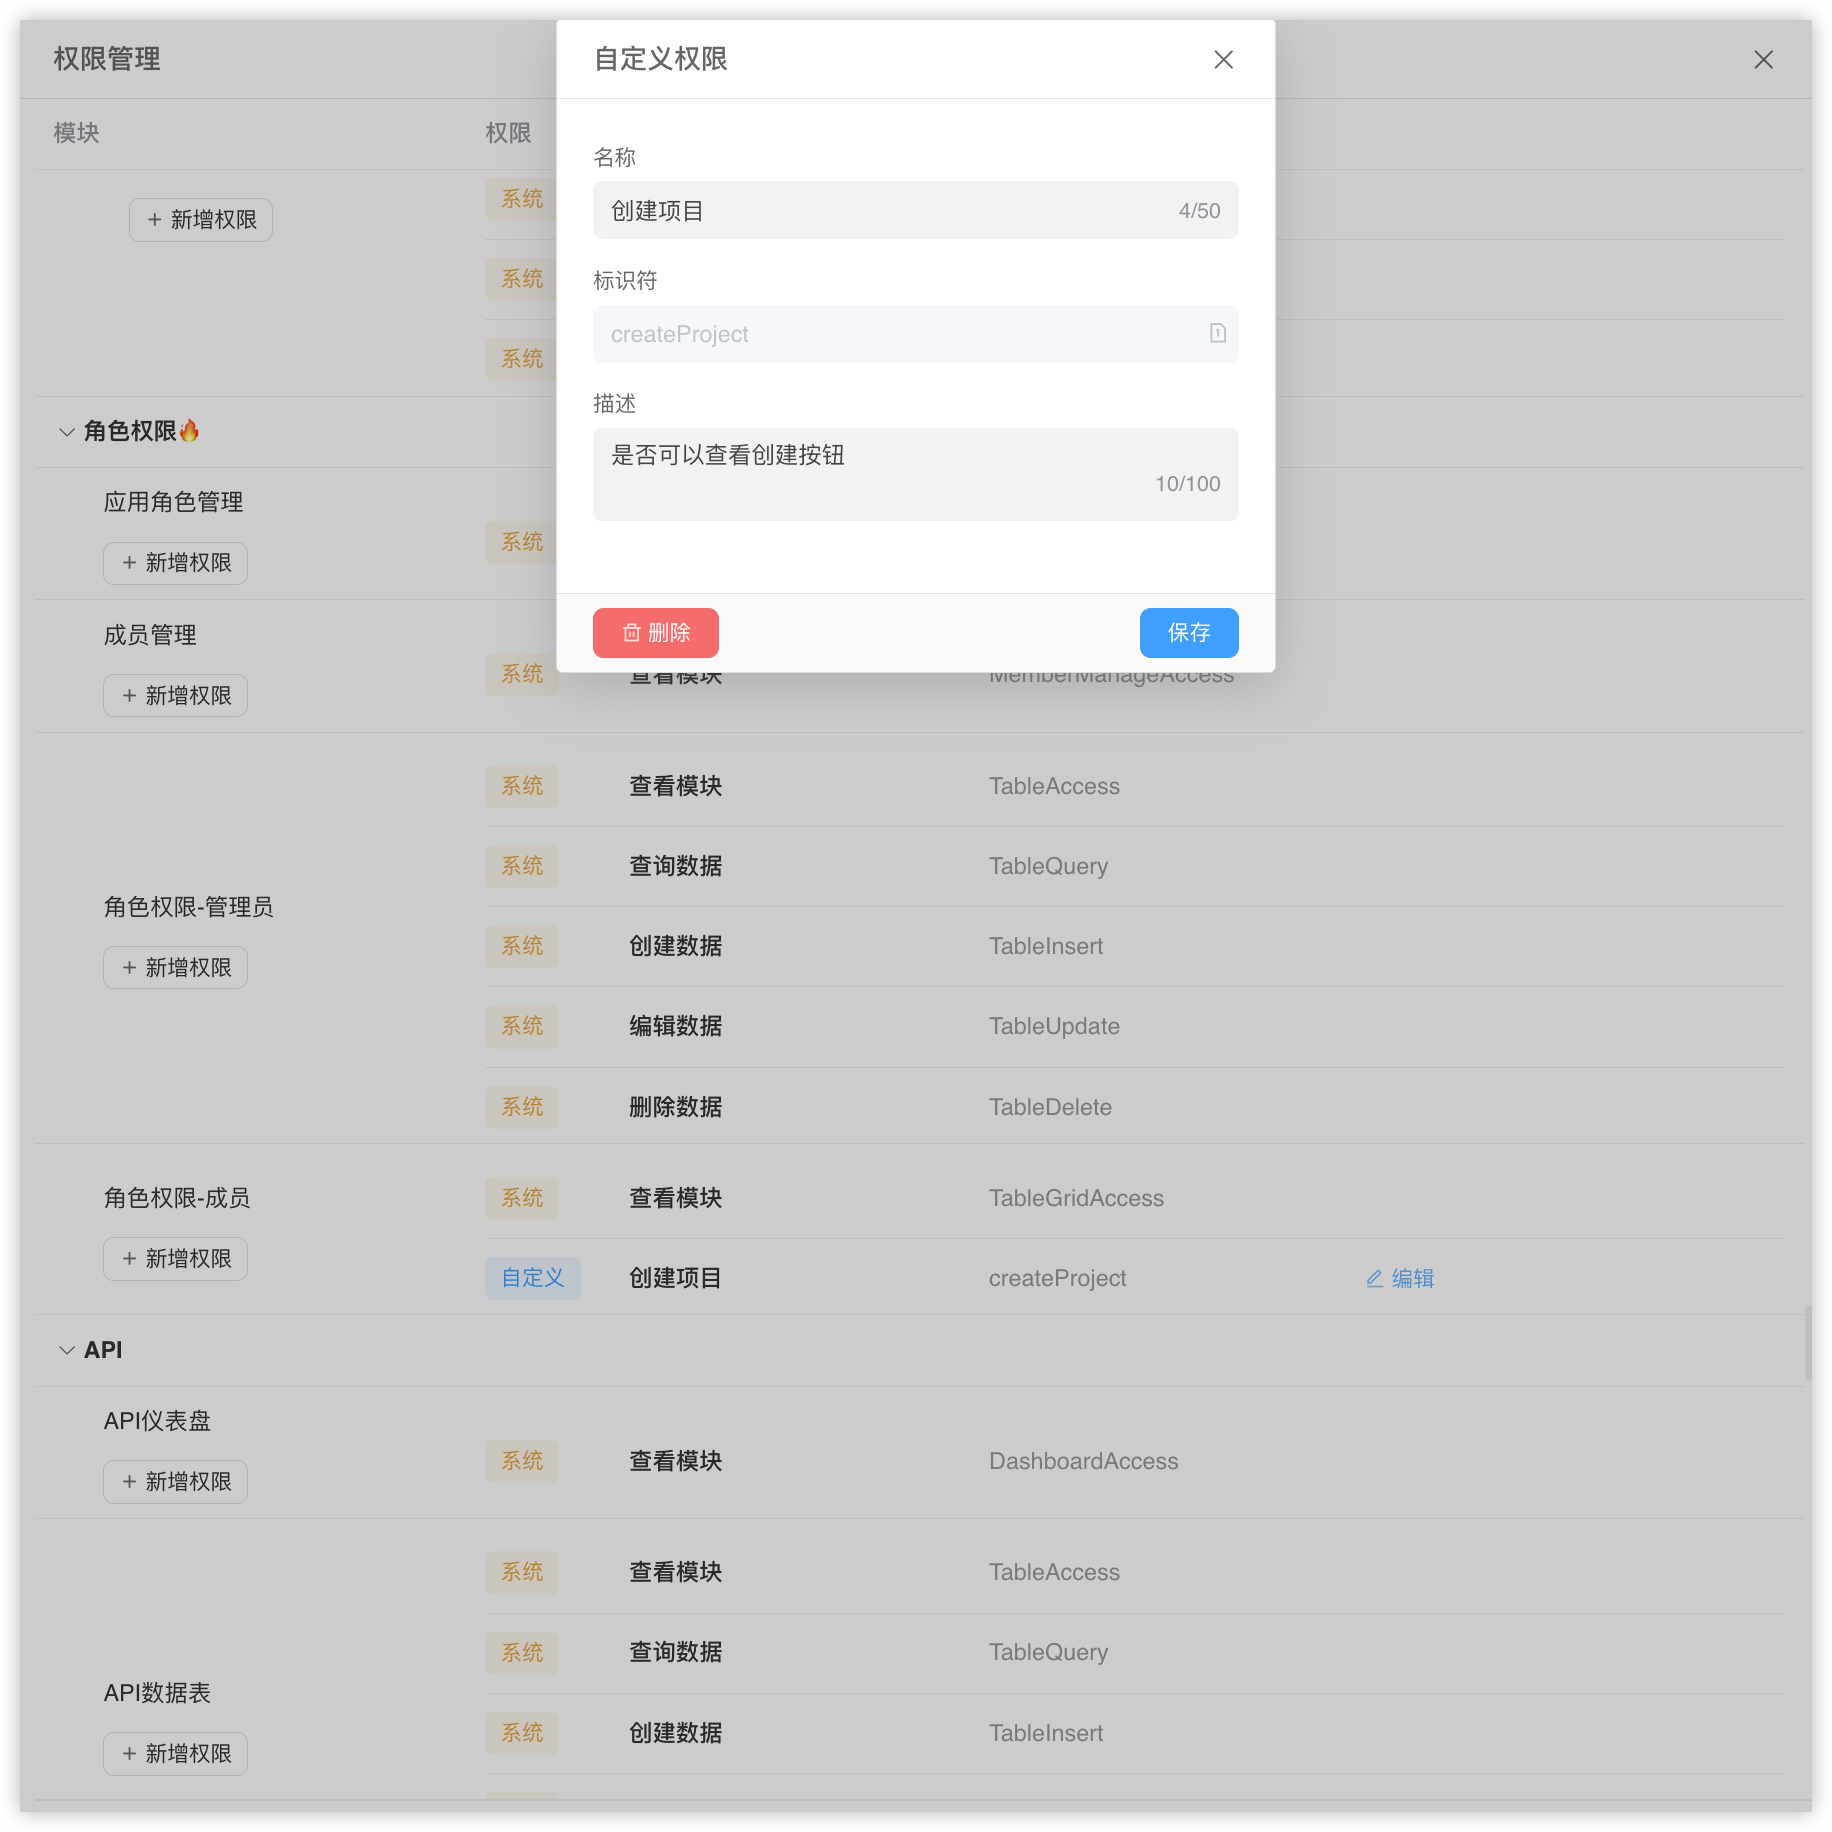
Enter the information of the permission to be added and click save. The identifier here will be used when calling methods later, please be sure to name it according to specifications
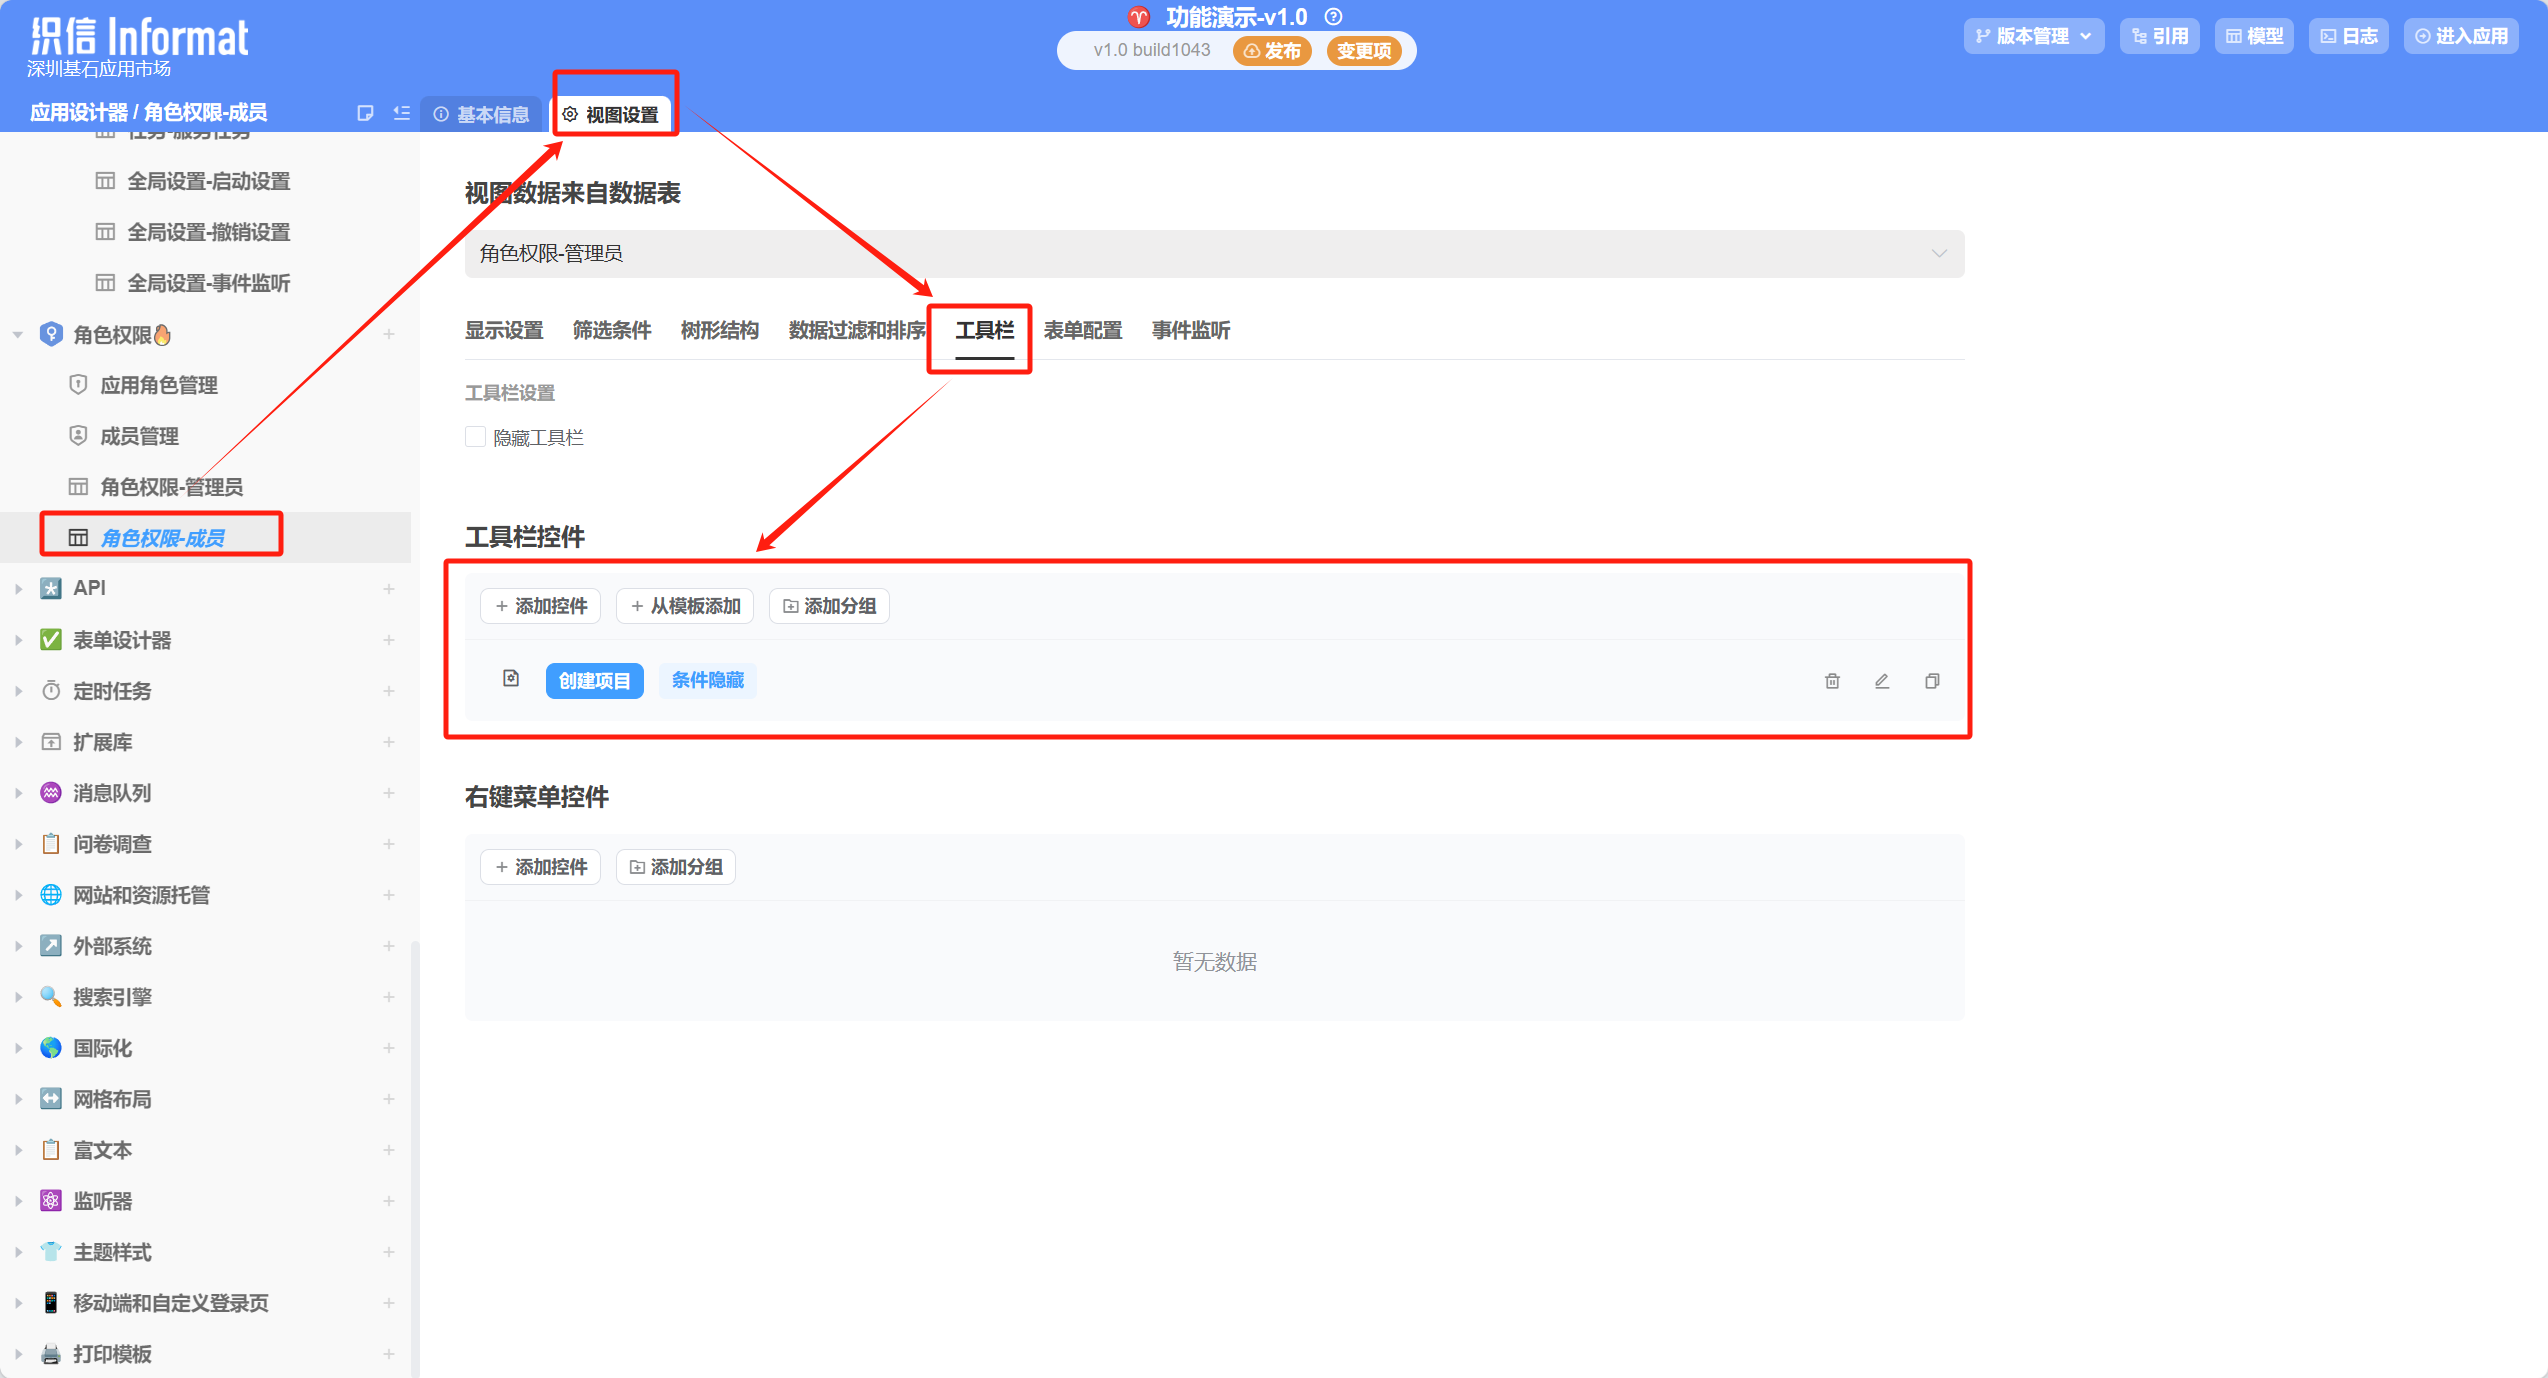
Add a create button in the form toolbar of [Role Permission-Member]:
Open the [Role Permission-Member] module in the application designer, enter the view settings section, open the toolbar tab, and add a “Create Project” button control. The configuration of this control is as follows:
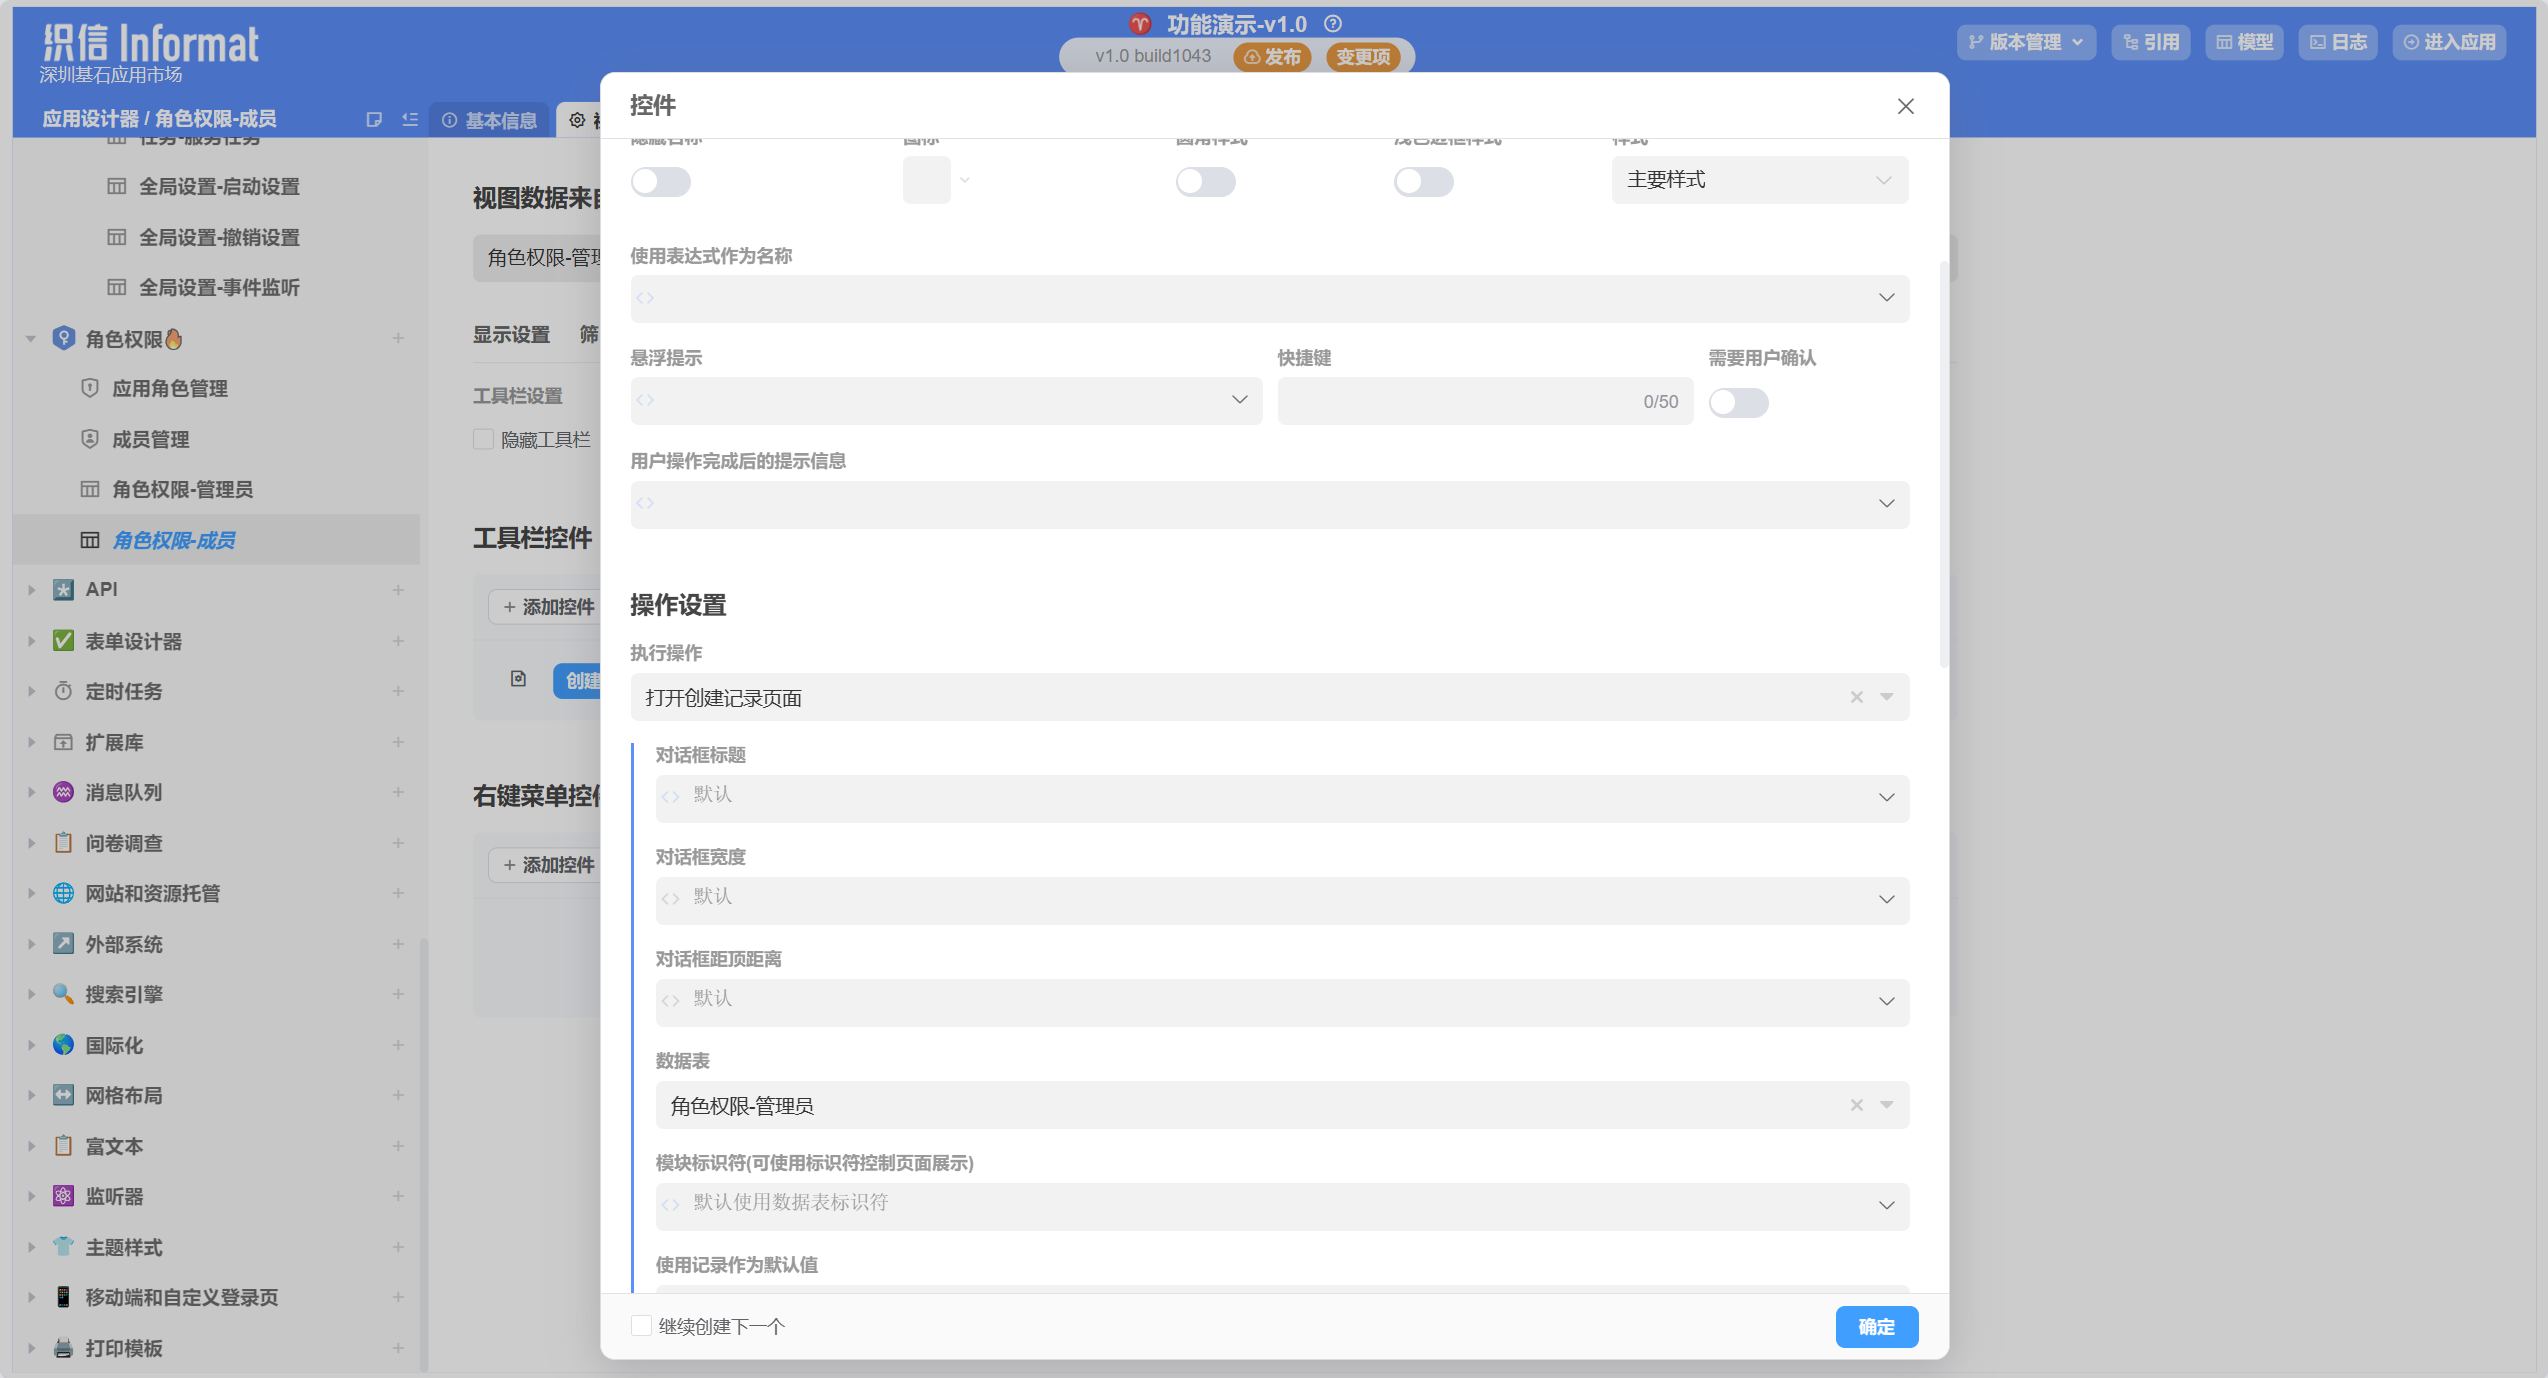
Use Context.hasModulePerm() in this button to set conditional hiding:
In the [Hide when condition is met] configuration item in the control, use the Context.hasModulePerm() method to set, so that the configuration achieves hiding when the user does not have the permission. Click here to view the help documentation for this method. The expression content is as follows:
${!Context.hasModulePerm('rolesUser','createProject')}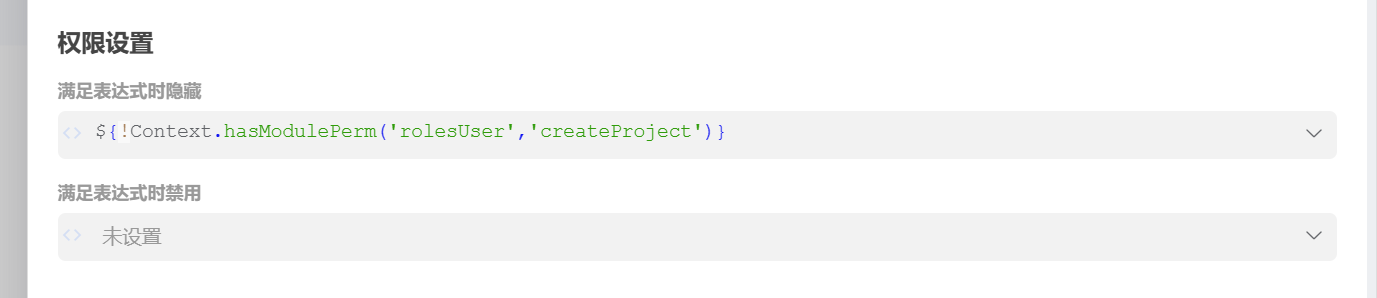
Effect display:
In the current configuration, the member role does not have the permission to create projects, while the supervisor role has the permission to create projects.
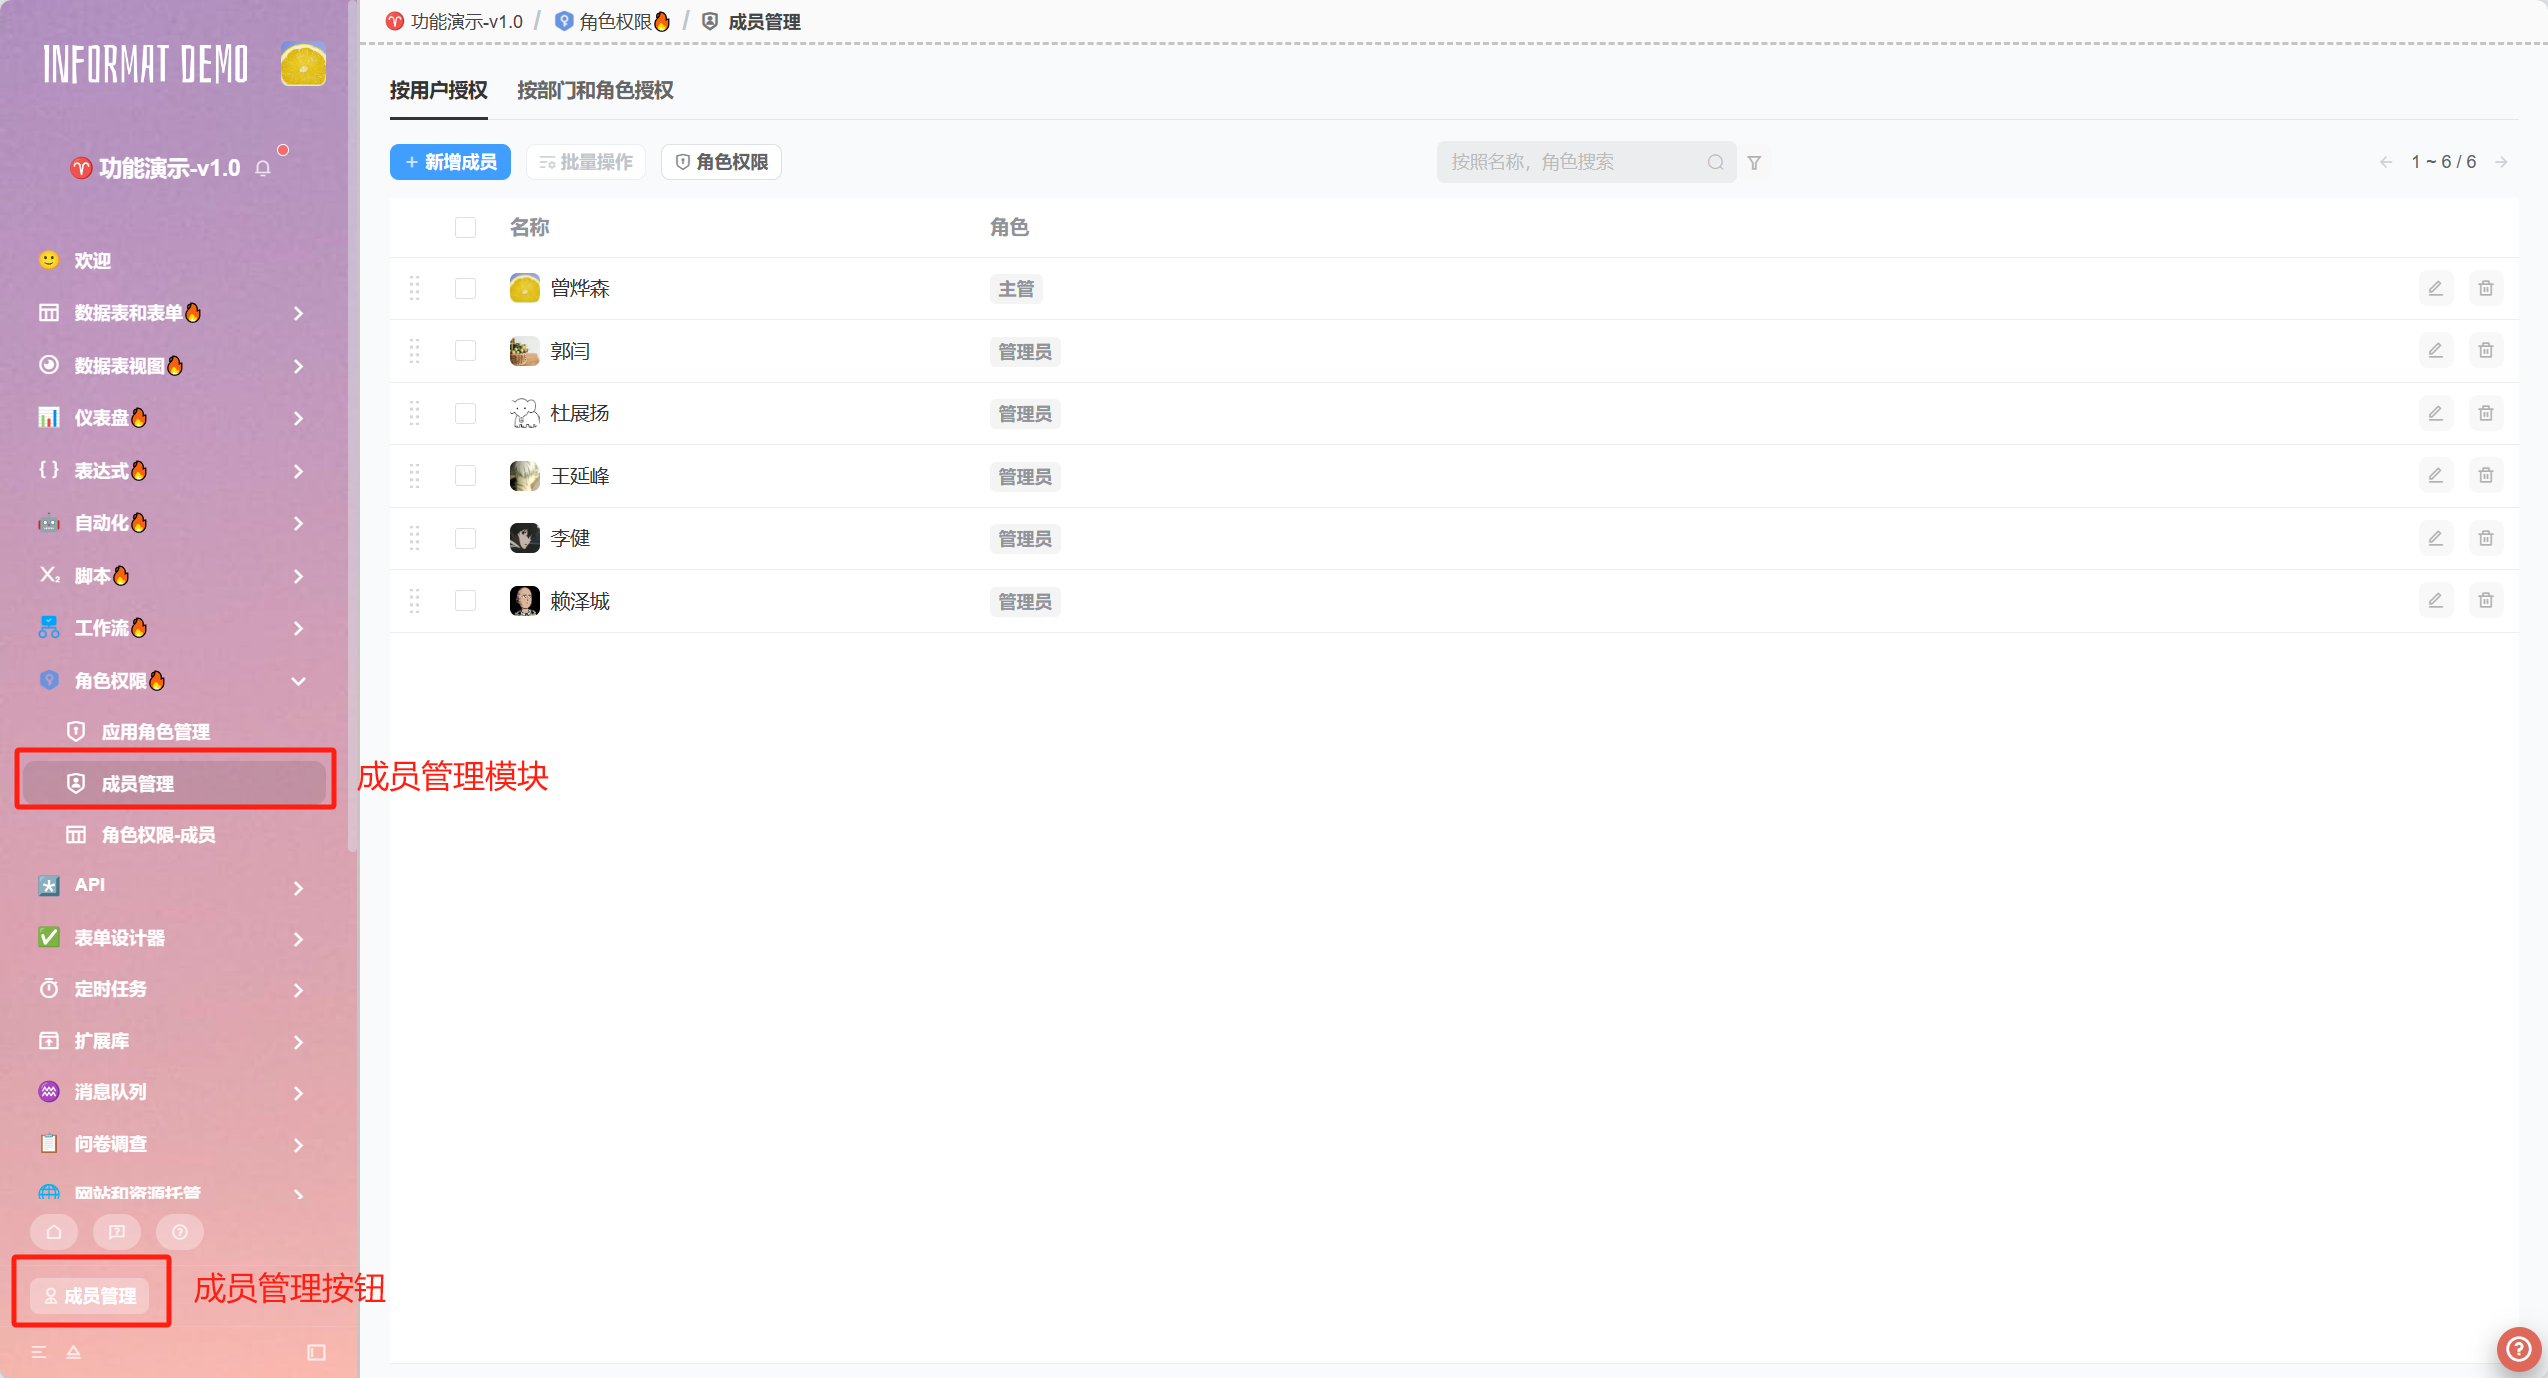
9.2 Member Management
The application member management module is a core functional module for managing members and permission assignments in applications. This module can help application administrators control specific users and specific departments that can access the application, and change user roles when necessary to control user permissions in the application.
Function Introduction:
The following are the main functions of the application member management module:
- Member Addition and Removal: Application administrators can add team members to the application or remove existing members from the application through this module.
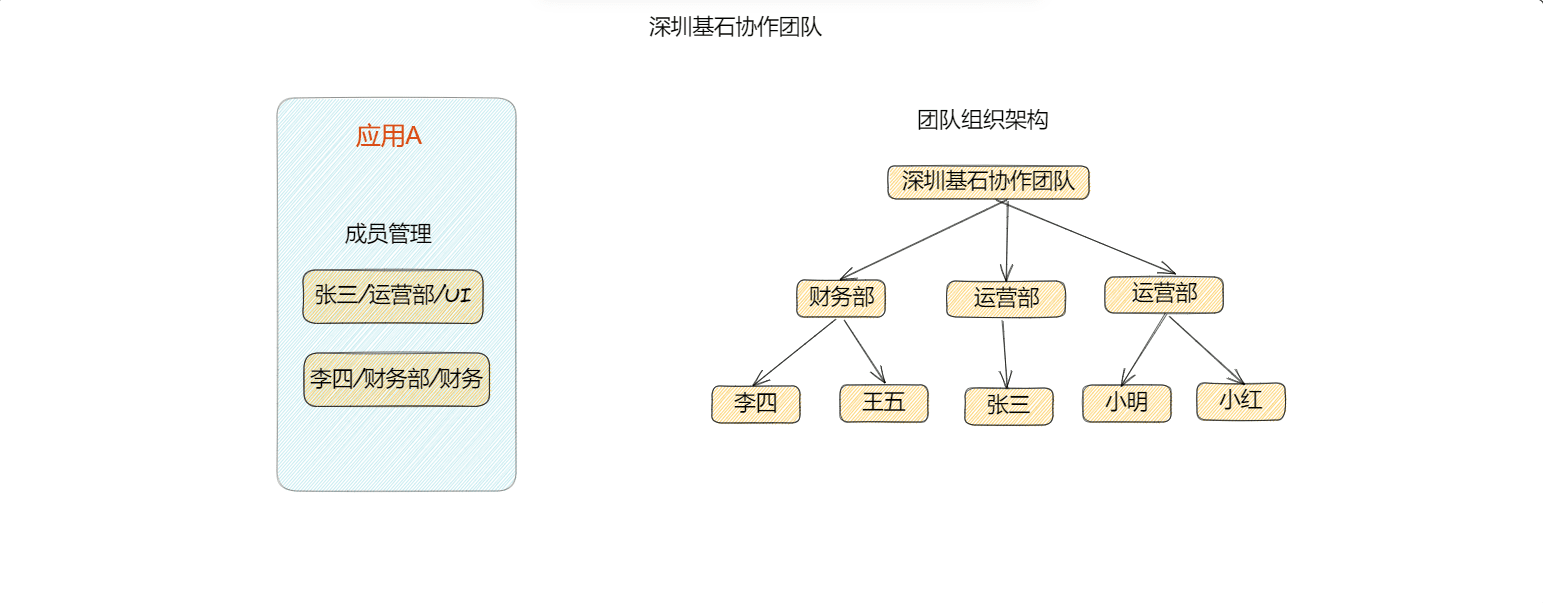
- Addition and Removal of Department and Role Authorizations: Application administrators can grant and remove access permissions to the application for specific
team departmentsorteam rolesthrough this module. - Role Assignment: Allows application administrators to assign application roles to members in the application. Allows administrators to easily manage a large number of users and ensure they only have access to the parts of the application module they need.
In the case, both places shown in the figure can enter the member management module.
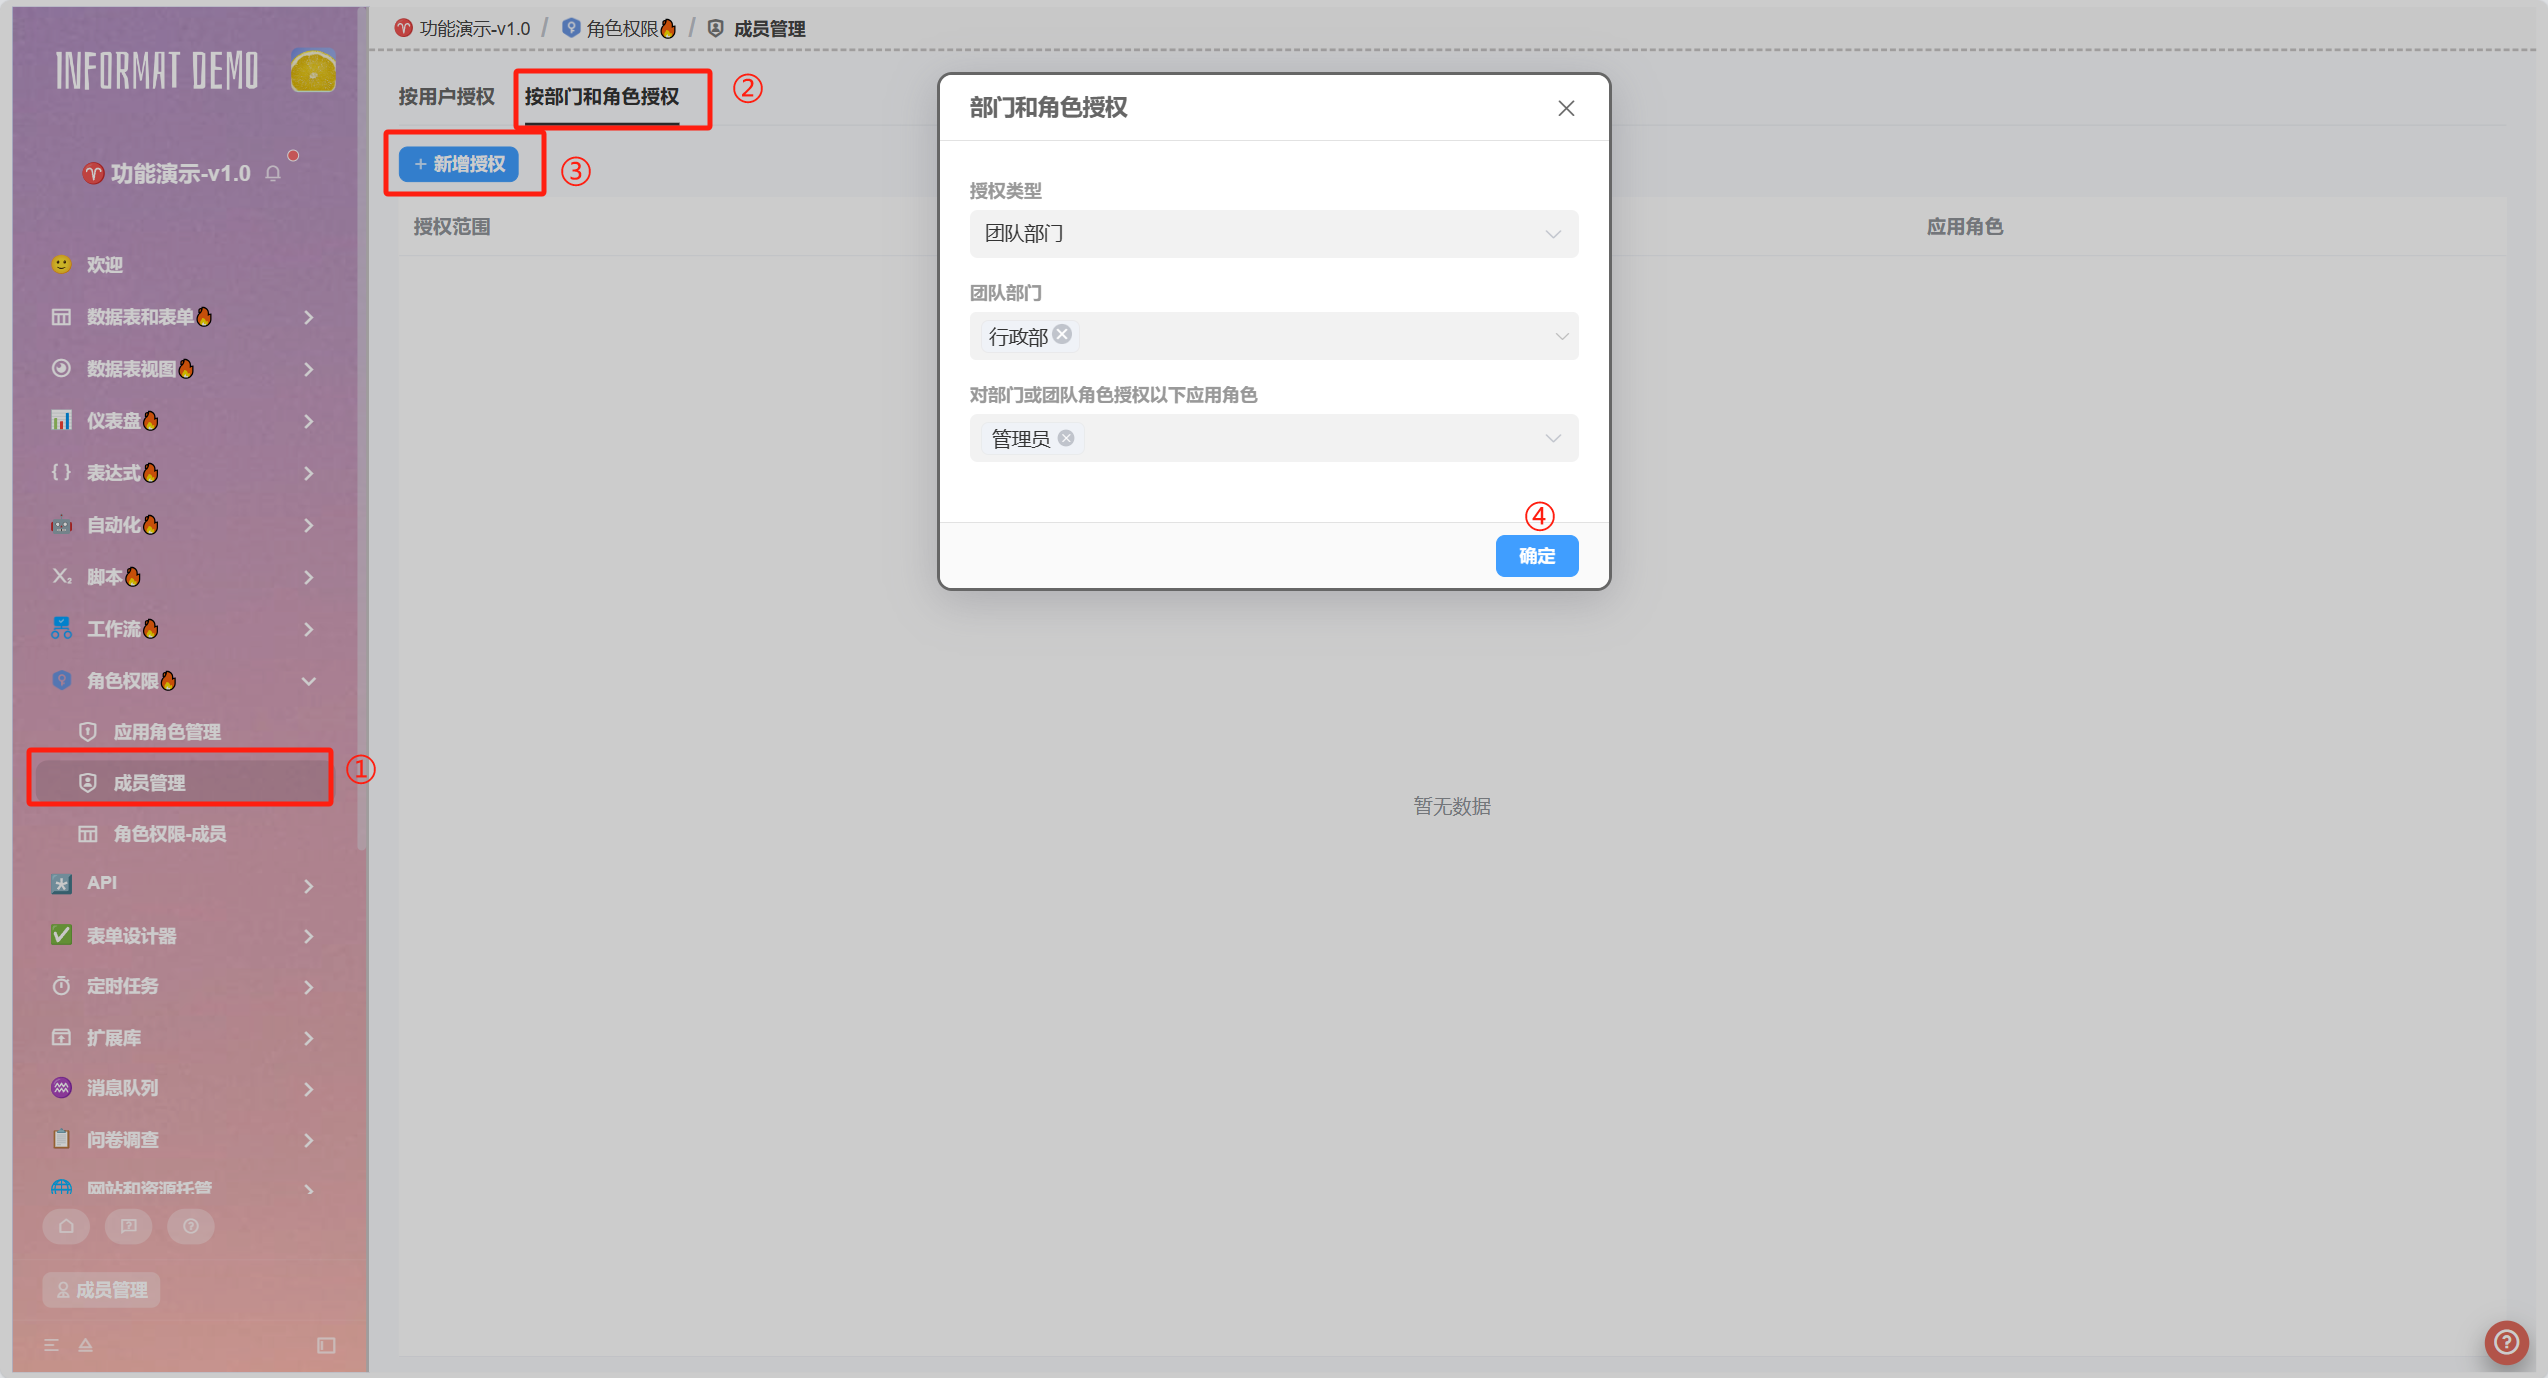
Authorization by Department and Role:
In member management, it supports authorization by department and role to grant permissions to specific team roles or departments.
- All members under the authorized department will have access permissions to the application
- Users with the authorized team role can access the application
Operation method:
Open member management, switch to the authorization tab by department and role, click "Add Authorization", fill in as needed, and click "OK".
9.3 Data Permission Control
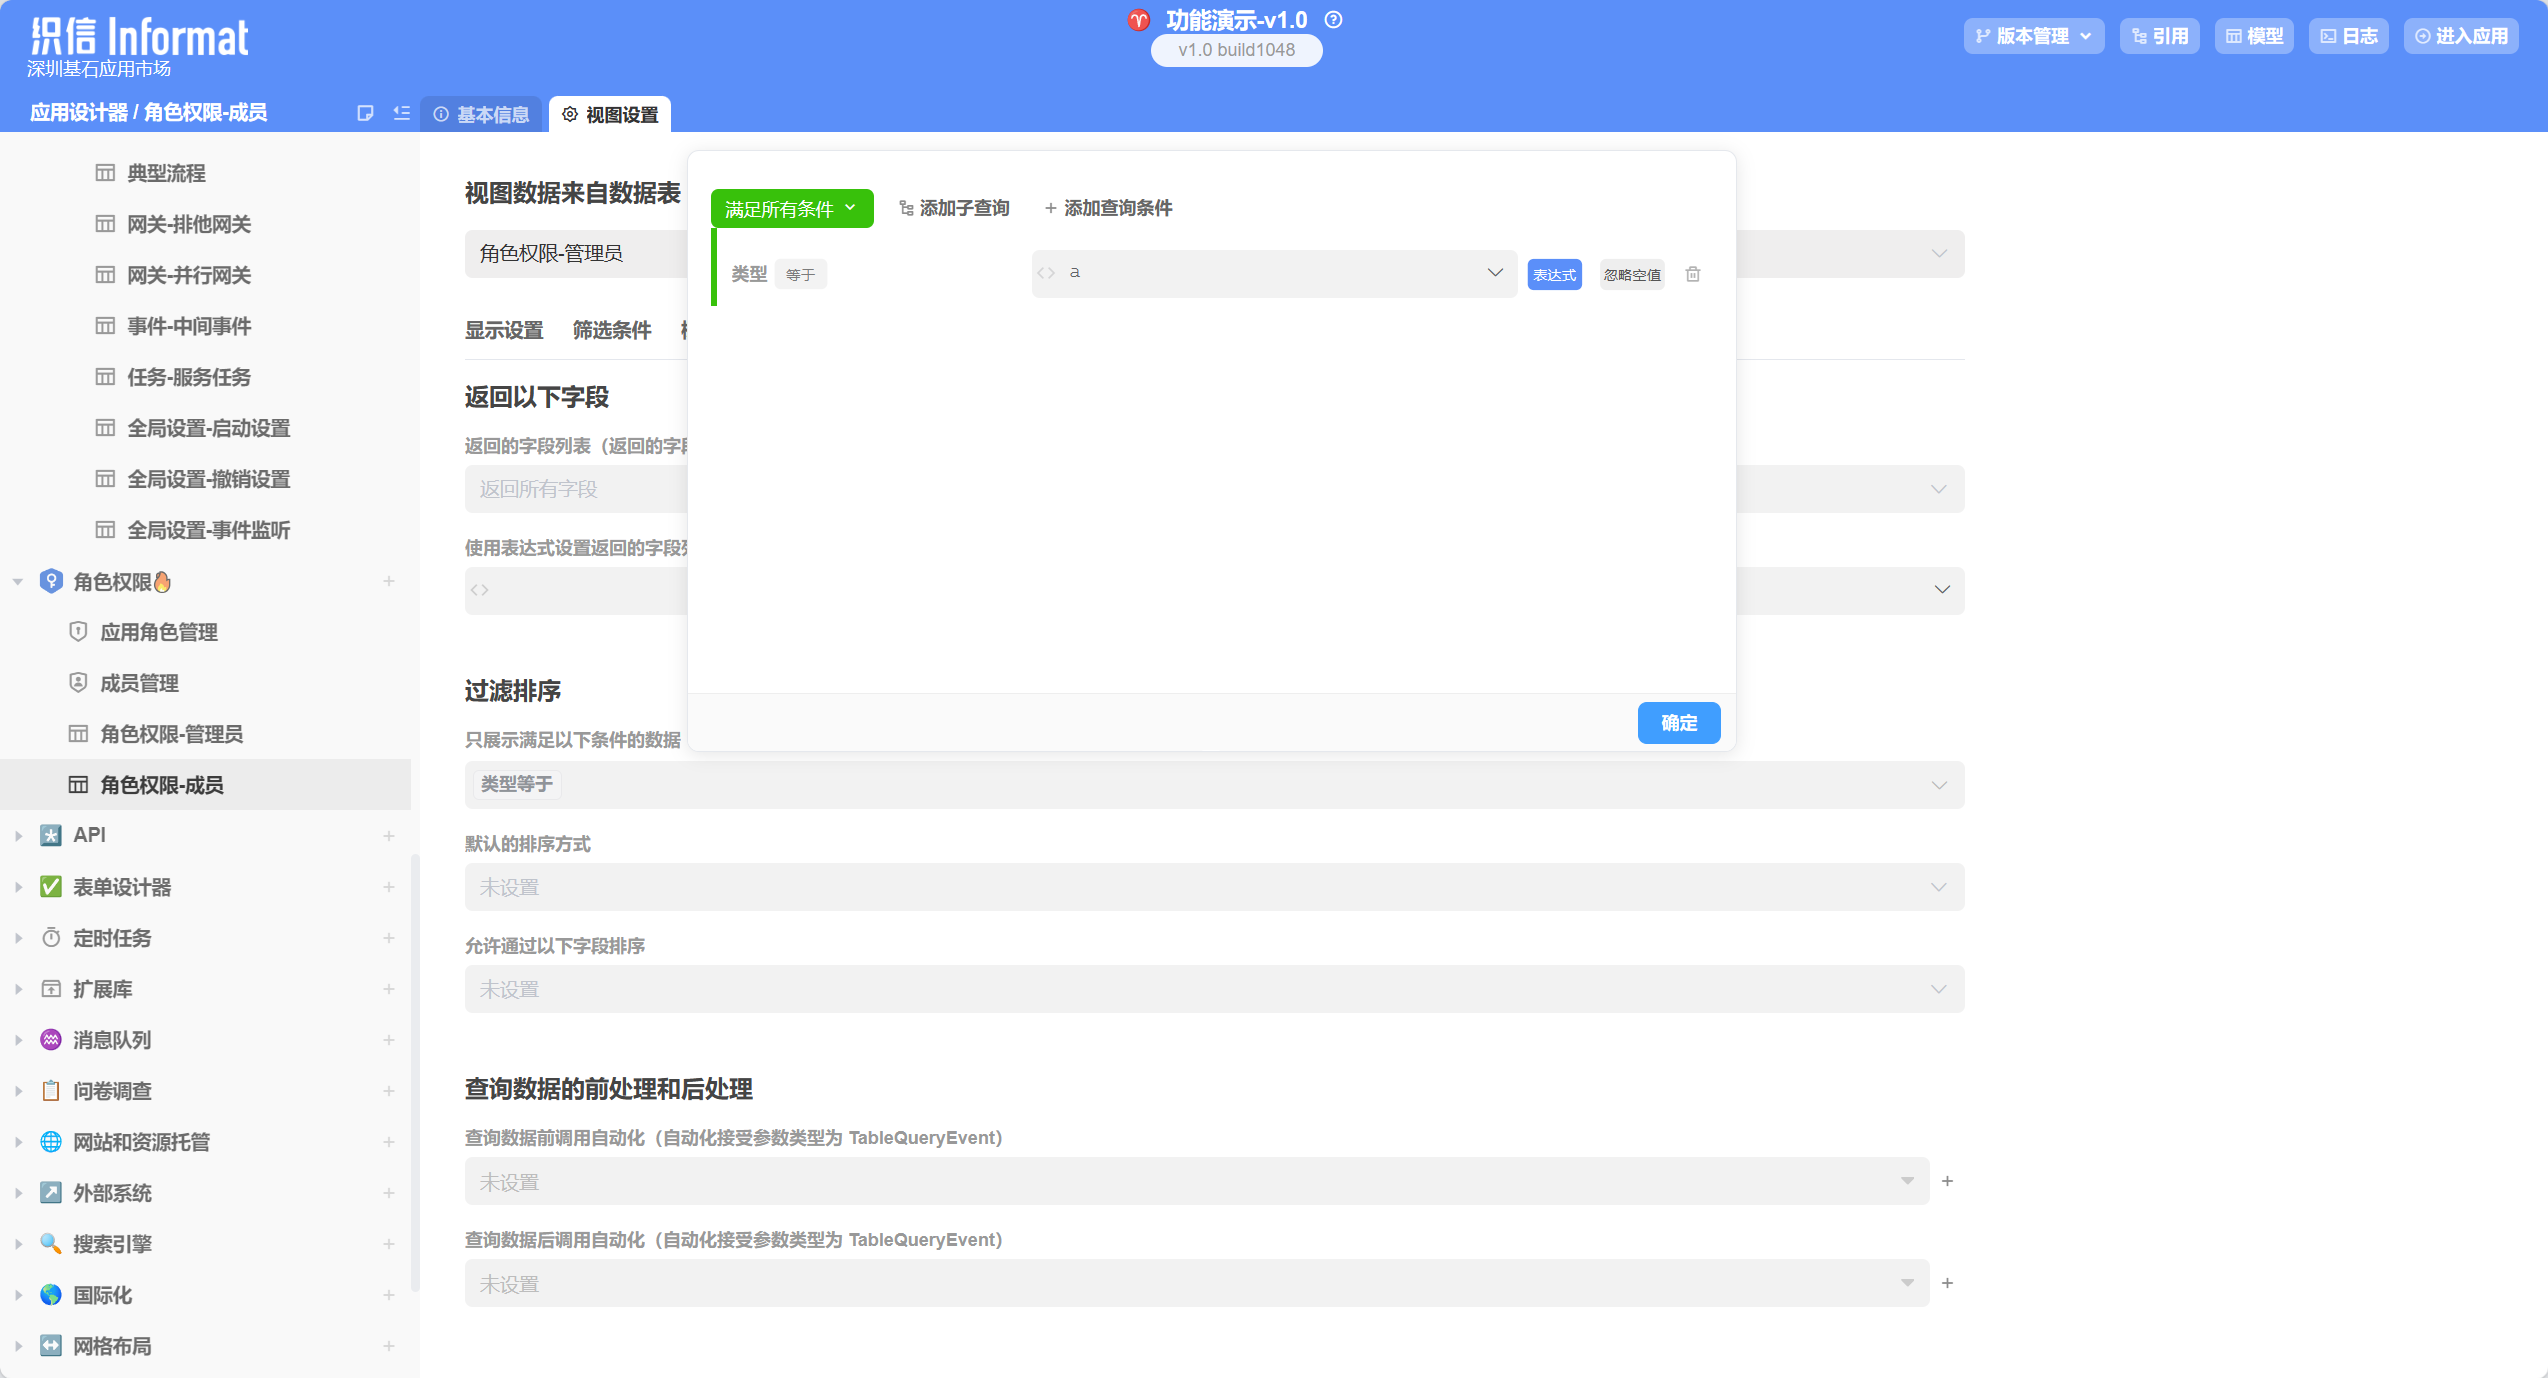
In some specific scenarios, we hope to control the data permissions of modules, restricting different roles in the same module to view different data. This can be achieved through the [Only display data that meets the following conditions] configuration item in view settings.
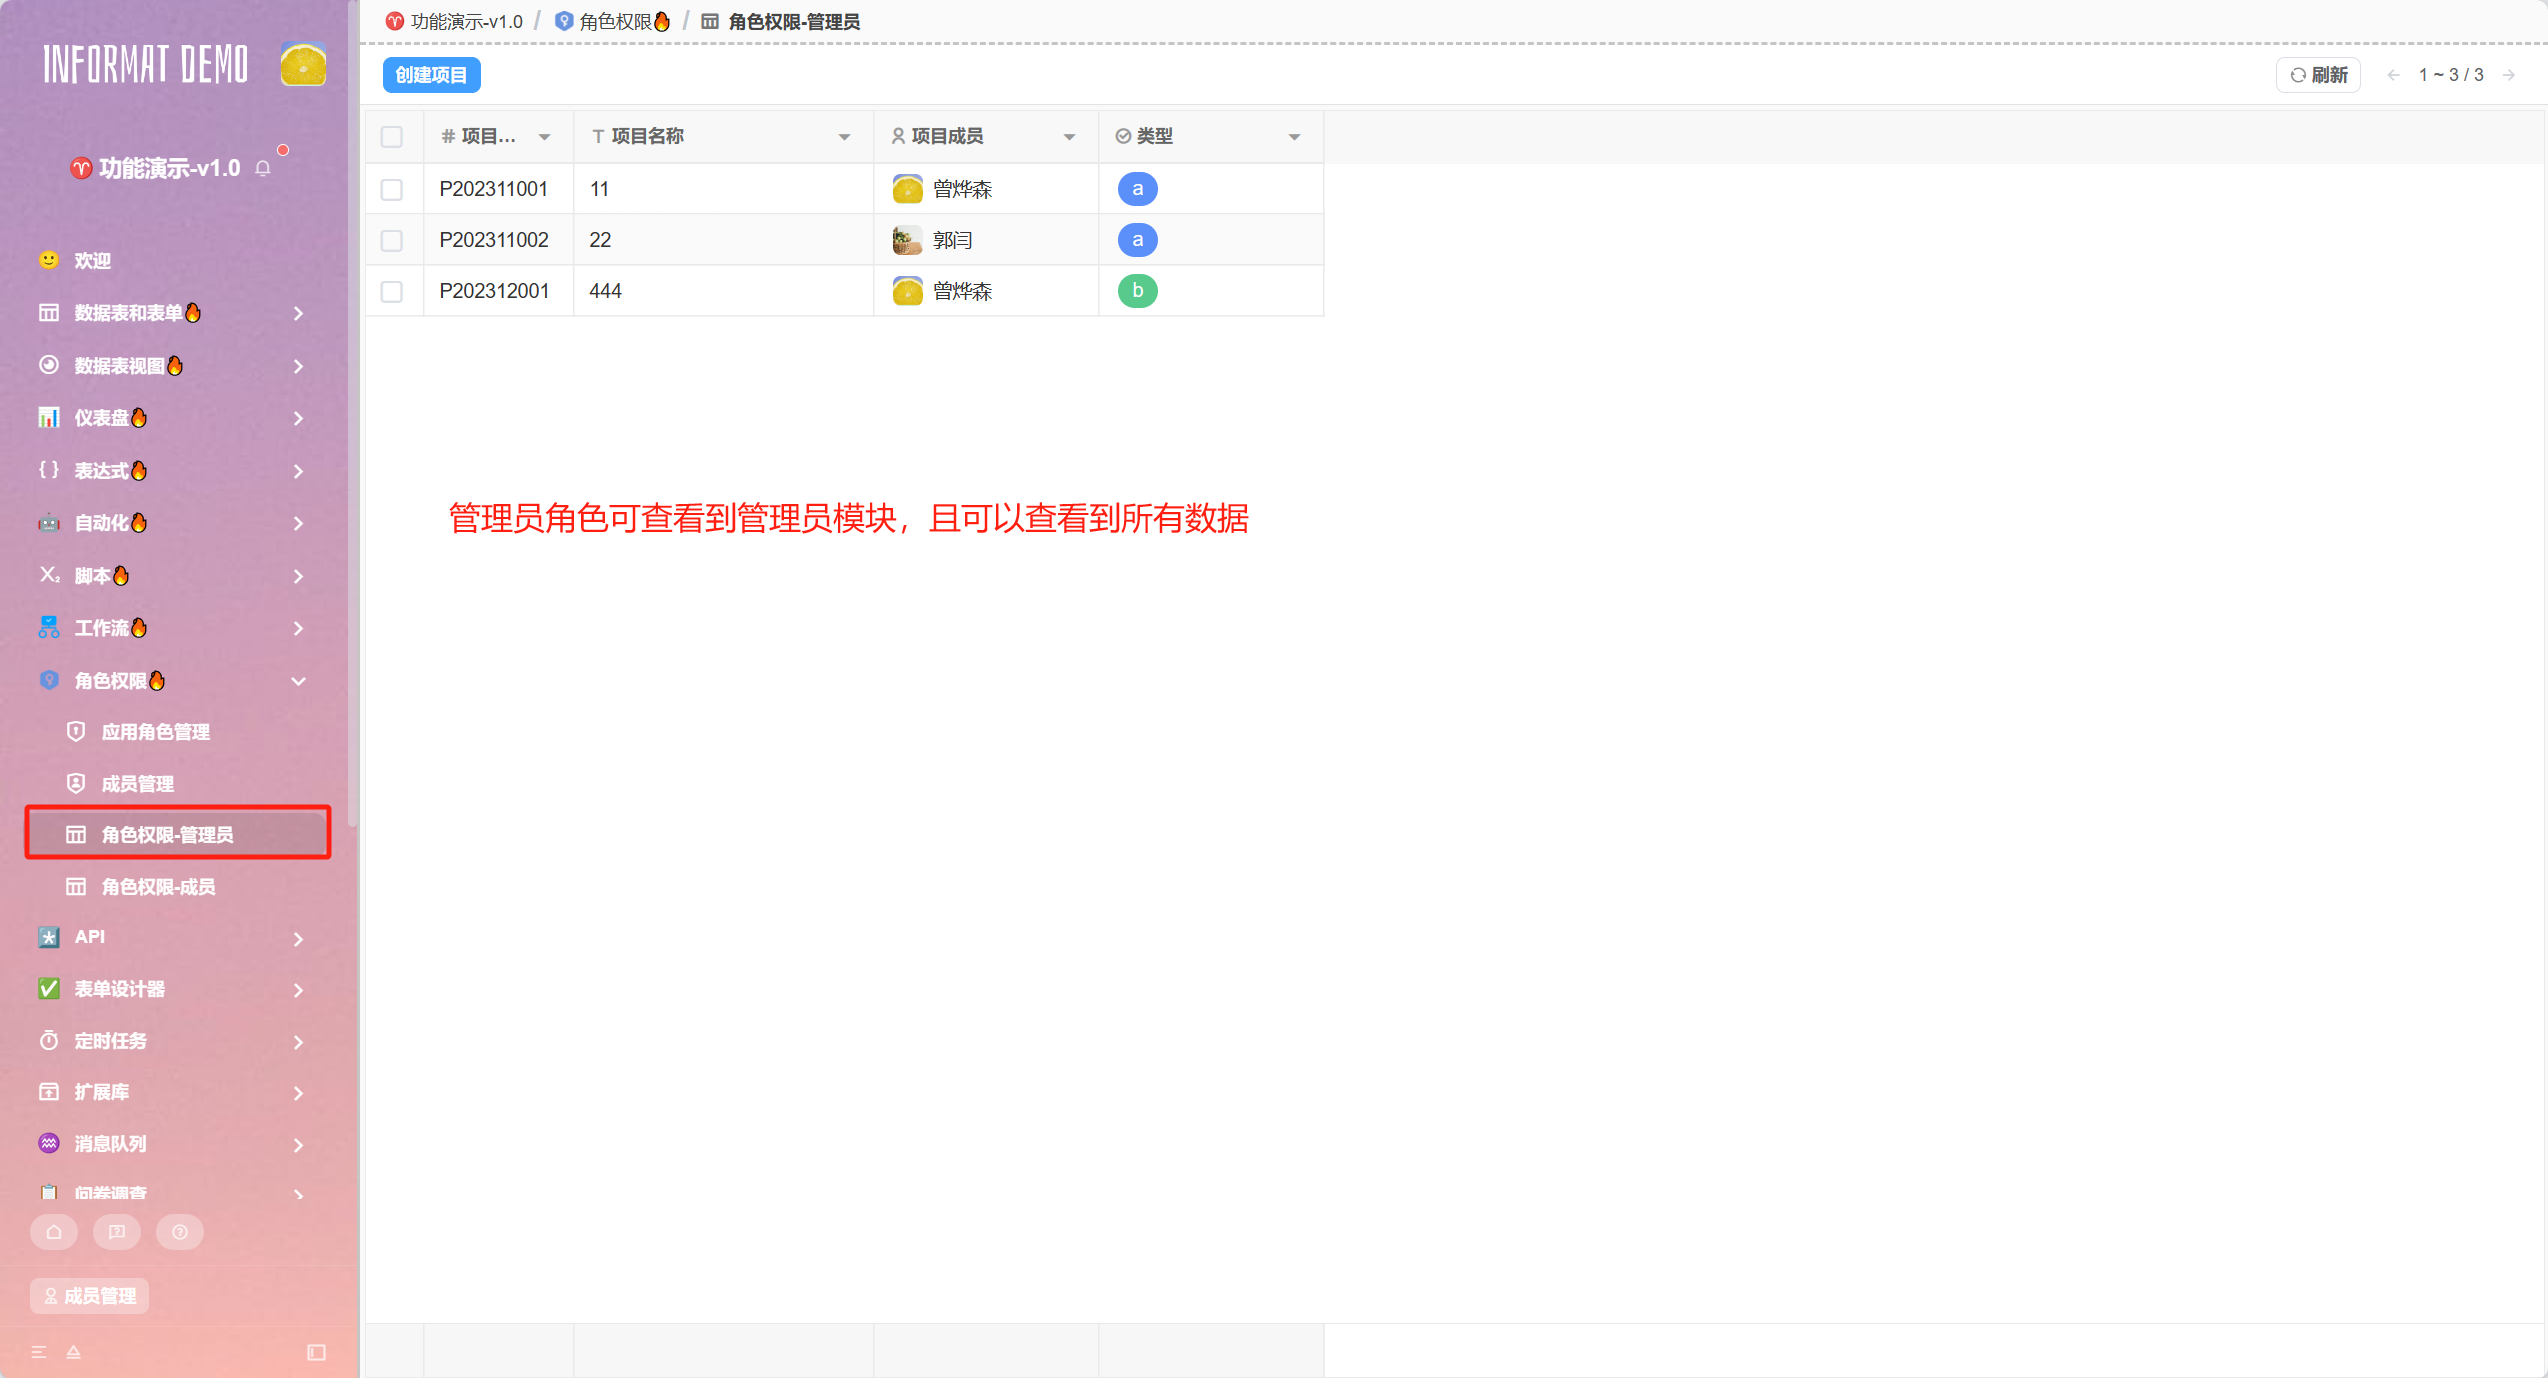
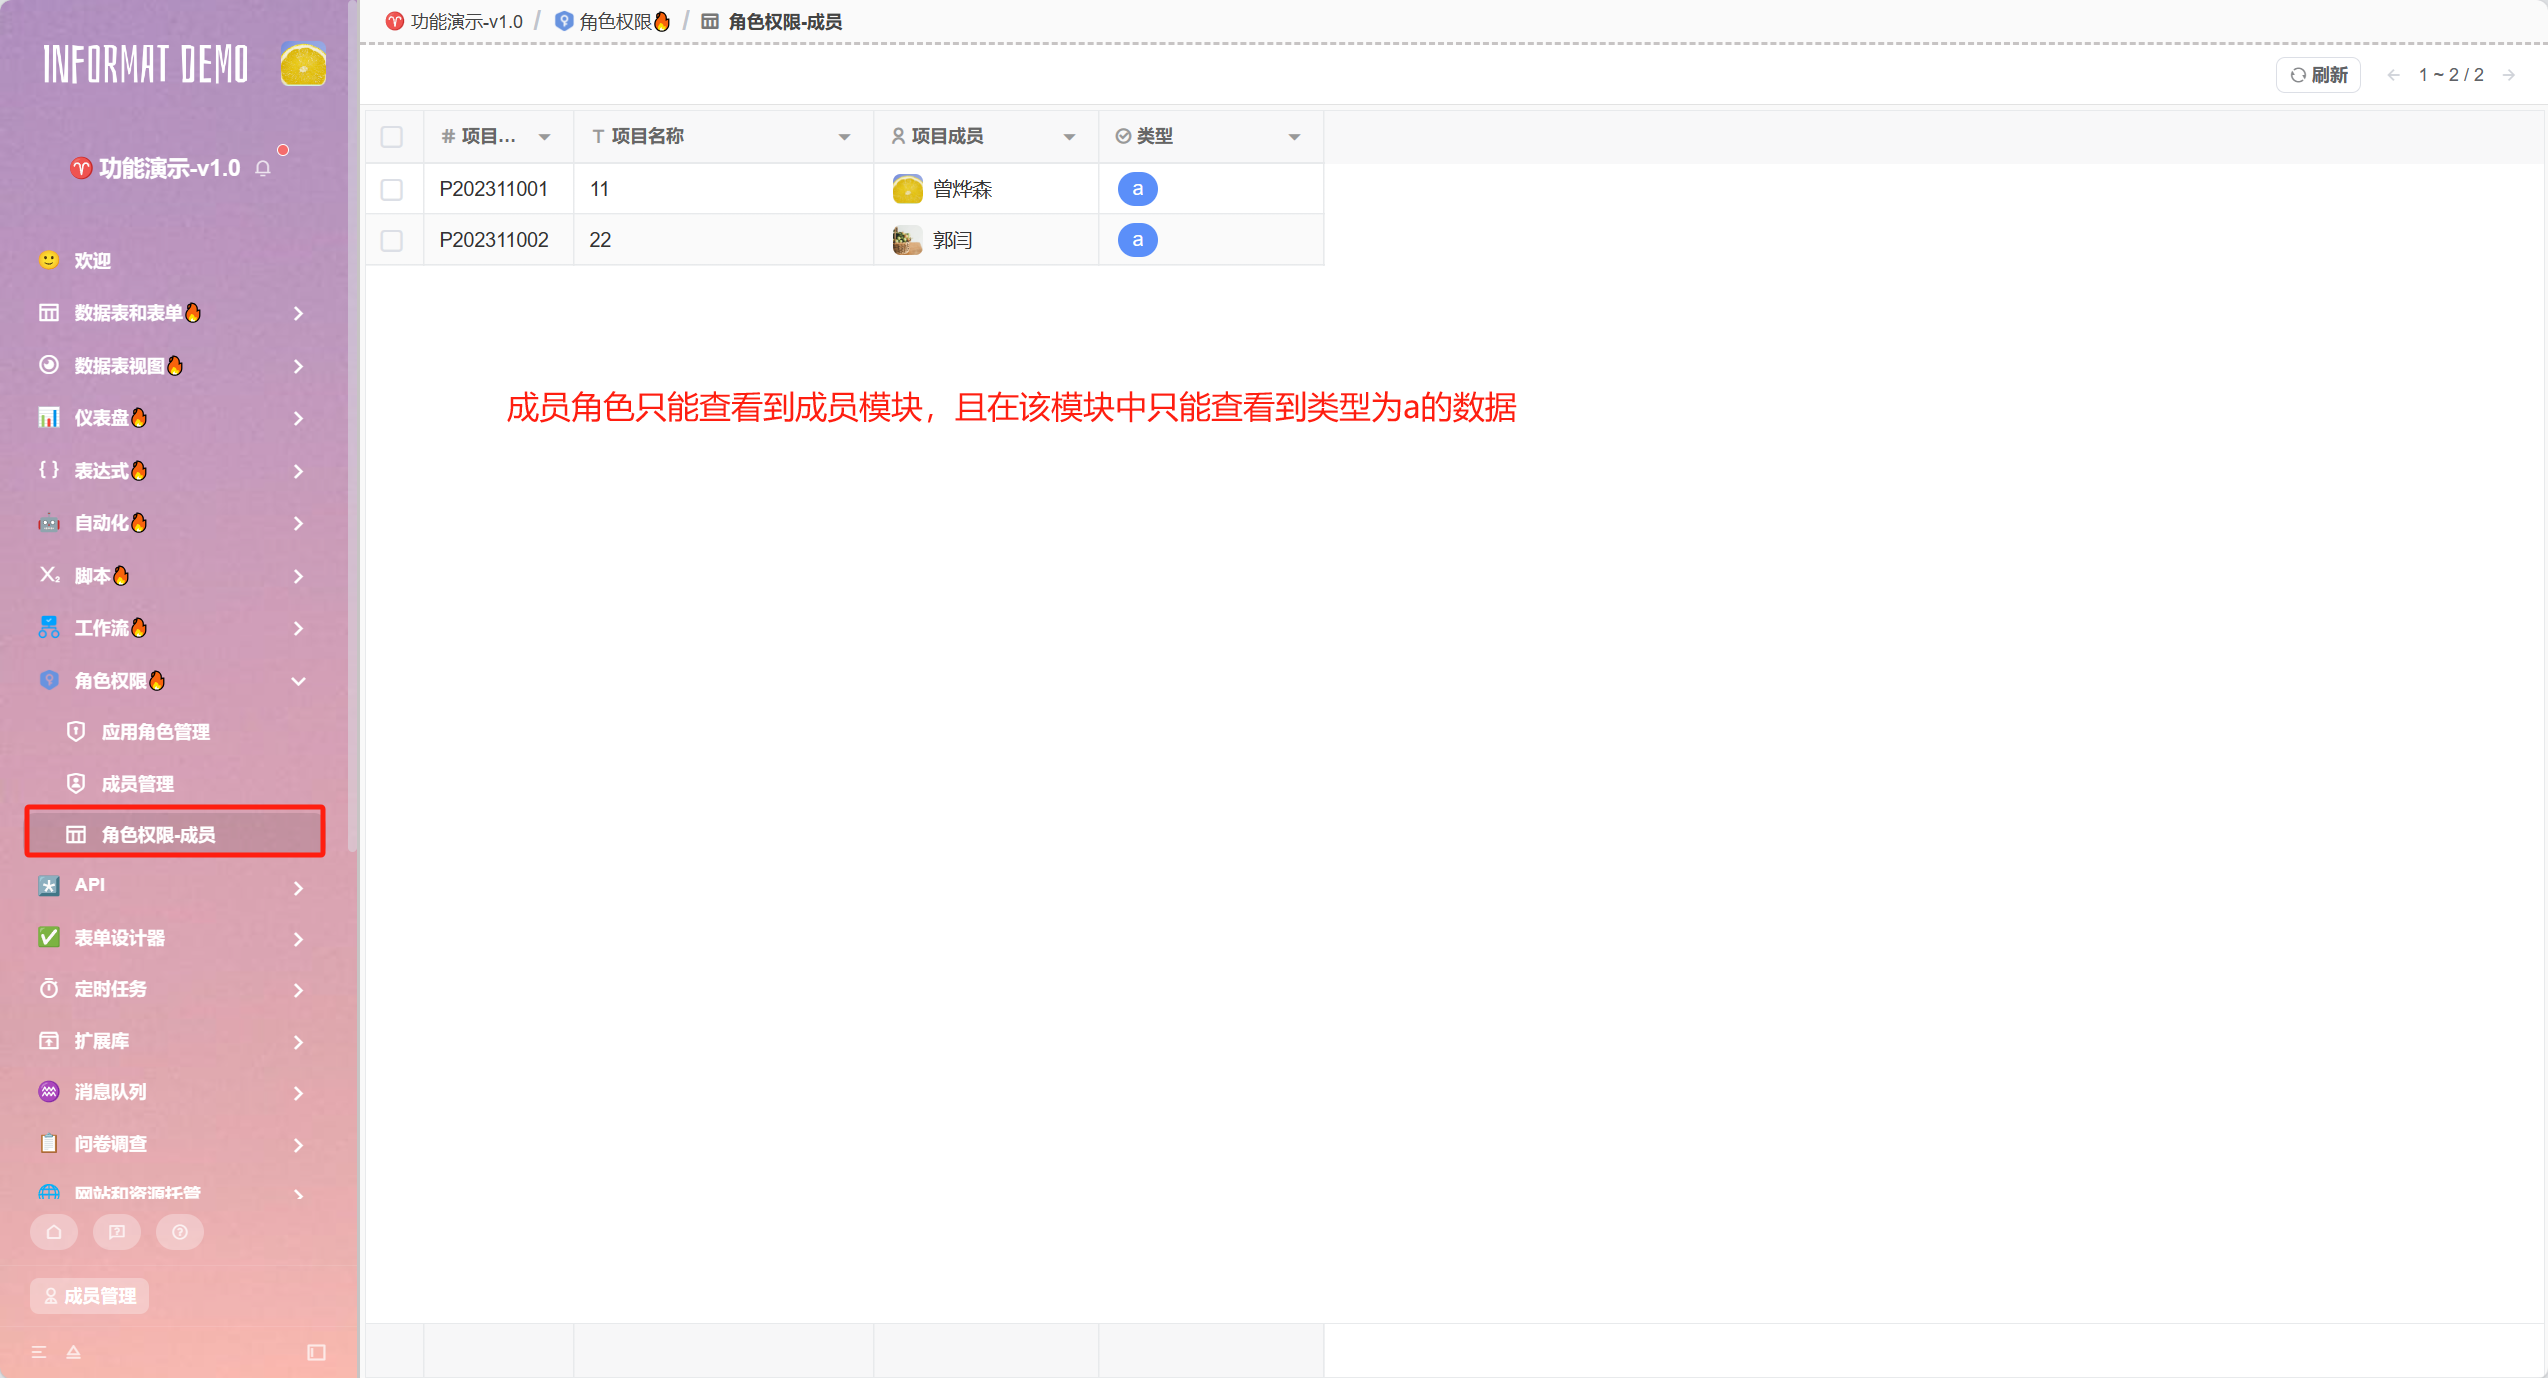
Example: We have an [Administrator] data table that displays all data and can only be viewed by the administrator role. Then we hope to use this table data to create a [Member] module, so that all members can access this module and can only view data with type as b in the module.
In the above scenario, after we create the [Administrator] data table and member view, we then set permissions for these two modules in role permissions. The configuration is as follows:
Because the [Member] module is a view of the [Administrator] data table, its view and other permissions are consistent with those of the [Administrator] data. You need to check other permissions except view module in the [Administrator] data table. If the query data permission is not checked, members with that role will not be able to view data in the [Member] module. The same applies to create, edit, and delete permissions.
Next, in the view settings of the [Member] module, you need to control the obtained data in the [Only display data that meets the following conditions] configuration item. The configuration is as follows:
Effect display: